Have you ever canned tomato sauce? This super-basic, canned (jarred) tomato sauce contains only tomatoes—with a little lemon juice or acid for safety. We seal the jars in a boiling water bath. No special “canner” needed. Get ready to use up all of those end-of-summer tomatoes!
Why Canning Tomato Sauce Is Worth It
I grew up in a small-town neighborhood in a family that tended a big vegetable garden, fruit trees, and berry bushes. Our three siblings helped our parents grow the food and filled our cellar shelves with tomatoes, applesauce, raspberries, currants, various jams and jellies, corn, shell beans, green beans, and many varieties of pickles.
Admittedly, I didn’t enjoy any of this work as a child. But against all odds, I’m the sibling who carried on the family tradition. After I moved to New Hampshire, I planted a big garden. Canning tomato sauce was my first solo venture into preserving the fruits of my labors.
Everybody tasted and raved about the homemade spaghetti or pizza sauce made with tomatoes from a nearby farm or garden. It’s really the easiest way to begin!
Supplies Needed for Water-Bath Canning
Before you start canning tomato sauce (or any high-acid food), having the right tools makes the process safer, easier, and more efficient. Here’s a complete checklist of what you’ll need for a successful water-bath canning session:
1. Canning Jars
- Choose clean, sturdy glass jars designed for home canning.
- Pint (16 oz) and quart (32 oz) sizes are the most common.
- Inspect jars for cracks or chips; damaged jars may break during processing.
2. Lids and Bands
- Use two-piece canning lids (flat lid + screw band).
- Flat lids are single-use; screw bands can be reused.
- Keep lids in clean water until ready to use, but avoid boiling them.
3. Large Stockpot or Saucepan
- Needed to cook your tomato sauce before filling jars.
- Stainless steel or enameled pots work best.
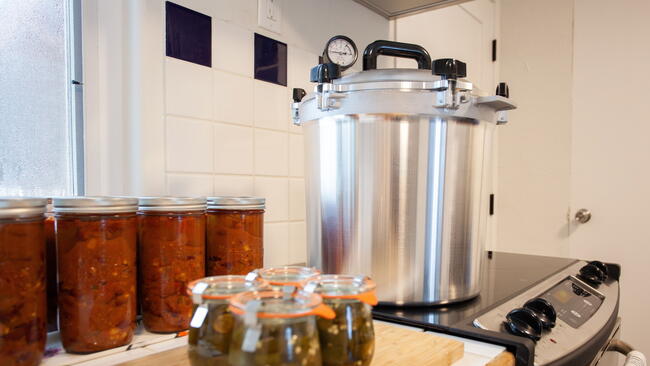
4. Water-Bath Canner
- A large pot with a rack that keeps jars off the bottom is essential.
- Alternatively, a deep stockpot with a rack can work if you carefully monitor water levels.
5. Jar Lifter
- Heat-safe tool to safely lift hot jars in and out of the boiling water.
6. Funnel
- Wide-mouth funnel helps fill jars without spilling tomato sauce.
7. Ladle
- A long-handled ladle ensures smooth, controlled pouring into jars.
8. Bubble Remover / Spatula
- A non-metallic utensil (plastic spatula, chopstick, or silicone tool) removes air bubbles from filled jars.
9. Clean Towels
- Thick kitchen towels or heat-resistant pads protect your countertop and provide a safe place to set hot jars.
10. Timer
- Keep track of processing time to ensure safe preservation.
11. Optional: Food Mill or Sieve
- Helps remove skins and seeds from cooked tomatoes for a smooth sauce.
Tip: Organize your supplies on a clean counter before starting so everything is within reach. This reduces stress and helps ensure a smooth, safe canning process.
If you haven’t read my previous post—an introduction to water-bath canning—I recommend that you start there, as it will give you a good overview of what supplies you’ll need to preserve safely at home. Water-bath canning is the easiest method as long as you add acid.
Choosing the Right Tomatoes for Sauce
This basic tomato sauce recipe calls for only one ingredient: ripe tomatoes. Okay, it also needs citric acid or lemon juice to ensure safety. You don’t need salt for safety. If you want salt, add it when preparing a recipe that uses canned tomato sauce.
You also don’t need a special variety of tomatoes. Any ripe tomato or a blend of varieties will make a delicious sauce. Note: Don’t use tomatoes from dead or diseased plants, and make sure they are free of cracks, spots, and growths.
You’ll see tomato varieties sold as “canning tomatoes.” That usually means the ripe fruits of the variety contain a high ratio of flesh to juice. The juicier ones will need more simmering to arrive at the right consistency.
Adding Acid for Safe Canning
There may be confusion about whether or not any tomato variety is “acidic enough” for canning in a hot-water bath submerged in boiling water for a specified period of time instead of a pressure canner. For foods whose pH (measure of acidity) is below 4.6, the acid works with the heat of boiling water to kill molds, yeasts, and bacteria that may cause spoilage and/or serious illnesses such as botulism.
With this tested recipe, you’ll be adding enough acid to your tomatoes in jars to ensure the safety of your finished product, no matter what kind(s) of tomatoes you use.
Bottled lemon juice, citric acid granules, or even five percent household vinegar will do the job. Most people think the vinegar imparts an off-taste to the sauce; however, I prefer to use citric acid granules, which I buy in one-pound bags, available in stores that sell canning equipment and online. It’s easy and less messy to measure, carries no flavor of its own into your finished product, stores well for at least a couple of years at room temperature, and has many other uses in cooking and household cleaning.
If you love to add peppers, onions, garlic, other vegetables, or an herb blend to your sauce, find a recipe that uses these ingredients and was tested by the USDA, or you can add them after you open the jar and prepare to use it.
Preparing to Make and Can Tomato Sauce
- Clean up your kitchen workspaces with soap and water, and wipe down your countertops and cutting boards.
- Gather all your canning gear.
- Decide whether you want to put up your sauce in pint or quart jars.
- No need to sterilize jars or lids. Scrub them well (even brand-new jars) with hot, soapy water. Rinse well and set clean jars rim-side down on a thick kitchen towel.
How Many Tomatoes Are Needed?
The U.S. Department of Agriculture estimates a bushel of tomatoes weighs 53 pounds and yields seven to nine quarts of tomato sauce. That’s around six and a half pounds to make a quart of sauce and something over three pounds per pint.
But that’s an average because the juicier your tomatoes, the more tomatoes you’ll need to boil down into a sauce.
I don’t worry too much about amounts. If I make a little too much left over after filling the jars I’ve set out, I either freeze it or refrigerate it and use it in the next few days. If I don’t have quite enough to fill the final jar, I simply add boiling water to the partially filled jar, pop a lid on it, and can it along with the full jars. It will make a great foundation for minestrone!
Homemade Canned Tomato Sauce Recipe
Here’s the process for my favorite recipe, step-by-step:
Step-by-Step: Preparing Your Tomato Sauce
- After cleaning your jars and allowing them to dry, add the acidifying agent directly to the jars before you fill them with tomatoes later: two tablespoons of bottled lemon juice or ½ teaspoon of citric acid granules per quart jar; one tablespoon lemon juice or ¼ teaspoon of citric acid per pint. If you do it first, you won’t forget it later on!
- Wash tomatoes, remove their stems, and trim cores and minor blemishes.
- Cut up a few tomatoes and squeeze or mash them into the bottom of your stainless steel stockpot to release the juice. Turn the burner on high, and try to keep it on a low boil as you keep adding more cut/crushed tomatoes.
- After you’ve cut up all your tomatoes, bring the whole pot to boiling and simmer for five minutes.
- Then, run the softened tomatoes through a food mill to remove the seeds and skins.
- Return the sieved pulp to the pot and simmer until the volume is reduced by half for a thick sauce. Stir often to prevent burning.
- In the meantime, fill your water bath canner with a rack half full of water and begin heating it on the burner you plan to use for processing. You want the water temperature close to boiling when you begin loading it with jars of hot tomato sauce.
Step-by-Step: Processing Jars in a Water Bath
- Before you begin processing, boil a tea kettle of water to have on hand if you need to adjust the water level in the canner.
- When the sauce has reached the desired consistency in the stockpot, using a ladle and a funnel, pour it carefully into the jars, leaving a 1/2-inch space at the top, which is called the “headspace.”
- Gently run a small rubber spatula, plastic wand, or a large chopstick between the sauce and the edges of the jar, as well as up and down to allow any air bubbles to escape.
- Wipe down the rim of each jar with a damp paper towel. One small bit of tomato left on the rim may prevent the jar from sealing properly.
- Place a clean lid atop each jar and secure it in place with a metal screw band. Tighten until you can’t turn it any further and no more.
- Using a jar lifter, carefully lower each jar of sauce into the water-bath canner fitted with a rack to keep the jars from contacting the bottom of the canner. Make sure that the boiling water in the canner flows freely around the jars.
- When you’ve loaded all your jars, adjust the water level with boiling water from the tea kettle (if necessary) to ensure the water is at least two inches over the tops of the jars.
- Cover the canner, bring it to a vigorous boil, and keep it boiling continuously (called “processing”) for the length of time specified below. The processing time will vary based on your altitude and the size of the jars you are using.
Processing Times for tomato sauce in a water-bath canner.| Recommended Process Times for Tomato Sauce in Water-Bath Canner |
| Process Time at Altitudes of… |
| | 0 - 1000 ft | 1001 - 3000 ft | 3001 - 6000 ft | Above 6000 ft |
| Pints | 35 min | 40 | 45 | 50 |
| Quarts | 40 | 45 | 50 | 55 |
| Source: National Center for Home Food Preservation |
9. If you get interrupted and the water stops boiling at any time during processing, bring it back to a full boil and start the timing process over. That’s right, begin timing all over again—it’s important to process the jars completely!
10. When the processing time is up, turn off the heat, remove the lid from the canner, letting the steam move away from you, and let the jars sit in the water for 5 to 10 minutes.
11. Using the jar lifter, remove jars from the canner and set them upright on a clean towel or a cooling rack.
12. As the jars seal, you’ll hear popping sounds to indicate a good seal. You’ll also notice an indentation on the lids of properly sealed jars. They don’t always seal immediately. Don’t futz with them; leave the jars alone until the contents have cooled for 12 to 24 hours. Before storing check, the seals by gently pressing down on the lid, if it gives then the jar has not sealed correctly.
13. When the jars have cooled completely, remove the reusable screw bands from the properly sealed jars, and store the tomato sauce in a cool, dark place for up to 1 year.
14. If you discover one or more jars that didn’t seal, either have spaghetti or pizza for supper, or pour the sauce into a freezer container and freeze it. It’s not safe to attempt sealing by replacing the lid with a new one and boiling it again.
Canning Tomato Sauce: Jar Sizes, Acid, and Water-Bath Processing Times| Jar Size | Acid to Add | Water-Bath Processing Time | Notes |
|---|
| Pint (16 oz) | 1 tbsp lemon juice or ¼ tsp citric acid | - 35 min (0–1000 ft)
- 40 min (1001–3000 ft)
- 45 min (3001–6000 ft)
- 50 min (above 6000 ft)
| Leave ½-inch headspace; remove air bubbles; wipe rims clean |
| Quart (32 oz) | 2 tbsp lemon juice or ½ tsp citric acid | - 40 min (0–1000 ft)
- 45 min (1001–3000 ft)
- 50 min (3001–6000 ft)
- 55 min (above 6000 ft)
| Leave ½-inch headspace; remove air bubbles; wipe rims clean |
Learn More
Have you ever canned tomatoes or tomato sauce? Do you have any tips or tricks? Tell us about your experience below!


Comments