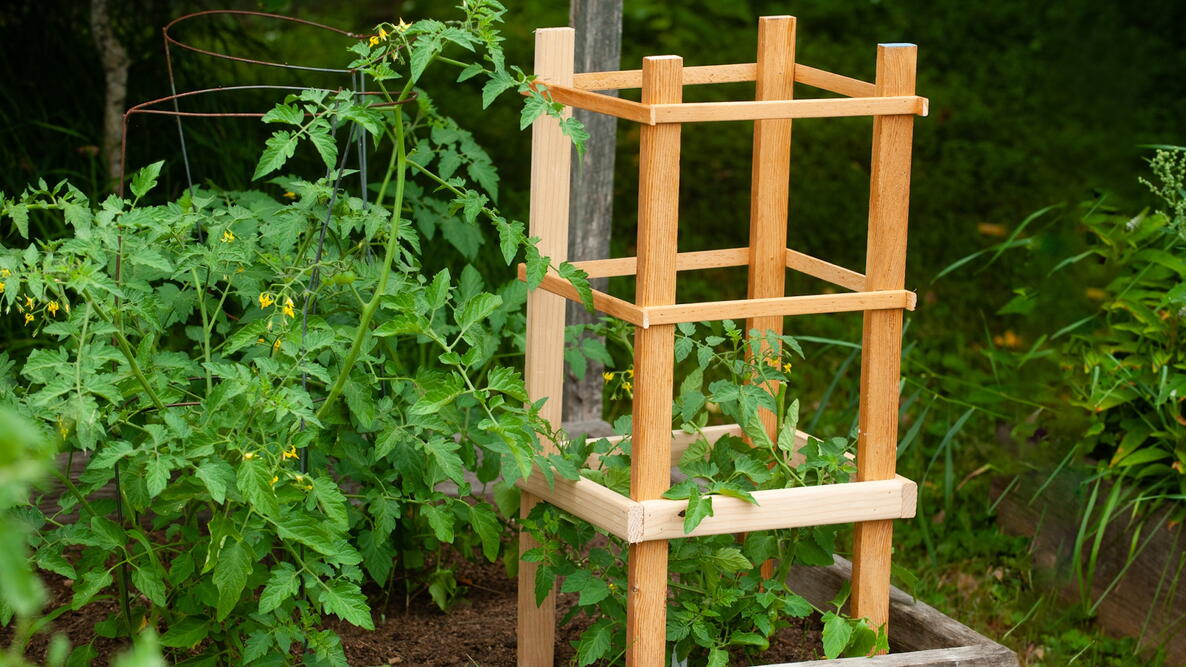

Need a sturdy, inexpensive support for your tomato plants? This simple DIY tomato cage costs about $15, takes less than an hour to build, and helps support plants when they’re heavy with fruit. And if you’re already growing your own food, why not go a step further and make some of your own garden equipment? There’s something satisfying about doing it yourself—so let’s get building.
Project at a Glance
- Finished size: About 30 inches tall × 12 inches wide × 12 inches deep before installation
- Project time: 30–60 minutes
- Skill level: Beginner
- Cost: Under $15
- Best for: Compact, bush-type tomatoes (called determinate tomatoes). Taller, vining indeterminate tomatoes need a larger support.
- Lifespan: Multiple growing seasons with proper storage
What Size Tomato Cage Do You Need?
A tomato cage needs to be tall and sturdy enough to support the plant as it grows and becomes heavy with fruit.
This 30-inch cage is designed primarily for determinate tomatoes, which generally stay more compact than indeterminate varieties. If you grow an indeterminate tomato, you’ll need a taller support or an enlarged version of this design.
Not sure which type you have? See the difference between determinate and indeterminate tomatoes.
How to Build a DIY Tomato Cage
Materials and Tools
- Tape measure
- Pencil
- Hand saw (or power saw if you’d like)
- Hammer
- Box of 1¼” nails or screws (shorter if you’re using thinner wood)
- 4 x 30” furring strips (for the legs)
- 4 x 12” furring strips (for the lower braces)
- 8 x 12” furring strips, lath, or trim for the upper braces
Safety Note: Wear eye protection when cutting or fastening wood. Follow all tool manufacturers’ instructions and work within your skill level.
Step 1: Choose Your Wood
We built this wooden tomato cage using 1x2 furring strips, which are narrow pieces of lumber commonly used for home projects. Furring strips are very cheap and can be purchased for almost pennies per foot.
We used inexpensive 1×2 furring strips for the legs and lower braces. Although they’re sold as 1×2s, their actual dimensions are about ¾ × 1½ inches. For the lighter upper braces, we used ¼ × ¾-inch trim.
You can substitute other narrow strips of wood of similar dimensions, making this a good project for suitable scrap lumber you may already have on hand.

Step 2: Measure and Cut the Wood
Cut:
Four 30-inch pieces for the legs
Twelve 12-inch pieces for the horizontal braces
The thin lumber is easy to cut with a hand saw, though a power saw will make the job faster.

Step 3: Build the First Two Sides
Lay two of the 30-inch legs parallel on a flat surface, about 12 inches apart.
Place one 12-inch brace horizontally across the legs, about 12 inches from the bottom. Fasten it with nails or screws.
Repeat with the remaining two legs to make a second matching side.

Step 4: Join the Two Sides
Now you can take your two sides and join them together. Use the remaining lower 12-inch braces to connect them, forming a square cage. Fasten each brace securely with nails or screws.
An extra pair of hands can make this step easier while you hold the pieces in position.

Step 5: Add The Upper Supports
At this point, your tomato cage should stand up on its own, which makes construction a little easier.
To wrap up, add two more levels of horizontal braces around the cage:
One level about 20 inches from the bottom
One level about 28 inches from the bottom
These braces support the stems and fruiting branches as the tomato plant grows.
Fasten the braces with nails or screws.

How to Install and Use Your Tomato Cage
Place the cage around the tomato plant while it is still small so you don’t damage mature stems or roots later.
Press the four legs firmly into the soil to anchor the cage. As the plant grows, guide the stems and fruiting branches through or against the horizontal supports. If needed, use soft plant ties to secure heavy branches loosely to the cage.

Frequently Asked Questions
Can I Use This Cage for an Indeterminate Tomato?
This 30-inch design is best suited to determinate tomatoes. Indeterminate tomatoes grow much taller and generally need a larger support.
You can adapt the same basic design by using longer legs and wider braces. For example, 48-inch legs and 16-inch braces would create a substantially larger cage.
How Long Will a Homemade Tomato Cage Last?
With proper care, a wooden tomato cage can be reused for several growing seasons. Store it in a dry, protected place over winter to help extend the life of the wood.
How Do I Keep a Tomato Cage From Blowing Over?
Push the cage legs firmly into the soil so they are well anchored. In especially windy locations or once the plant becomes heavy with fruit, you can add a T-post or metal stake beside the cage for extra support.
Sources
- Penn State Extension — Tomatoes: From Seedlings to Fruit
- University of Illinois Extension — Tips and Trellising for Tomato Success

More Like This






Comments