
Caption
Beautiful DIY trellis in the vegetable garden

Give climbing plants the support they need with this simple DIY garden trellis. Learn how to build a sturdy, two-sided trellis for pole beans, peas, cucumbers, squash, and other climbing plants.
DIY Garden Trellis at a Glance
- Project time: 2–4 hours
- Skill level: Beginner to Intermediate
- Best for: Pole beans, peas, cucumbers, squash, climbing flowers, and other vining plants
- Lifespan: Many growing seasons with proper maintenance
Author’s Note: Daniel Johnson built the trellis shown here using basic lumber and common tools. The photos document each step of the construction process.
Why Build a Garden Trellis?
Pole beans, peas, cucumbers, squash, and flowering vines all need a sturdy structure to climb. A garden trellis supports healthy growth by keeping fruits and plants off the ground, improving air circulation, and making harvesting easier.
This A-frame design provides climbing space on both sides, giving vegetable and flower vines plenty of room to spread while making better use of your garden space. Growing vertically also creates a more organized, productive garden and helps reduce overcrowding.
Vegetables aren’t the only plants that benefit from a trellis. Flowers like nasturtiums also climb happily and make excellent companion plants, helping attract pests away from vegetables, according to the University of Minnesota Extension. Flowering vines such as clematis also thrive on a trellis, adding height, color, and beauty to the garden.
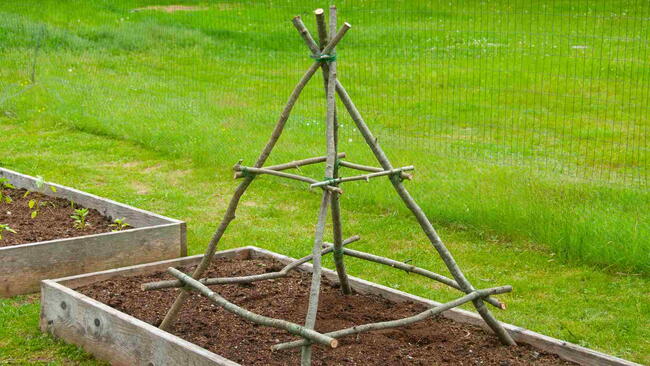
Growing mostly pole beans or working with limited space? A DIY Bean Teepee is another excellent option that takes up less room while providing sturdy support for climbing beans and peas.
How to Build a DIY Garden Trellis
If you’re even a little handy, you can build this trellis in an afternoon. The design is intentionally simple, and you can build it exactly as shown or adjust the dimensions to fit your garden and the materials you already have on hand.
The step-by-step photos below walk you through every stage of the project.
Supplies Needed
This project requires only a few basic tools. We’ve also included alternate options based on what you already own—or can borrow from a friend.
Safety Note: Always use caution when working with hand or power tools, wear appropriate safety gear, and follow the manufacturer’s instructions.
Tools Needed
- Pencil.
- Tape measure.
- Paint and paintbrush (you can look for nontoxic—even organic—paint for use in the garden).
- Saw: This is for trimming wood to the proper lengths. On a project this small, it could be a basic handsaw or a power circular saw. Optional: table saw to “rip” your lumber into the wood strips needed quickly and easily.
- Hammer. Optional: pneumatic pin nailer (for quick and easy assembly).
- ⅞-inch carpentry finish nails (adjust the length of the nail if you’re using thicker lumber for any reason).
- Safety protection (ear protection, dust mask, safety glasses, etc.).
For assembly, use a hammer or a pin nailer. A pin nailer helps keep the wood from cracking during the nailing process and makes assembly very easy. You can load your nailer with either carpentry finish nails or a type of small staple for extra strength.
If you don’t have access to a pin nailer or are uncomfortable using one, then just carefully nail the project together with a hammer and carpentry finish nails. In this case, it can be helpful to pre-drill “pilot” holes for nails with a cordless drill and a small wood drill bit—this will help keep the wood from cracking.
Lumber Cut List:
Even though your trellis is for use outdoors, it may be best to forgo treated wood if it’s going into a vegetable or food garden. Pine wood is typically used for these types of projects, although for a little extra expense, use cedar, which has natural rot-resistant properties. You’ll need wood cut into different sizes, which we’ll explain in the steps below.
- 5 60” ½” x 1” pine
- 2 35 ¼” ½” x 1” pine
- 1 40” ½” x 1” pine
- 1 37” ½” x 1” pine
- 1 34” ½” x 1” pine
- 1 31” ½” x 1” pine
- 1 28” ½” x 1” pine
Now you’re ready to start building! It’s going to be easy!
Step 1: Make your lumber cuts
We are making a trellis in a fan shape with five 60-inch pieces. This design uses some fairly narrow strips of wood.
- For the specific design we built in the photos, we used ½ x 1-inch pine that we “ripped” down (cut lengthwise) with a table saw from larger pieces of lumber. This a good way to use spare wood that you already have on hand.
- However, you can find 1 x 2-inch lumber—sometimes called furring strips—at a home-supply retailer, and this will work fine for this trellis. In this case, all you need to do is cut them to the appropriate lengths, which could even be done with a simple handsaw since they are so narrow (or maybe the home-supply store will do it for you!).

Step 2. Begin the layout
Take a good look at the photo of the finished trellis before you start so you have the right idea. This can help you lay out the first sections of the trellis correctly. As you’re creating a fan shape with the five 60-inch pieces, we’ll call these five pieces the “vertical sticks.” Place these out on a flat surface like a garage or shop floor. It’s helpful to have a friend who can lend an extra pair of hands for this.
Begin by spacing the bottom end of each vertical stick about 4¼ inches apart—as accurately as you can. To make a fan shape, space the top end of each vertical stick 8¾ inches apart. Making the initial layout can be tricky because adjusting the spacing on the bottom affects the spacing at the top and vice versa. But you should be able to complete the design with a bit of care. It can be helpful to start with the center vertical stick and its immediate left and right neighbors. Once you have those appropriately spaced, add the final two. You’ll have the proper shape if you successfully maintain spacings of 4¼ inches at the bottom and 8¾ inches at the top.


Step 3. Assemble
Now, let’s lock that design together before someone accidentally knocks it out of place with their toe! We’ll tie the vertical sticks together with five horizontal struts. We’re looking to space these at intervals of 11 inches. Beginning at the bottom, place a horizontal strut at 11, 22, 33, 44, and 55 inches along the vertical sticks. Use the center vertical stick as your guide for making these measurements. Ideally, the horizontal struts are perpendicular to the center vertical piece. You’ll create a grid-like pattern.

Nail them into place with the pin nailer, placing a nail at every junction. Or, you can hand-nail with a hammer, although this is trickier; pre-drilling pilot holes makes hand-nailing far easier.


Step 4. Make extra improvements
At this point, the trellis is starting to look nice, but if you stop here, the structure might be a little weak. We have two final pieces that can add structural stability while providing a decorative touch. These are the two 35¼-inch sections.
Use these to form a kind of “A” shape on the top of the trellis, as shown in the photos. The point of the “A” goes at the top-most horizontal strut, lined up with the center vertical stick. Fasten these with the pin nailer as well.
Optional: If you’d like it to look a little fancier, you can use your saw to angle the ends of the “A” to match.


Step 5. Paint
To protect the trellis from the weather and add a pop of color to your garden, you can easily paint this finished trellis in under an hour. Exterior paints last a long time and are readily available.

Step 6: Position the Trellis
Place the finished trellis over the row or bed where you’ll be growing climbing vegetables. Push the legs a few inches into the soil to help stabilize the frame. If your garden is especially windy, you can anchor the legs with landscape stakes or secure the trellis to T-posts for additional support.

Plant Your Climbing Crops
Place the finished trellis over your garden bed and press the legs a few inches into the soil before sowing seeds or setting out transplants. If your garden is especially windy, anchor the trellis with stakes or T-posts for additional stability.
Once the trellis is in place, sow seeds or transplant seedlings according to the plant tag or seed packet directions. As vines begin to grow, gently guide young stems onto the trellis until they begin climbing on their own.
Pole beans, peas, cucumbers, and small squash will quickly cover the frame during the growing season. Climbing flowers such as nasturtiums and clematis also thrive on a garden trellis, adding height, color, and beauty to the landscape.
Maintain Your Trellis
Your new trellis requires very little maintenance. Painting or sealing the wood (see Step 5) helps protect it from moisture and extend its lifespan.
At the end of each growing season, remove dried vines and plant debris before storing the trellis indoors or in another dry location for winter. Periodically inspect the frame and tighten or replace any loose screws or fasteners so it’s ready for another season in the garden.
A well-built garden trellis can serve your garden for many growing seasons, supporting healthy vines and plentiful harvests year after year.


Comments