
Good soil makes good gardens. Here's how to get it ready for planting.
Before you plant a single seed this spring, take a moment to look down—right at your soil. Often, when plants struggle, it’s because the soil underneath isn’t up to the job. Soil is the heart of your garden: healthy soil grows healthy plants, and healthy plants stand a better chance against pests and the weather.
The good news? You don’t need a green thumb or fancy tools to fix your soil. Just a little patience, some simple steps, and a bit of elbow grease. Below is an easy 3-step guide to prepare your soil, plus a few bonus tips if you’re ready to dig a little deeper.
3 Easy Steps for Soil Preparation
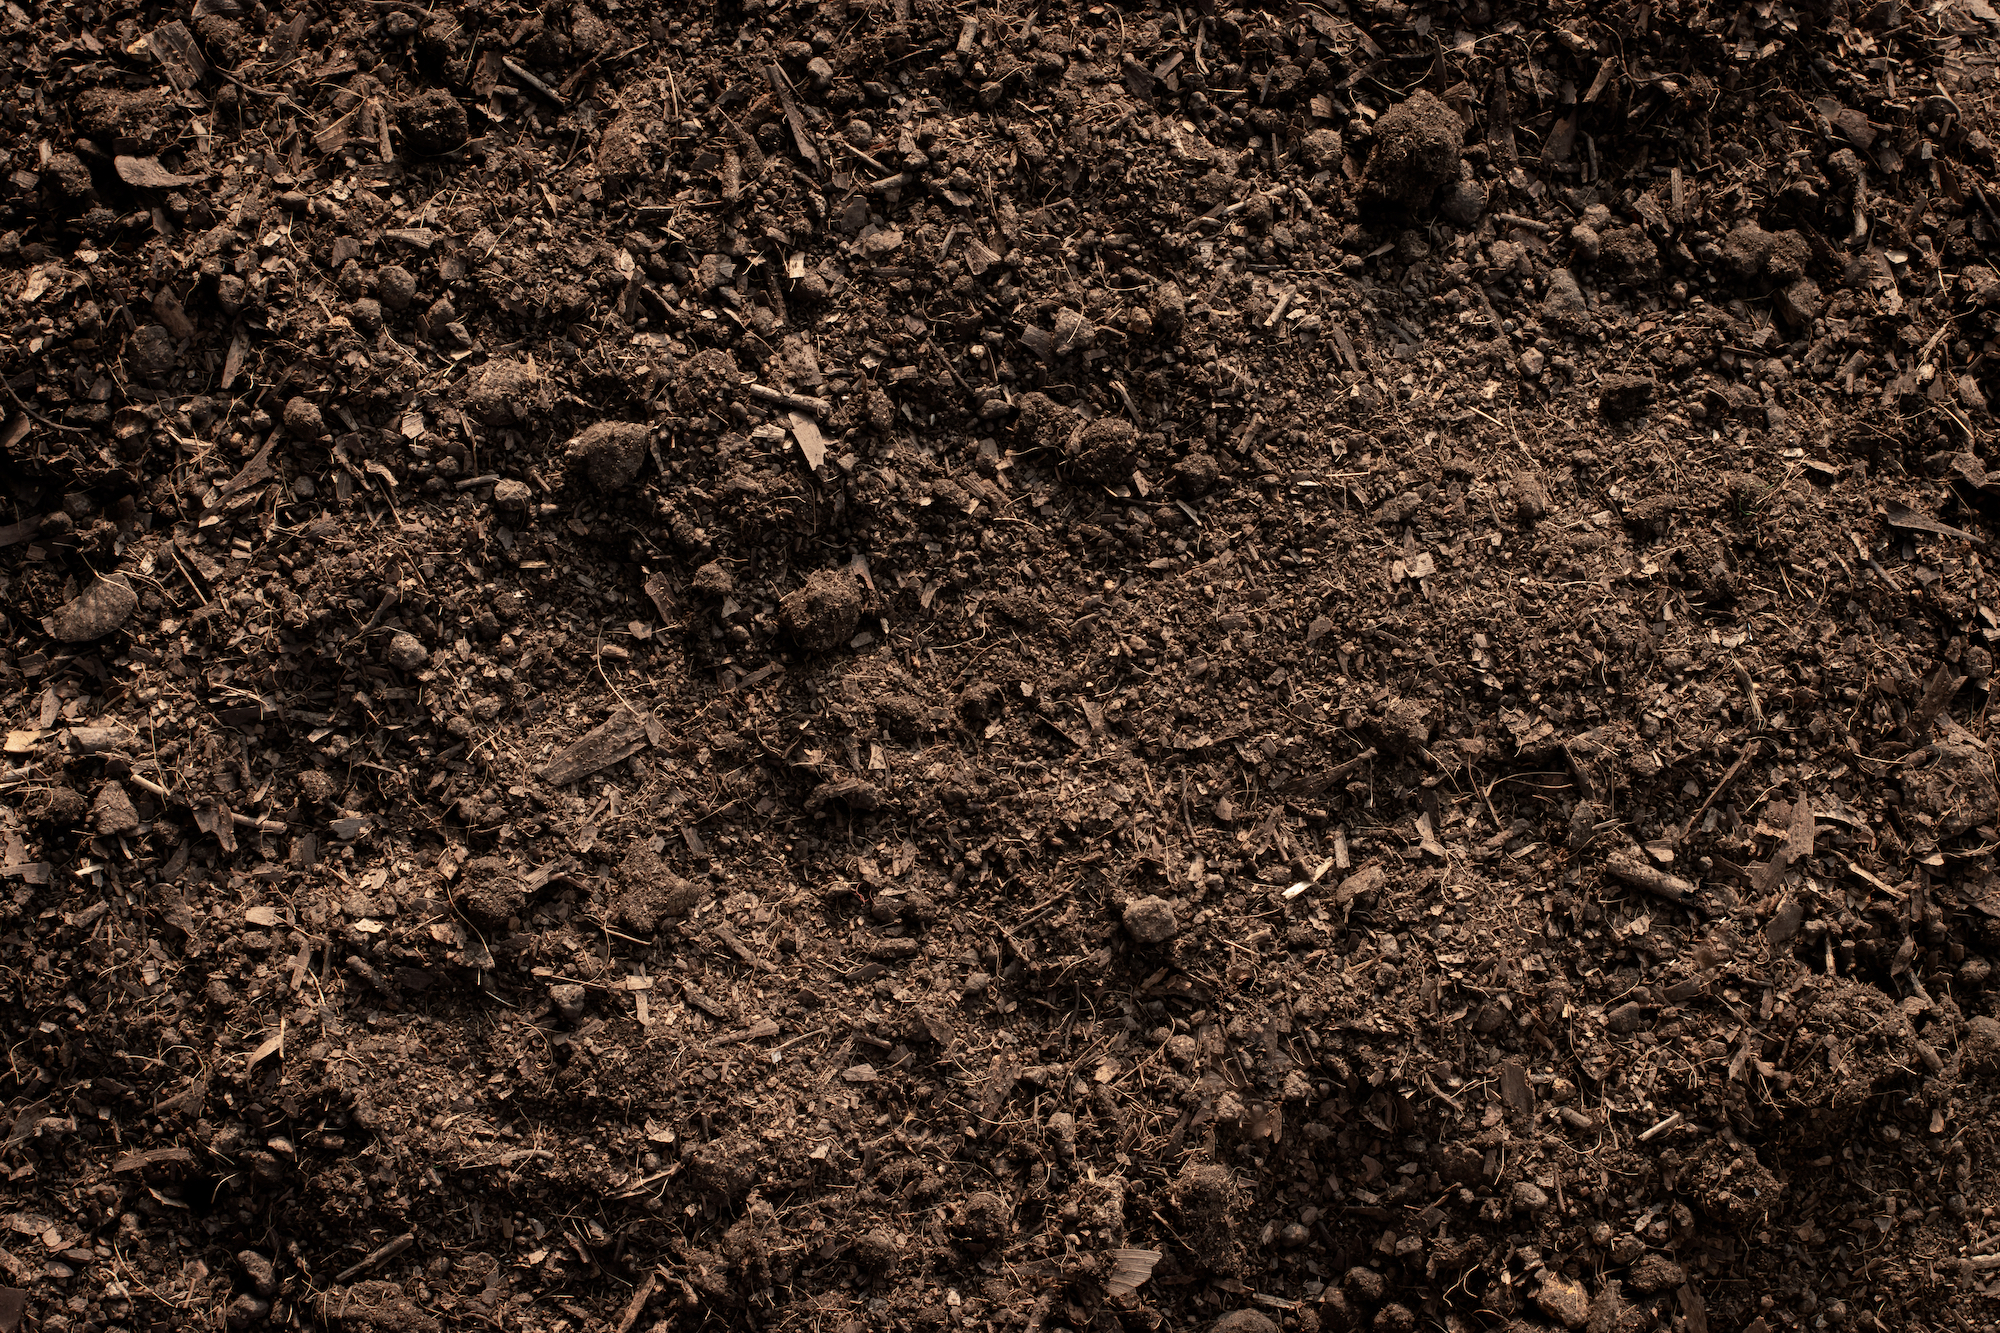
Truth be told, fall is the best time to prep your soil—when the garden’s asleep and nature has time to work her magic. Compost and other organic materials have all winter to break down, feed the soil life, and mellow into a rich, workable earth by spring. But many of us don’t think about soil until the first warm days hit! No worries. Whether you’re just starting out or playing catch-up, here’s a simple plan to get your soil in shape before planting.
1. Clear Out Rocks and Debris
Remove rocks, sticks, and other debris. If you’re digging up grass, use a sharp spade to cut the sod into small squares and pry them out with the flat edge.
2. Loosen the Soil
If this is your first garden, loosen the soil to a depth of at least 8 inches—12 inches is even better—so that plant roots can grow deep and strong.
3. Add Organic Matter
Compost (or aged manure) adds nutrients, improves drainage, and loosens compacted soil so roots get the oxygen they need.
📌 According to Cornell University:
- For new garden beds, mix 2 to 3 inches of compost into the top 6 to 8 inches of soil.
- For established beds, follow a no-dig approach: top-dress with 1 to 2 inches of compost each year and let earthworms and microbes work it in naturally. This preserves soil structure and helps suppress weed seeds.
4. Level the Soil
Use a steel rake or hoe to level the surface of the soil. A flat, even bed helps with planting and watering.
Bonus Tips for Cold or Weedy Gardens
🌱 Cold Climates:
In cooler regions, consider using a raised bed, which warms up and dries out more quickly in spring. You can also cover your beds with black plastic or cardboard before planting to block light, warm the soil, and prevent erosion. Read more about warming up the spring soil.
🌱 Weedy Beds:
Starting with a very weedy garden? Try solarization in late winter: cover the soil with clear plastic. This traps heat, encouraging weed seeds to germinate. Once seedlings appear, remove them with a hoe. Avoid digging the soil—disturbing it can bring buried weed seeds to the surface.
Once you build a rich, dark, fertile soil foundation, gardening gets easier with each passing season!
Digging Deeper: Know Your Soil
If you really want a thriving garden, don’t guess—get to know your soil. Is it clay or sandy? Acidic or alkaline? Rich or depleted? Understanding your soil’s texture, fertility, and pH will guide how—and what—you plant, and how you amend the soil.
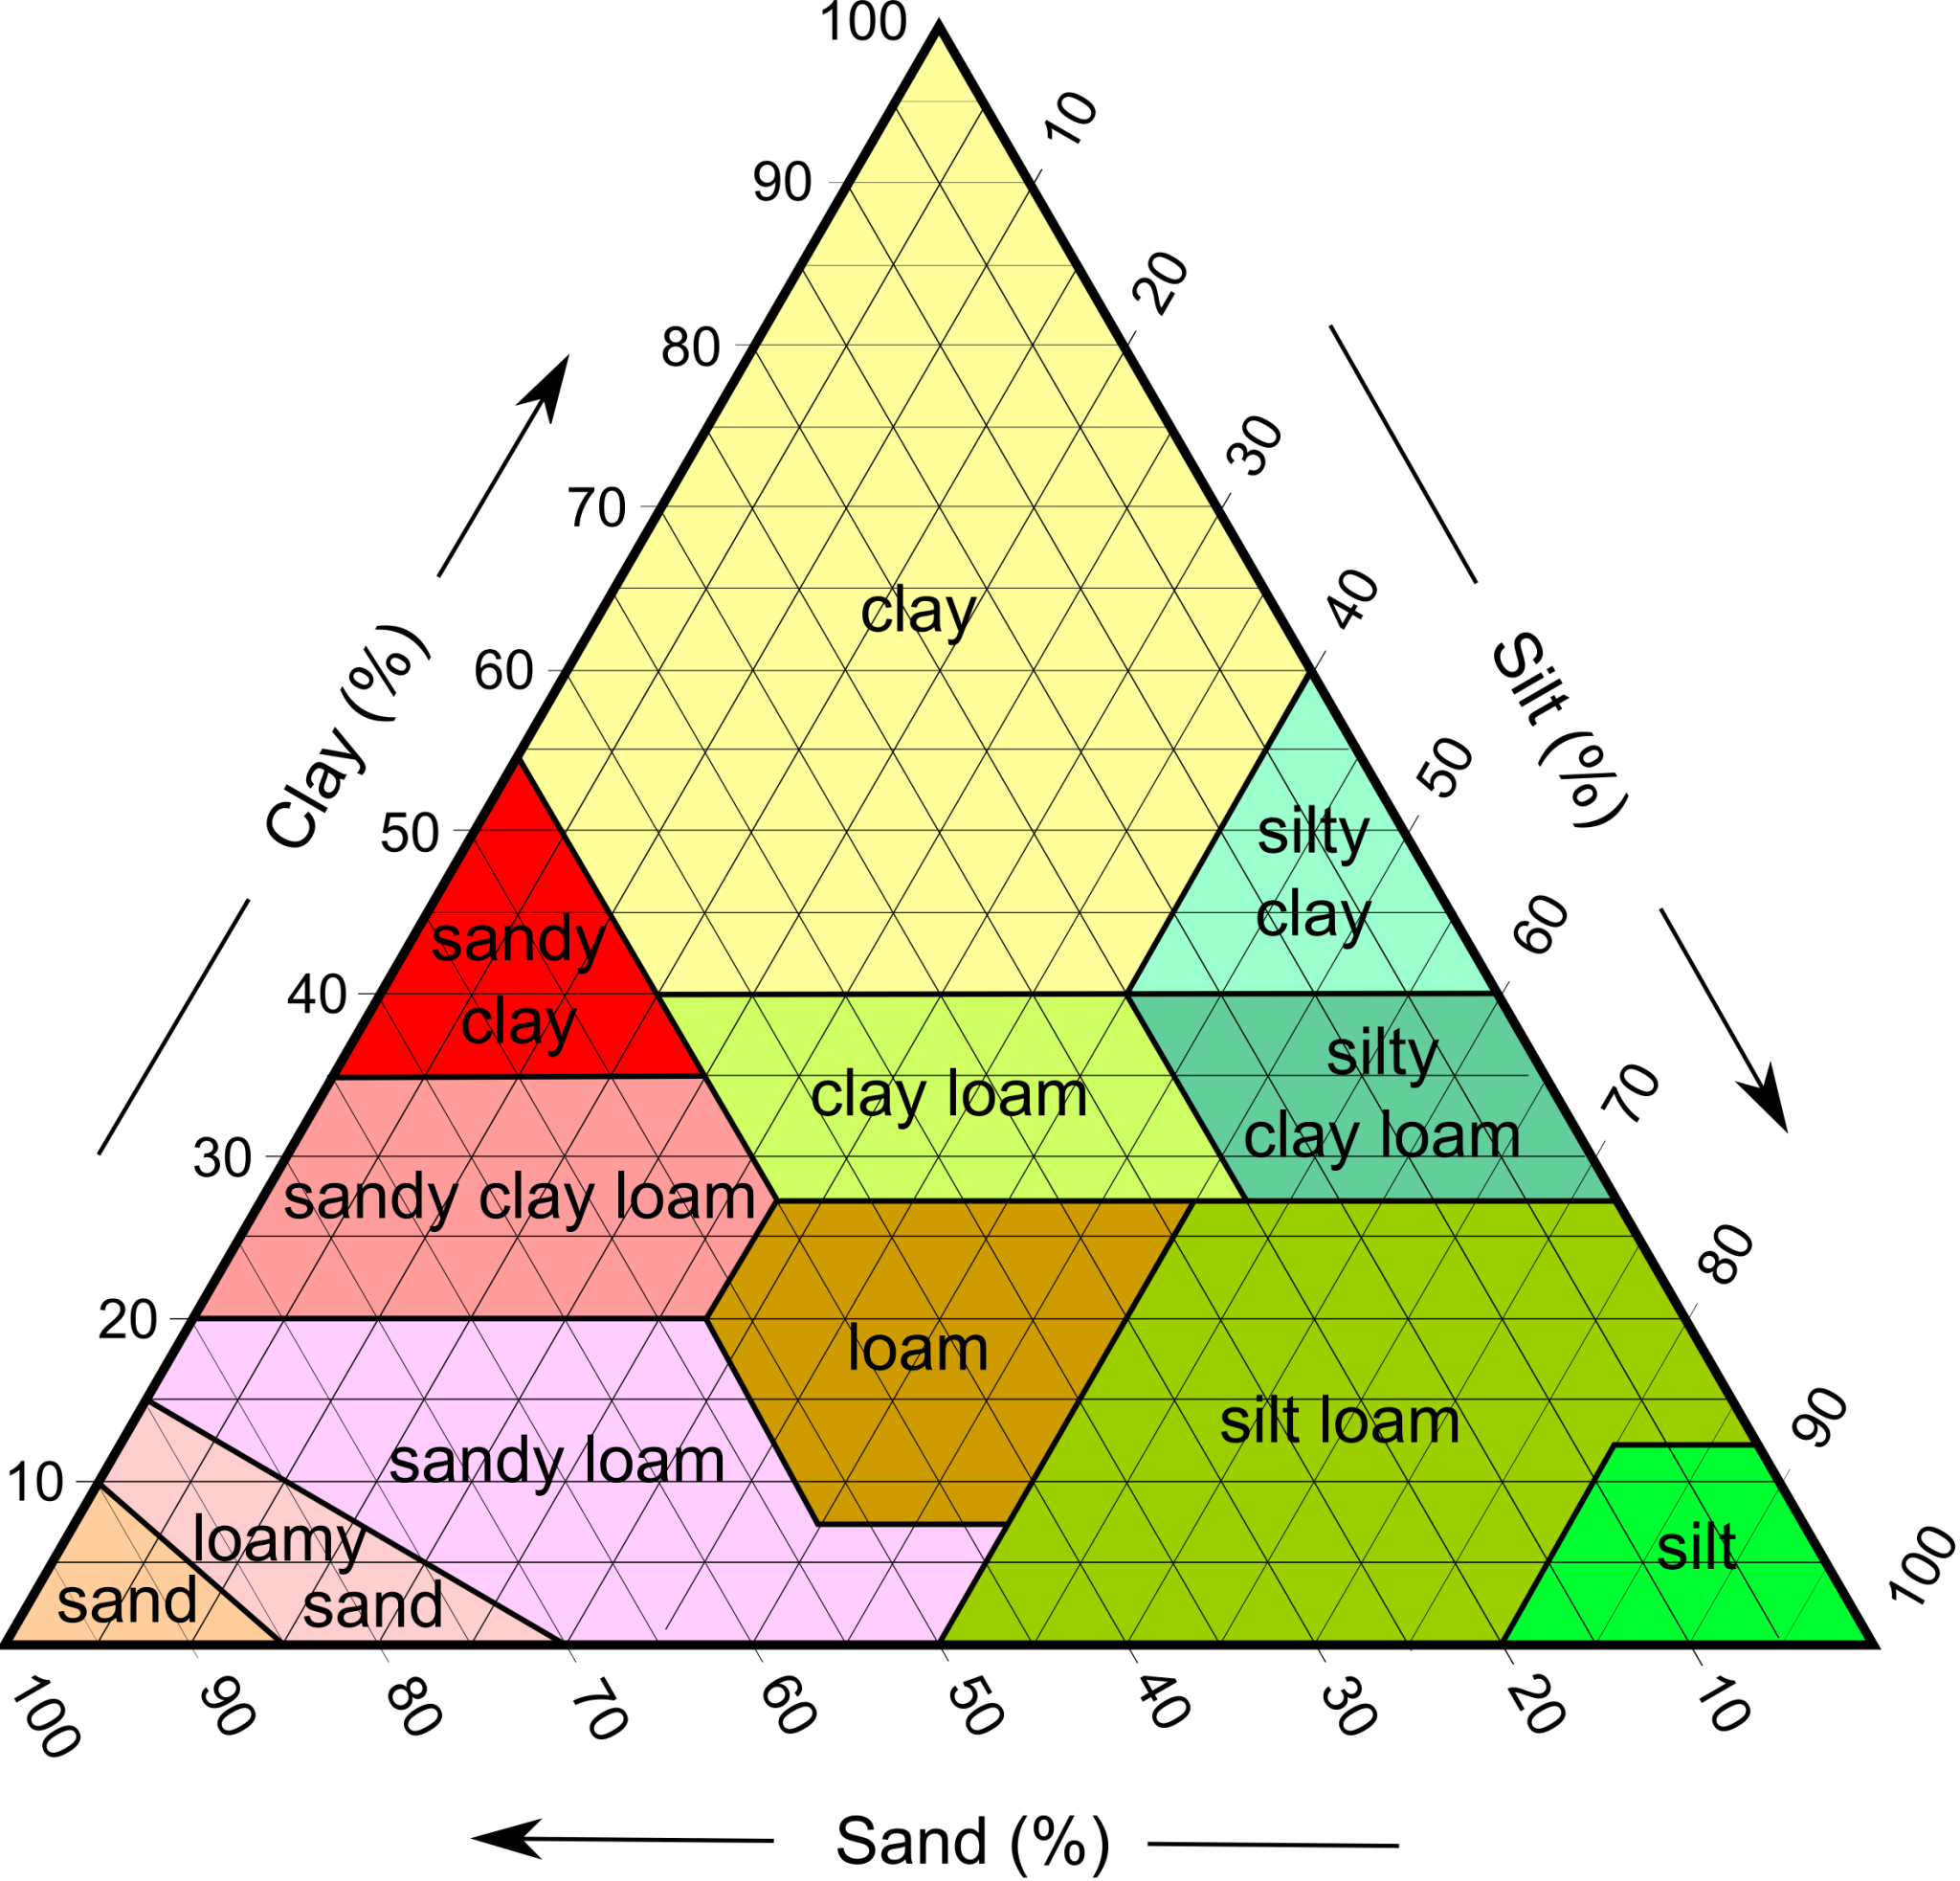
I. Soil Texture
Soil comes in three basic textures—clay, sand, and silt—but the gold standard is loam, a balanced mix of all three.
Loamy Soil (The Goal)
- Feels damp but not sticky
- Crumbles easily after rain
- Holds moisture while draining well
- Packed with organic matter (humus)
Clay Soil
- Fine particles; sticky when wet
- Holds water too well and drains poorly
- Nutrients may be present but are “locked up”
- Cracks in dry heat, compacts easily
✅ Fix it: Add compost and fibrous materials like straw or shredded bark. Avoid adding sand—it makes matters worse.

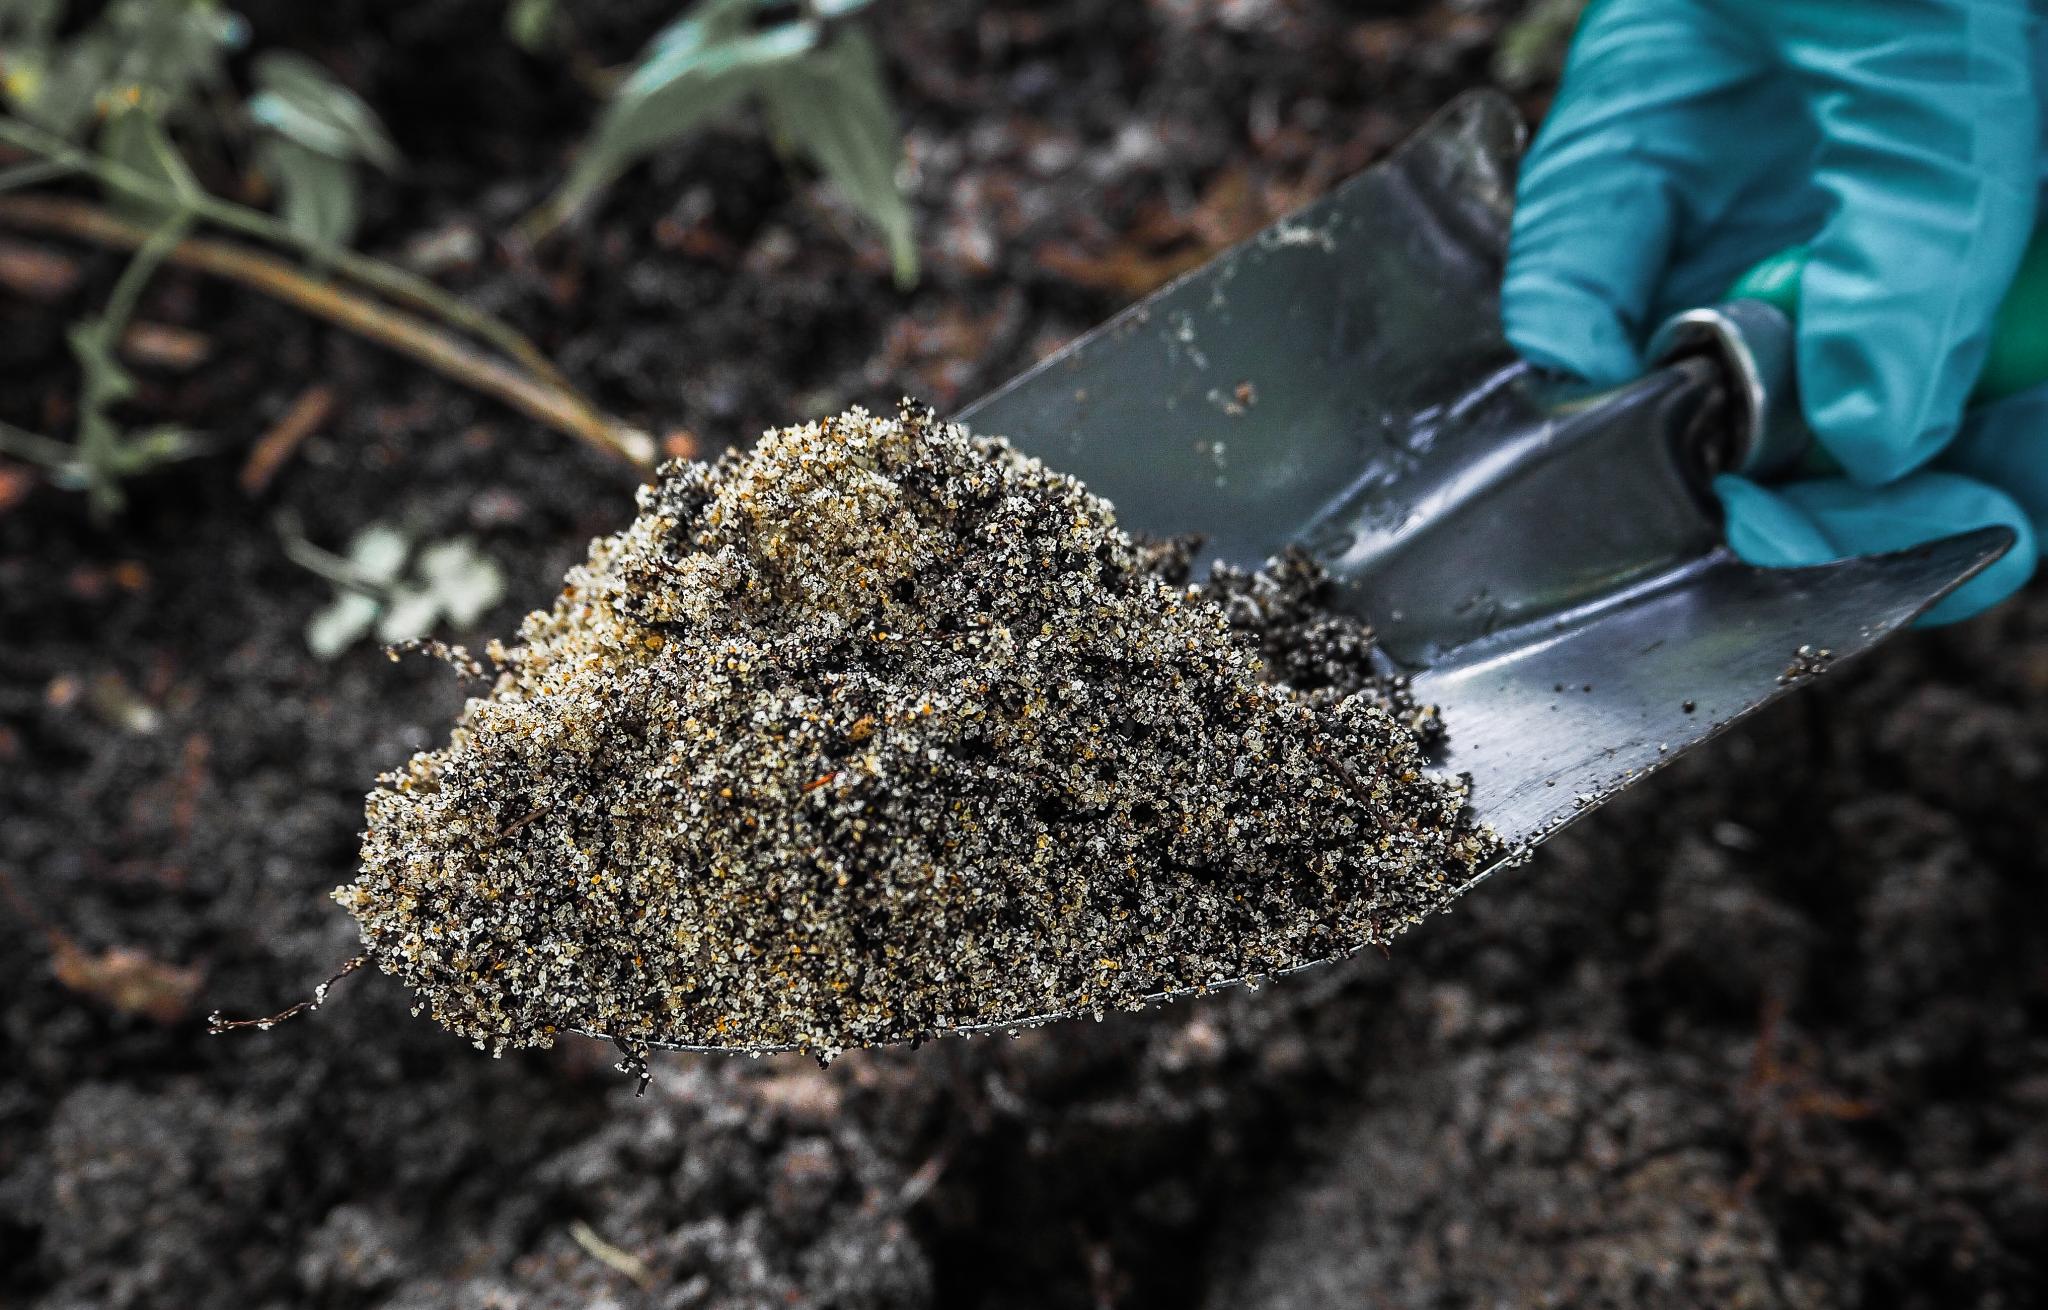
Sandy Soil
- Gritty and loose; drains fast
- Leaches nutrients quickly
✅ Fix it: Add compost, well-aged manure, and coconut coir for moisture retention.
Silty Soil
- Smooth, holds moisture
- Fertile but compacts and erodes easily
✅ Fix it: Add organic matter annually, minimize tilling, and use raised beds if needed.
Want to test your soil texture at home? Try the simple jar test—it’s easy, cheap, and surprisingly revealing. See instructions.
II. Soil Nutrition
Fertile soil is the key to lush plants and productive harvests. The big three nutrients are:
- Nitrogen (N) – Leaf and stem growth (greens, brassicas)
- Phosphorus (P) – Root and flower development (tomatoes, squash)
- Potassium (K) – Root vigor, disease resistance, and flavor (root crops)
These appear on fertilizer labels as N-P-K numbers. But before you add anything, get a soil test—too much of a good thing can backfire.
✅ Organic ways to boost nutrients:
- Nitrogen: Aged manure, alfalfa meal, fish emulsion, blood meal
- Phosphorus: Bone meal (fast), rock phosphate (slow)
- Potassium: Greensand, kelp meal, wood ash (only if pH allows)
Don’t forget secondary nutrients like calcium and magnesium, which also show up in a soil test.
Learn more about NPK Ratio: What Do Those Numbers Mean?
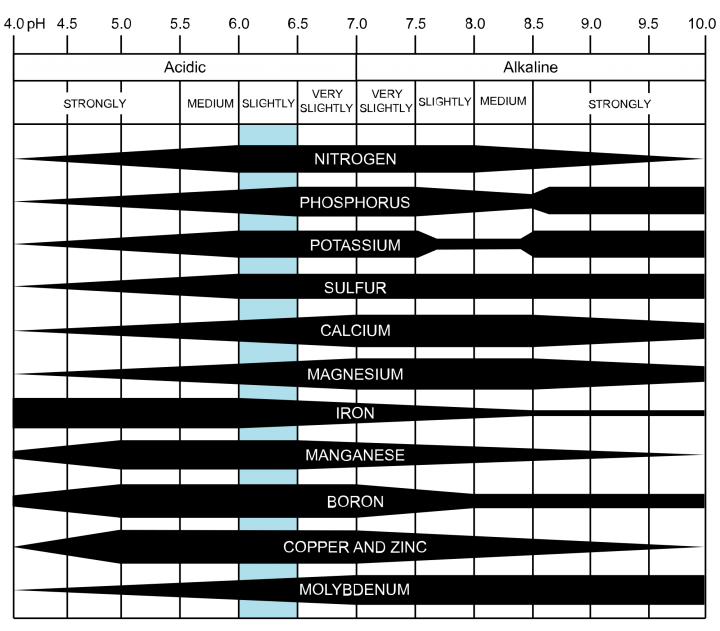
III. Soil pH
Soil pH affects how well plants can absorb nutrients. Most veggies prefer a pH between 6.0 and 7.0, which supports strong microbial activity.
✅ Acidic? Add garden lime.
✅ Alkaline? Use powdered sulfur.
But don’t guess—always test before adjusting pH. And remember, you don’t need to “fix” the pH if you grow plants suited to your existing soil.
pH changes take time, so plan ahead. Learn more about plants and their pH preferences.
Availability of Nutrients at Varying pH Values
How to Improve Any Soil Type
No matter your soil type, the long-term solution is the same: add organic matter.
Why Add Organic Matter?
It improves:
- Drainage and aeration in heavy clay
- Water retention in sandy soils
- Soil structure and workability
- Slow-release nutrients and microbial activity
- Soil pH balance
Common Organic Amendments
| Amendment | Use |
|---|---|
| Compost | Adds nutrients, improves structure |
| Aged manure | Rich in nutrients—composted only! |
| Leaf mold | Boosts water retention and microbes |
| Coconut coir | Sustainable water-holding material |
| Plant material (leaves, straw) | Add months in advance to decompose |
| Cover crops (green manure) | Planted in fall, turned under in spring |
| Topsoil | Adds volume, not nutrients—combine with compost |
❗ Do not use raw manure, uncomposted bark/sawdust, or random soil additives without a soil test. These can deplete nitrogen or upset soil balance.
The Best Time to Add Compost? Fall!
If you remember nothing else, remember this: fall is the ideal time to add compost and other organic matter. The materials have all winter to break down and blend into the soil, so by spring, you’re working with dark, crumbly, nutrient-rich earth. Fall applications also feed beneficial soil microbes year-round and help protect soil from erosion and compaction over winter.
But if you missed fall? Don’t worry—you can still amend in early spring before planting. Just give the soil a couple of weeks to settle before sowing seeds.
When to Add Organic Matter
Best time: Add in the fall, so materials break down over winter and enrich the soil by spring.
Spring option: Apply compost as soon as the soil is workable—not wet and sticky.
How much: Spread 2 to 3 inches of compost and mix it into the top 6 to 8 inches of soil.
Max limit: Avoid adding more than 4 inches at once; aim for organic matter to make up about 25% of the soil blend.
🧪 Tip: Need help calculating? See our Soil Calculator.
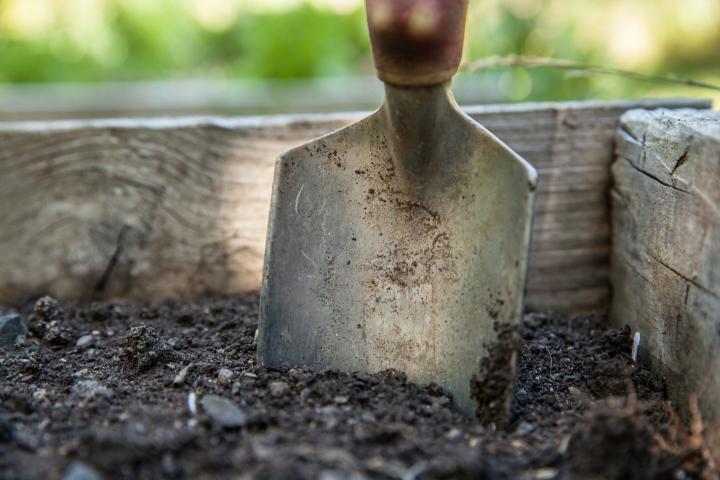
To test if the soil is workable, squeeze a handful from 6 inches deep:
- If it crumbles, it’s ready.
- If it forms a sticky ball, wait a few days and test again.
After amending, let the soil rest 1 to 2 weeks before planting. Then rake it smooth—and you’re ready to grow.
Raised Beds: A Smart Alternative
Tired of compacted or poor soil? Consider raised garden beds, which give you full control over the soil mix.
Benefits:
- Warm faster in spring
- Drain better in wet regions
- Avoid foot traffic and compaction
- Great for regions with poor native soil
Tip: Keep raised beds no wider than 4 feet so you don’t walk on the soil. Cover them with cardboard, black plastic, or even salvaged windows to warm them in spring and suppress weeds.
Learn more about choosing the best soil for raised garden beds from our gardening experts.
Final Thought
Soil doesn’t need to be perfect overnight. Improving your garden soil is a season-by-season process—but each year gets better.
Fall is the best time to feed your soil and let nature do the heavy lifting. But whether you’re prepping in autumn or digging in come spring, the key is to start. Get to know your soil, amend thoughtfully, and trust that a little care now will grow rewards for seasons to come.
Do you have an over-spent or neglected field you want to turn into a garden? Read our article about reclaiming your garden soil.

Getting Started
Planning For a Garden
Planting a Garden
Plant Growing and Care
Harvesting and Storing Vegetables


Comments
Very interesting post you wrote on this newsletter. I'd like to see much more about this so maybe you should be writing more articles right now. I shared this with 3 others who may also be interested
And just like that, I'm not building a garden now. It sounds like way too much money is needed. Smh. I know they used to just till up the dirt, put the seed in the soil, and water it. Period. Smh. I guess we have different dirt now..?
My plants keep growing but does not bear any fruits like okra, tomatoes.
what is best way to water tomatoes? They are watered most each day, now looking wilty..
One of the best, and thorough articles I've found about prepping your bed. I really particularly love the breakdown about NPK, pH and the different soil classification. These terms are just bandied about amongst the garden/farming world as if everyone knows exactly what they mean. If you haven't yet, PLEASE do an in-depth breakdown about compost (THE most confusing term when used without further description!) and the different types and characteristics. As a new gardener, I've purchased the something referred to as compost, but was really more like a mulch instead.