How to Grow Prickly Pear Cactus: Indoor & Outdoor Care Tips

Prickly Pear

Caption

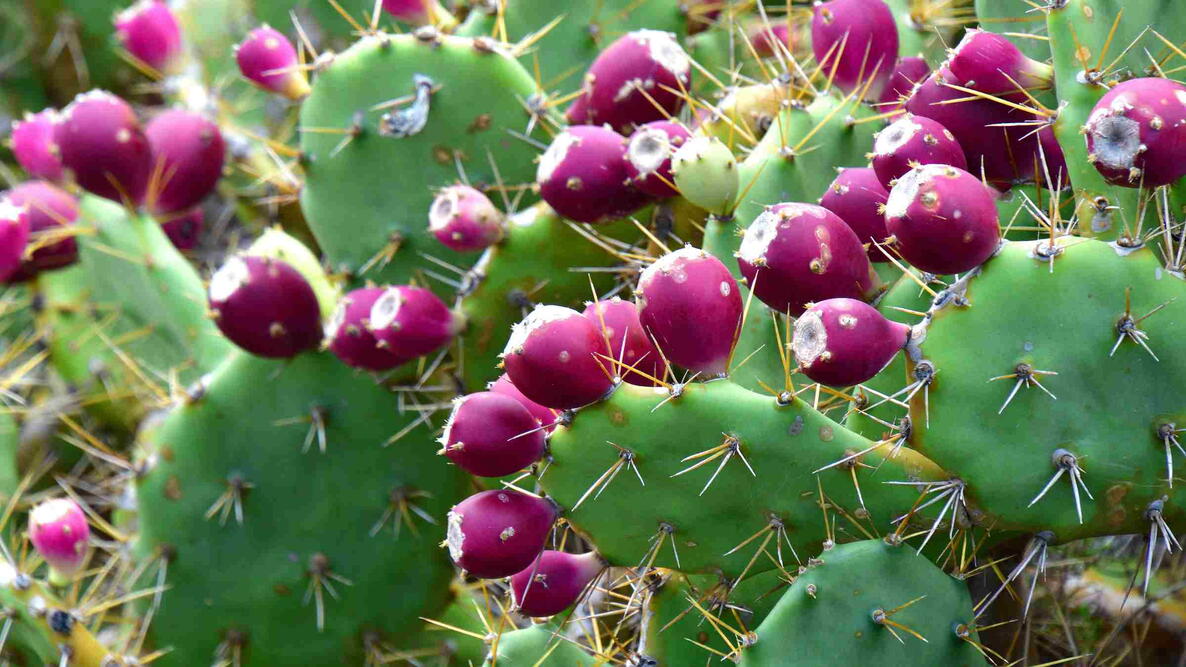
Prickly perfection: stunning paddle-shaped stems, blooms, and even edible pads!

Photo Credit
CarlosHerrerosfotografia
Botanical Name
Opuntia spp.
Plant Type
Sun Exposure
Soil pH
Bloom Time
Flower Color
Hardiness Zone
Subhead

Tips for Growing Prickly Pears as Houseplants or in the Garden

Written By: Lauren Landers Master Gardener and Contributing Writer

Whether you keep them indoors or out, prickly pears are un-pear-alleled plants with stunning good looks—and they’re edible! Although most cacti crave the heat, prickly pears are among the most widespread and cold-tolerant cacti you can find, with some species able to overwinter in areas as cold as Zone 4. Even in chilly New England, I’ve successfully grown prickly pears in my garden, and I’ve also cultivated them as houseplants—so I’ll share all my favorite growing tips right here!

About Prickly Pear Plants

Like most cacti, prickly pears are native to the Americas; however, unlike many other cacti, prickly pears have a wide geographic range and grow wild as far north as Canada. Some varieties are surprisingly cold-tolerant, while others prefer warm, dry conditions. That means in the southern and western U.S., prickly pears often thrive outdoors in xeriscapes and rock gardens, while in colder regions, they’re more often enjoyed indoors as easygoing houseplants.

No matter where you grow them, prickly pears are impressively hardy as long as they’re planted in well-draining soil and get plenty of sun. Their flat, paddle-shaped stems make a striking silhouette, and once mature, they’ll reward you with big, showy flowers, pollinator visits, and even sweet fruit. On top of that, most varieties have edible paddles (nopales), which are famously used in tacos and other tasty fare. 

Prickly pear cactus with pink flower in bloom
Blooming beauty: this prickly pear shows off a stunning pink flower. Credit: PaulSat

Although some prickly pears grow up to 15 feet tall, others stay much shorter, and common varieties, like the bunny ear cactus, can be kept as small houseplants. I’ve grown a few prickly pear plants in a bright window in my home and was pleased to find them very easy to care for and undemanding in terms of water and fertilizer. But if you’d rather grow prickly pears outside, these plants look stately in xeriscape beds along with coneflowers, yucca, agave, and other plants that don’t need much water, or they can be grown along property lines as a handy natural fence.

Planting

Prickly pears have a wide native range, but certain varieties can be invasive in some areas, so it’s important to do a bit of research before planting them outside. Most plant nurseries will only sell prickly pear species that can survive local winters or that can be grown as houseplants, but it’s wise to read plant labels carefully to ensure the prickly pears you choose are winter hardy in your growing zone.

  • Plant at the right time: Prickly pears can be planted in any season if you’re growing them indoors, but spring or summer are the best times to plant prickly pears in the garden.
  • Choose a well-draining location: Regardless of where you grow these plants, ensure the soil drains well and doesn’t remain waterlogged. If you’re growing prickly pears in pots, choose a wide pot with drainage holes and use a well-draining potting mix that’s intended for succulents and cacti.
  • Wear gloves: Prickly pears can prick your fingers, so wearing gloves is essential. If possible, use sturdy leather gloves, which are more resistant to cactus spines. Consider wearing nitrile gloves beneath your gardening gloves to avoid the cactus’s smaller, prickly hairs.
  • Please wait for the soil to dry: Cactuses are easier to remove from their pots when the soil is dry.
  • Plant at the proper depth: Prickly pears should be planted at the same depth they were growing in their nursery pot. After planting, wait at least one week before watering so your plants have time to settle in.

Water
Overwatering prickly pears is the number one reason why these plants fail. To avoid this fate, keep prickly pears in well-draining soil with plenty of sand or gravel, and only water them when the soil is completely dry. Outdoor plants are usually happy with rainfall alone, but shriveled cactus pads can indicate your plants need more water.
Light
Full-sun locations are a must for prickly pears, although these plants may prefer some light afternoon shade in hot climates. If you’re growing these plants indoors, keep them in bright south- or west-facing windows that receive at least 6 to 8 hours of direct sun per day.
Humidity
Prickly pears are at their best in low humidity conditions, while high humidity can increase the risk of fungal problems.
Temperature
Some prickly pears are more cold-hardy than others, so it’s important to select a variety that will survive winters in your growing location. If you keep prickly pears as houseplants and move them outside in summer, be sure to bring your plants back indoors before temperatures dip below 50°F. Position indoor plants away from heating and A/C units, too.

Fertilizer

In general, prickly pears don’t need fertilizer, but you can boost their growth by feeding them with a balanced cactus fertilizer in spring and summer. You can also use a high nitrogen fertilizer to encourage your plants to produce more paddles, or a low nitrogen fertilizer to favor flowers and fruit.
Toxicity
Prickly pears are nontoxic, but their sharp spines and prickles can cause skin and eye irritation.

Harvesting

Slow-growing prickly pears can take 3 to 4 years to produce fruit and flowers, but most plants yield edible cactus paddles even earlier. When harvesting, always wear gloves and use a sterilized knife to cut the fruit and stem paddles between their segments. Prickly pear fruit should be peeled before eating, while paddles will need their spines stripped away carefully before you cook them up.

Prickly Pear Fruit on a counter
A prickly exterior, a sweet surprise—prickly pear fruit at its peak. Credit:  Elena.Katkova

Pests/Diseases

While prickly pears are relatively hardy, they can still struggle with pests and other issues that may affect their growth.

  • Pests, like mealybugs and scale insects, are more likely to affect indoor prickly pear plants, but they can occur outside, too. If these pests are plaguing your plants, spot treat them with a Q-tip dipped in rubbing alcohol or treat the entire plant with an organic insecticidal soap spray.
  • Overwatering can cause prickly pears to become mushy and collapse due to root rot. If the rot is minor, your plant may recover when you reduce watering; however, if severe rot has set in, you may need to propagate healthy stems to salvage your plant — or start over with a new prickly pear.
  • Fungal issues can create lesions and dark spots on prickly pear paddles that spread throughout the plant. These issues can’t be fully cured, but you can manage them by removing and destroying affected cactus paddles.

Potting and Repotting

How Often to Repot

Indoor prickly pears don’t need to be repotted often and only require a pot upgrade if they become rootbound or top-heavy.

When to Repot

The best time to repot prickly pears is in spring and summer.

How to Repot

  • Let the soil dry: Cactus pots are easier to remove when the soil is dry. Don’t forget to wear gloves!
  • Remove the old pot: Holding the cactus in one hand and the pot in the other, carefully wiggle the plant pot free. If the pot sticks, use a butter knife to loosen the soil from the pot’s rim.
  • Use a well-draining potting mix: Select a potting mix specifically designed for cacti and a well-draining pot, and plant your cactus at the same depth it was growing in its old container. Firm the soil around the plant’s roots and wait at least one week before watering.
Cactus flower with young fruit, Indian fig. Isolated on white. Opuntia ficus indica.
Flower to fruit: Opuntia ficus-indica shows off blooms and baby prickly pears. Credit: Sarah2

Propagation

Prickly pears can be grown from seed, but this is an act of patience and will take years to yield a plant that’s big enough to flower. To speed things along, most growers propagate prickly pears from paddles instead, which can be harvested from the plant in spring or summer.

  • Use a sharp knife: Remove a paddle cutting by cutting between the segmented cactus paddles with a sharp, sterilized knife.
  • Let the paddle callus: Place the cutting to the side in a warm, dry spot for a few days so it can callus over.
  • Plant it right: Plant the cut paddle end in a pot filled with a well-draining cactus potting mix and water it just once immediately after planting. Watering more than this can lead to rot.
  • Repot: Once the cactus paddle has formed roots and can’t be easily lifted from the soil, repot it into a larger pot if needed, or plant it outdoors after the risk of frost has past.
Bunny ear cactus or Opuntia microdasys in botanic garden
Bunny Ear cactus in the garden: small, striking, and surprisingly hardy. Credit: Farknot Architect

Seasonal Care

Outdoor prickly pears will often look shriveled and dry during winter, but they should plump up when spring returns. As long as you’ve chosen a variety that’s winter-hardy in your area, you shouldn’t need to provide your plants with winter protection. Pruning is generally not needed with prickly pears, but late fall is the best time to shape them and remove damaged paddles.

Wit and Wisdom

  • Aside from their culinary appeal, prickly pear cactuses have many other uses and were traditionally used as medicinal plants to treat wounds, inflammation, and digestive issues. They’ve also been used as natural livestock fences and, more recently, to create biofuel and a type of vegan leather.
  • The Mexican flag features an image of an eagle, a snake, and a prickly pear, referencing the legend surrounding the founding of the Aztec capital, Tenochtitlán.
  • Red cochineal dye is produced from a particular type of scale insect that frequents wild prickly pears in Central America. This dye was traditionally used by the Incas, Aztecs, and Mayans, and is still used today. 

About The Author
Lauren Landers

Lauren Landers

Master Gardener and Contributing Writer

Lauren is a gardener, writer, and public speaker with over a decade of experience helping others learn about gardening, homesteading, and sustainable living.She combines years of practical gardening a...