How to Grow Broccoli: Planting, Growing & Harvesting Tips

broccoli growing in the garden
Botanical Name
Brassica oleracea (Italica group)
Plant Type
Sun Exposure
Flower Color
Subhead

Plant, grow, and harvest broccoli with ease for tasty, nutritious results

Print Friendly and PDF
Almanac Garden Planner

The Almanac Garden Planner - Use It Free for 7 Days!

Plan your 2025 garden with our award-winning Garden Planner.

Try Now

Broccoli: the crown jewel of the garden—and your dinner plate! This cool-season crop is crisp, tender, and loaded with nutrition. Whether you’re planting in spring or planning for a fall feast, follow our guide to grow your own bountiful broccoli harvest.

About Broccoli

Broccoli is part of the Brassicaceae family, along with cabbage, cauliflower, Brussels sprouts, and radishes.  The common type of broccoli in grocery stores is “Calabrese broccoli” (named after Calabria in Italy), which produces big green heads on thick stalks. 

Broccoli is a cool-season crop, so it should be started in early- to mid-spring (depending on your climate) for an early summer crop or in mid- to late summer for a fall crop. High temperatures will affect the development of the broccoli head (the harvestable part), so the goal is to get broccoli to mature before or after high temperatures are expected.

Broccoli takes a long time to mature, so be patient! Once you harvest the main head of a broccoli plant, it will often keep producing smaller side shoots that can be enjoyed for months.

This cole crop is worth growing for its nutritional content alone. It’s rich in vitamins and minerals and a good source of potassium, iron, calcium, fiber, vitamin C, and beta-carotenes.

Planting

Broccoli should be planted in a site that gets full sun (6 to 8 hours of sunlight per day). Lack of sunlight may produce thin, leggy plants and subpar heads. Soil should be well-draining and fertile. Use raised beds if you can’t adjust sandy or clay soil. To increase fertility before you plant, work in 2 to 4 inches of rich compost (humus) or a thin layer of manure in early spring. The soil pH should ideally be slightly acidic, between 6.0 and 7.0.

When to Plant Broccoli

We recommend planting transplants (start plants) or seeding indoors

  • For a spring crop, transplant 2 to 3 weeks before your last spring frost date, once soil temperatures reach 40°F (4°C), but warmer soil is preferred and will greatly speed up development. Consult our Planting Calendar to see recommended dates for your area.
  • If you are starting seeds indoors, start 6 to 8 weeks before your last frost date.

If you plant a fall crop, we would still recommend transplanting. Direct seeding in hot weather isn’t good for cole crops. 

Spacing for Broccoli

How to Plant Broccoli

  • Plant transplants that are 4 to 6 weeks old (and have 4 or 5 leaves) outdoors, 12 to 20 inches apart, in holes slightly deeper than their container depth.
  • Space rows of broccoli 3 feet apart. (Closer spacing yields smaller main heads but more secondary heads.)
  • Water well at the time of planting.

Video Demo of Sowing Broccoli

For those who wish to start sowing in pots, watch Ben in this video show you how it’s done! See the whole process from sowing to transplanting to broccoli care and harvesting.

Growing

  • Plants thrive in temperatures between 65° and 70°F (18° and 21°C).
  • Fertilize broccoli three weeks after transplanting seedlings into the garden. Use a low-nitrogen fertilizer, such as a 5-10-10 formula.
  • Thin when young plants reach 2 to 3 inches tall. Plants should be between 12 and 20 inches apart.
  • Provide consistent soil moisture with regular watering, especially in drought conditions. Water at least 1 to 1 1/2 inches per week.
  • Do not get developing broccoli heads wet when watering, as it can encourage rot.
  • Roots are very shallow, so try not to disturb the plants—suffocate weeds with mulch instead of weeding.
  • Mulching around plants will also help to keep soil temperatures down.
  • Use row covers to minimize pests.
  • To promote the growth of a second head after the first has been harvested, maintain an active feeding and watering schedule.

Growing Broccoli, head of broccoli

Harvesting

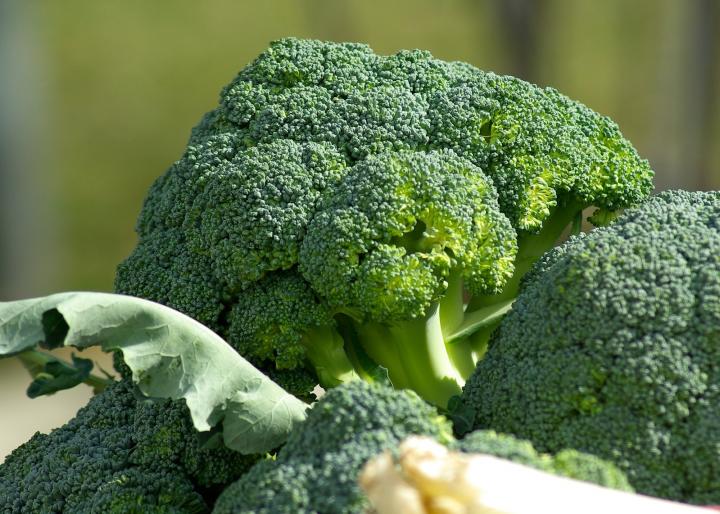
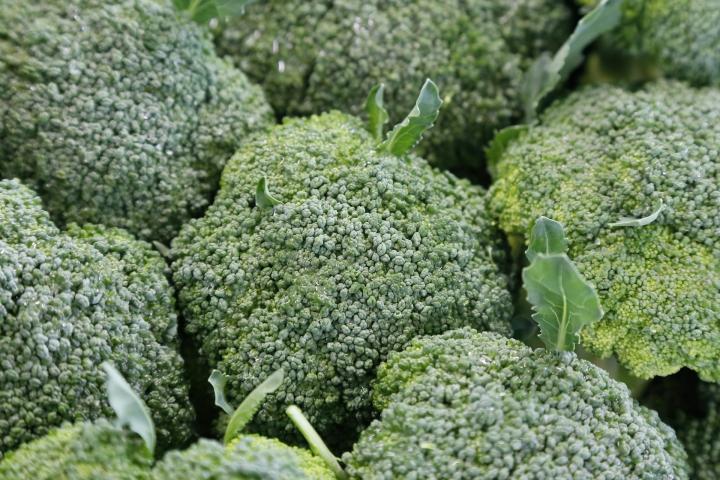
  • Harvest broccoli in the morning, when the buds of the head are firm and tight, just before the heads flower.
  • If you do see yellow petals, harvest immediately, as the quality will decrease rapidly.
  • Cut heads from the plant, taking at least 6 inches of stem. Make a slanted cut on the stalk to allow water to slide away. (Water can pool and rot the center of a flat-cut stalk, ruining the secondary heads.)
  • Most varieties have side-shoots that will continue to develop after the main head is harvested. You can harvest from one plant for many weeks, in some cases, from spring to fall, if your summer isn’t too hot.
  • Learn more tips on harvesting broccoli.

How to Store Broccoli

  • Store broccoli in the refrigerator for up to 5 days.
  • If you wash before storing, make sure to dry it thoroughly.
  • Broccoli can be blanched and frozen for up to one year. Learn how to freeze broccoli.

Close-up of broccoli heads

Gardening Products

Pests/Diseases

Broccoli Pests and Diseases
Pest/DiseaseTypeSymptomsControl/Prevention
AphidsInsectCurled, misshapen/yellow leaves; distorted flowers/fruit; sticky “honeydew” (excrement); sooty, black mold.Grow companion plants; knock off with water spray; apply insecticidal soap; put banana or orange peels around plants; wipe leaves with a 1 to 2 percent solution of water and dish soap (no additives) every 2 to 3 days for 2 weeks; add native plants to invite beneficial insects (such as ladybugs).
Cabbage loopersInsectLarge, ragged holes in leaves from larval feeding; defoliation; stunted or bored heads; excrement.Handpick off plants; add native plants to invite beneficial insects; spray larvae with insecticidal soap or Bacillus thuringiensis (Bt)—a natural, bacterial pesticide; use row covers; remove plant debris at end of season.
Cabbage root maggotsInsectWhite maggots become gray flies that resemble small houseflies. Wilted/stunted plants; off-color leaves; larvae feeding on roots.Use collars made of plastic or tin foil around seedling stems; monitor adults with yellow sticky traps; use row covers; destroy crop residue; till soil in fall; rotate crops.
CabbagewormsInsectLeaves have large, ragged holes or are skeletonized; heads bored; dark green excrement; yellowish eggs laid singly on leaf undersides.Handpick; use row covers; add native plants to invite beneficial insects; grow companion plants (especially thyme); spray Bt (Bacillus thuringiensis).
ClubrootFungusWilted/stunted plants; yellow leaves; roots appear swollen/distorted.Destroy infected plants; solarize soil; maintain soil pH of around 7.2; disinfect tools; rotate crops.
Downy MildewFungusYellow, angular spots on upper leaf surfaces that turn brown; white/purple/gray cottony growth on leaf undersides only; distorted leaves; defoliation.Remove plant debris; choose resistant varieties; ensure good air circulation; avoid overhead watering.
Nitrogen deficiencyDeficiencyBottom leaves turn yellow and the problem continues toward the top of the plant.Supplement with a high nitrogen (but low phosphorus) fertilizer or blood meal. Blood meal is a quick nitrogen fix for yellowing leaves.
Stink bugsInsectYellow/white blotches on leaves; shriveled seeds; eggs, often keg-shape, in clusters on leaf undersides.Destroy crop residue; handpick (bugs emit odor, wear gloves); destroy eggs; spray nymphs with insecticidal soap; use row covers; weed; till soil in fall.
White rustFungusChalk-white blisters mainly on leaf undersides; small, yellow-green spots or blisters, sometimes in circular arrangement, on upper leaf surfaces; possible distortion or galls; flowers/stems may also be infected. More common with warm days and cool/moist nights. Destroy infected plants; choose resistant varieties; weed; destroy crop residue; rotate crops.
WhitefliesInsectSticky “honeydew” (excrement); sooty, black mold; yellow/ silver areas on leaves; wilted/stunted plants; distortion; adults fly if disturbed; some species transmit viruses.Remove infested leaves/plants; use handheld vacuum to remove pests; spray water on leaf undersides in morning/evening to knock off pests; monitor adults with yellow sticky traps; spray with insecticidal soap; invite beneficial insects and hummingbirds with native plants; weed; use reflective mulch.

Wit and Wisdom

  • Originally, broccoli was eaten for its stems.
  • Early Roman farmers called broccoli “the five green fingers of Jupiter.”
  • Once you’ve gotten broccoli down pat, why not try growing one of its relatives? See our Growing Guides for cauliflower, cabbage, brussels sprouts, rutabaga, kale, and turnips!

Cooking Notes

One ounce of broccoli has an equal amount of calcium as one ounce of milk. Learn more about the amazing health benefits of broccoli

About The Author

Catherine Boeckmann

Catherine Boeckmann loves nature, stargazing, and gardening so it’s not surprising that she and The Old Farmer’s Almanac found each other. She leads digital content for the Almanac website, and is also a certified master gardener in the state of Indiana. Read More from Catherine Boeckmann
 

Gardening Club