Must-try shortcuts to gardening success
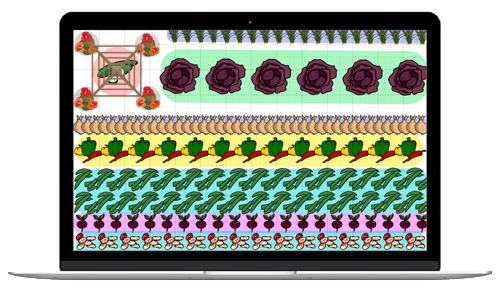
The Almanac Garden Planner - Use It Free for 7 Days!
Plan your 2025 garden with our award-winning Garden Planner.
Short on time? Here are 10 must-try shortcuts that can lead you to gardening success this year. Try these shortcuts, including some not-so-obvious lightbulb moments, and we promise that you’ll have more time to actually enjoy your garden!
These gardening hacks are all about lightening your gardening load to help ensure you success in your garden.
1. Team Up With Nasturtiums
If you plant climbing beans, also plant to pop in a few trailing nasturtium seeds while you’re there. The nasturtiums will climb up supports along with your beans and help to attract even more pollinators to the bean flowers. They can also act as a trap crop by attracting common pests such as black bean aphid away from your beans. Later on in the season cabbage white butterflies will often prefer to lay their eggs on nasturtium leaves. These can then be removed to an enclosed compost bin before they have a chance to hatch and spread, helping nearby cabbage family crops to potentially dodge an infestation. See how to grow nasturiums.
2. Grow Herbs in Water
Perennial evergreens like rosemary and thyme will continue to give up their aroma-filled leaves throughout the winter months, but what about fleshier herbs like mint and basil? Simple: take a few cuttings and grow them on in water on a bright indoor windowsill. They’ll produce roots within a week and, so long as your regularly change the water to keep it fresh and clear, should remain green and continue to grow for many, many weeks. Eventually, of course, you can just pot your rooted cuttings up into potting mix. Or take some more cuttings to keep the cycle going till growth outside resumes in spring. See how to propagate new herbs from cuttings.
3. Weed After Rain
Ever tried to weed in hard, sun-baked ground. It’s not easy is it? Instead, you’ll find it so much easier to weed after a rainstorm or, ideally, a period of wet weather. Rain softens soil, making it easier to pull up weeds and their roots. Look at this selection of my trousers here. They’ve all got holes in the knees! If this happens to you, consider wearing kneepads while you weed and tend your plants. Yes, yes, it’s a bit granny-ish, but just like walking poles, blankets and slippers they just make good sense! Learn more about garden weed techniques.
4. Hang on to Prunings
Don’t be in a hurry to get rid of prunings and hacked-back branches. Keep some aside, especially the thinner, twiggier stuff, to use around the garden. Twiggy sticks, or pea sticks, are just the job for supporting peas. These vining plants will weave their way up into the sticks, keeping them up off the ground so they don’t get nibbled or rot away. The peas will be a lot easier to pick too.
Another use for sticks like this is to keep cats and birds off your beds; no one wants them digging about!
5. Sow a Few Extra
When sowing into flats or seed trays, sow a few extra, just in case. Trickle any excess seeds into separate plant pots then grow these on elsewhere as an insurance policy against losses. These spare seedlings will come in handy should your other seedlings get targeted by pests or wiped out by bad weather. And if you don’t need them or don’t have the space for these extras, just give them away to friends and family. There’s no better way to instill goodwill than free plants.
6. Store Tools Correctly
Tools run the risk of turning rusty in damp air. Keep them as dry as possible and oil your tools from time to time to keep them protected. Keep an old towel or rag handy to dry off wet tools before storing them. And a great way to keep hand tools clean and tidy is to store them in a bucket of dry sand. They’ll always be on hand that way. When it’s time to get on and garden, select the tools and other bits and bobs you need and pop them into a bucket to keep everything together. Be disciplined – put things back in the bucket when you’re down with them or you’ll be constantly losing tools around the garden! Add bright yellow tape to the handles to make pruners and tools stand out more clearly. Learn more about caring for your beloved garden tools and which tools you need!
7. Stop Crushing Plants With Your Watering Hose
Rainwater is always best for watering plants, but when that runs out, I resort to the watering hose. Trouble is it’s all too easy to inadvertently drag the hose over crops and flowers as you stretch it out to reach further parts of the garden. Flattening plants like this is frustrating.
First of all, consider investing in a lightweight, non-kinkable hose and make sure it’s long enough (perhaps 75 or 100-feet). But also consider hose guides which are simply stakes that you can strategically place around the garden bed to avoid damage to the plants. Or you consider garden hoops through which you can feed the hose as you work my way along the rows of beds. You could even use a child’s croquet set or make your own from stiff wire. Simply push a hoop in at the start of each path, feed the hose through and then head up the path to water. Once you’re done with that path, head back, move along to the next, thread it under that hoop and off you go again. Learn more about watering the garden effectively.
8. Speed Up Garden Cleanup
When you’re raking up, say, a few leaves here and there a trusty wheelbarrow works just fine. But what if you’re working on a large are or have to rake up lots of fiddly or spiky prunings? Everyone needs a trusty tarp or an old bedsheet. Simply lay it out on the ground then rake leaves onto it. Or spread your tarp out where you’ll be working to catch pruning as they fall. When you’re done, gather the corners together, haul it over your shoulder and make your way to the compost heap.
9. Test Old Seeds
If you have seed packets leftover from last year, check the packet for their ‘sow by’ dates in preparation for the new growing season. But before you rush to throw any out that have expired, do a germination text first. Space some of the seeds out onto a sheet of damp paper towel. Fold over to cover the seeds then pop them into a lidded container. Move the seeds somewhere warm to germinate and respray the paper towel if it dries out over the coming days. After a week or two look for signs of germination; the smallest root or shoot counts. Now count how many seeds there are and how many have germinated to get your percentage success rate. Anything above 50% is fine. You’ll then know if you can eek out another growing season from your seeds or not. Read more about seed viability and testing old seeds.
10. Mark Out Sown Rows
Slow-to-germinate seeds like parsnip could do with being marked out so you know where you’ve sown and can safely work around the area. A simple solution is to use a different-colored potting mix to cover over the seeds. This makes it very obvious where the seedlings should appear. You can then hoe around this darker area and, as a bonus, weed seeds are far less likely to pop up within the row because your potting mix shouldn’t contain any weed seeds. An alternative is to mark out rows by leaving a line of string between sticks just above the row. Taut string lines like this are great for helping you achieve a dead-straight row at sowing time, so perhaps mark out your row, sow your seeds, then just leave the string where it is until the seedlings pop up.
See 20 more gardening hacks all about saving money for a more economical garden this year!
Catherine Boeckmann


ADVERTISEMENT