Pawpaw Bread: Taste an Early American Fruit!

Photo Credit
Catherine Boeckmann
Yield
1 loaf (8x11)
Category
Course
Preparation Method
Credit
Catherine Boeckmann
Print Friendly and PDF

This Pawpaw Bread is a super-moist quick bread made from a wonderful fruit native to America—once enjoyed by George Washington. Ripe from late summer to early fall, pawpaws have a tropical flavor even though they’re grown in temperate zones right here in the USA!

What Do Pawpaws Taste Like?

Native pawpaws (Asimina triloba) have a sweet tropical flavor that’s hard to describe—almost a blend of mango, papaya, and banana—unlike any other temperate zone fruit. When you bake and add sugar, it even tastes a bit citrus-y, like a tangerine. The yellow-orange flesh is creamy and custardy as well as highly nutritious.

Where do Pawpaws Grow?

Ever heard the song, “Bare Necessities” from the animated 1967 Disney film The Jungle Book? The bear sings,

But you don’t need to use the claw
When you pick a pear of the big pawpaw.”

What’s amusing is that pawpaws aren’t from the jungle! Come to think of it, neither are the bears nor the prickly pears from this catchy song. (Yes, it’s fiction!)

Called pawpaws or paw paws, the fruit tree is native to USDA zones 5 to 8. Native Americans are credited with spreading the pawpaw across the eastern U.S. to eastern Kansas and Texas, and from the Great Lakes almost to the Gulf. They would traditionally prepare pawpaws both fresh and dried. Early Colonial settlers also enjoyed pawpaw fruit. George Washington relished iced pawpaws

The unique pawpaw name may have come from European explorers (and enslaved peoples) who came here from the West Indies and assumed the fruit was a small papaya. (In Australia, the tropical papaya, Carica papaya, is also known as pawpaw). pawpaw fruit

Where to Find Pawpaws

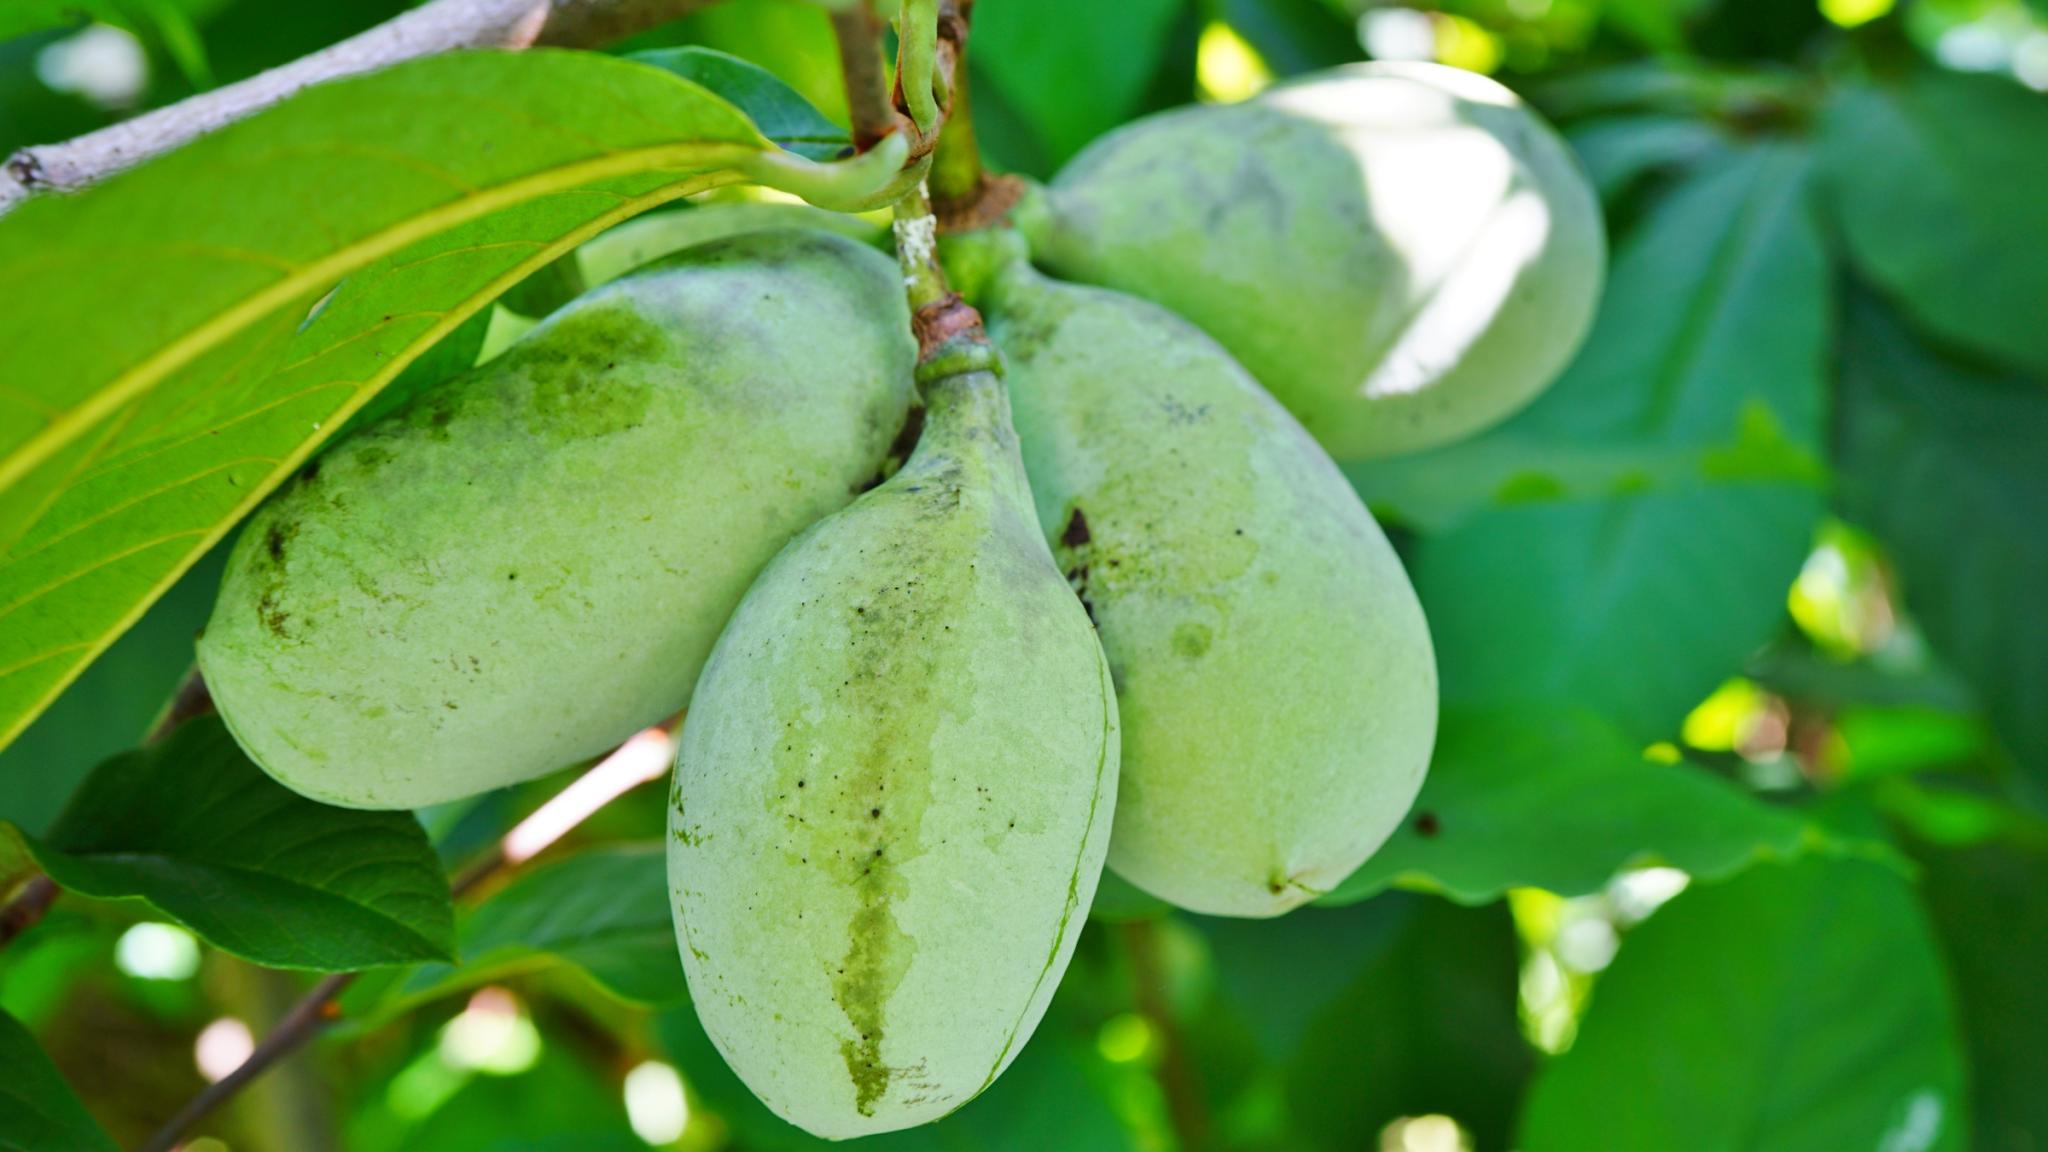
In the wild, you can find pawpaws in the woods, in local parks, and at nature parks. They are oblong light green fruits about 3 to 5 inches long and grow in clusters on small shrub-size trees about 10 to 15 feet tall with foot-long leaves. The fruit is ripe for about a four-week period between mid-August and into October.  

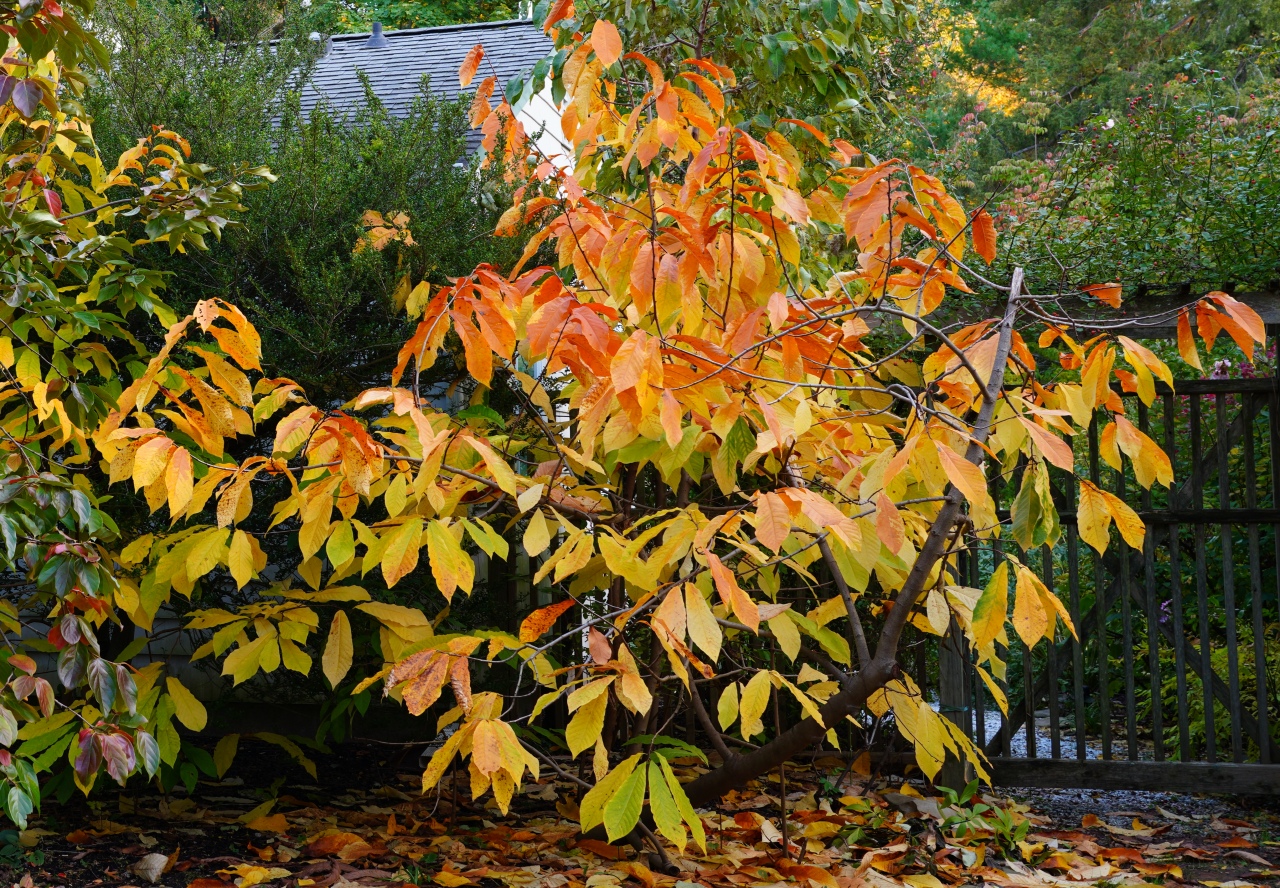
a paw paw tree in the fall
Yellow leaves of the common paw paw tree in the fall. Credit: EQRoy.


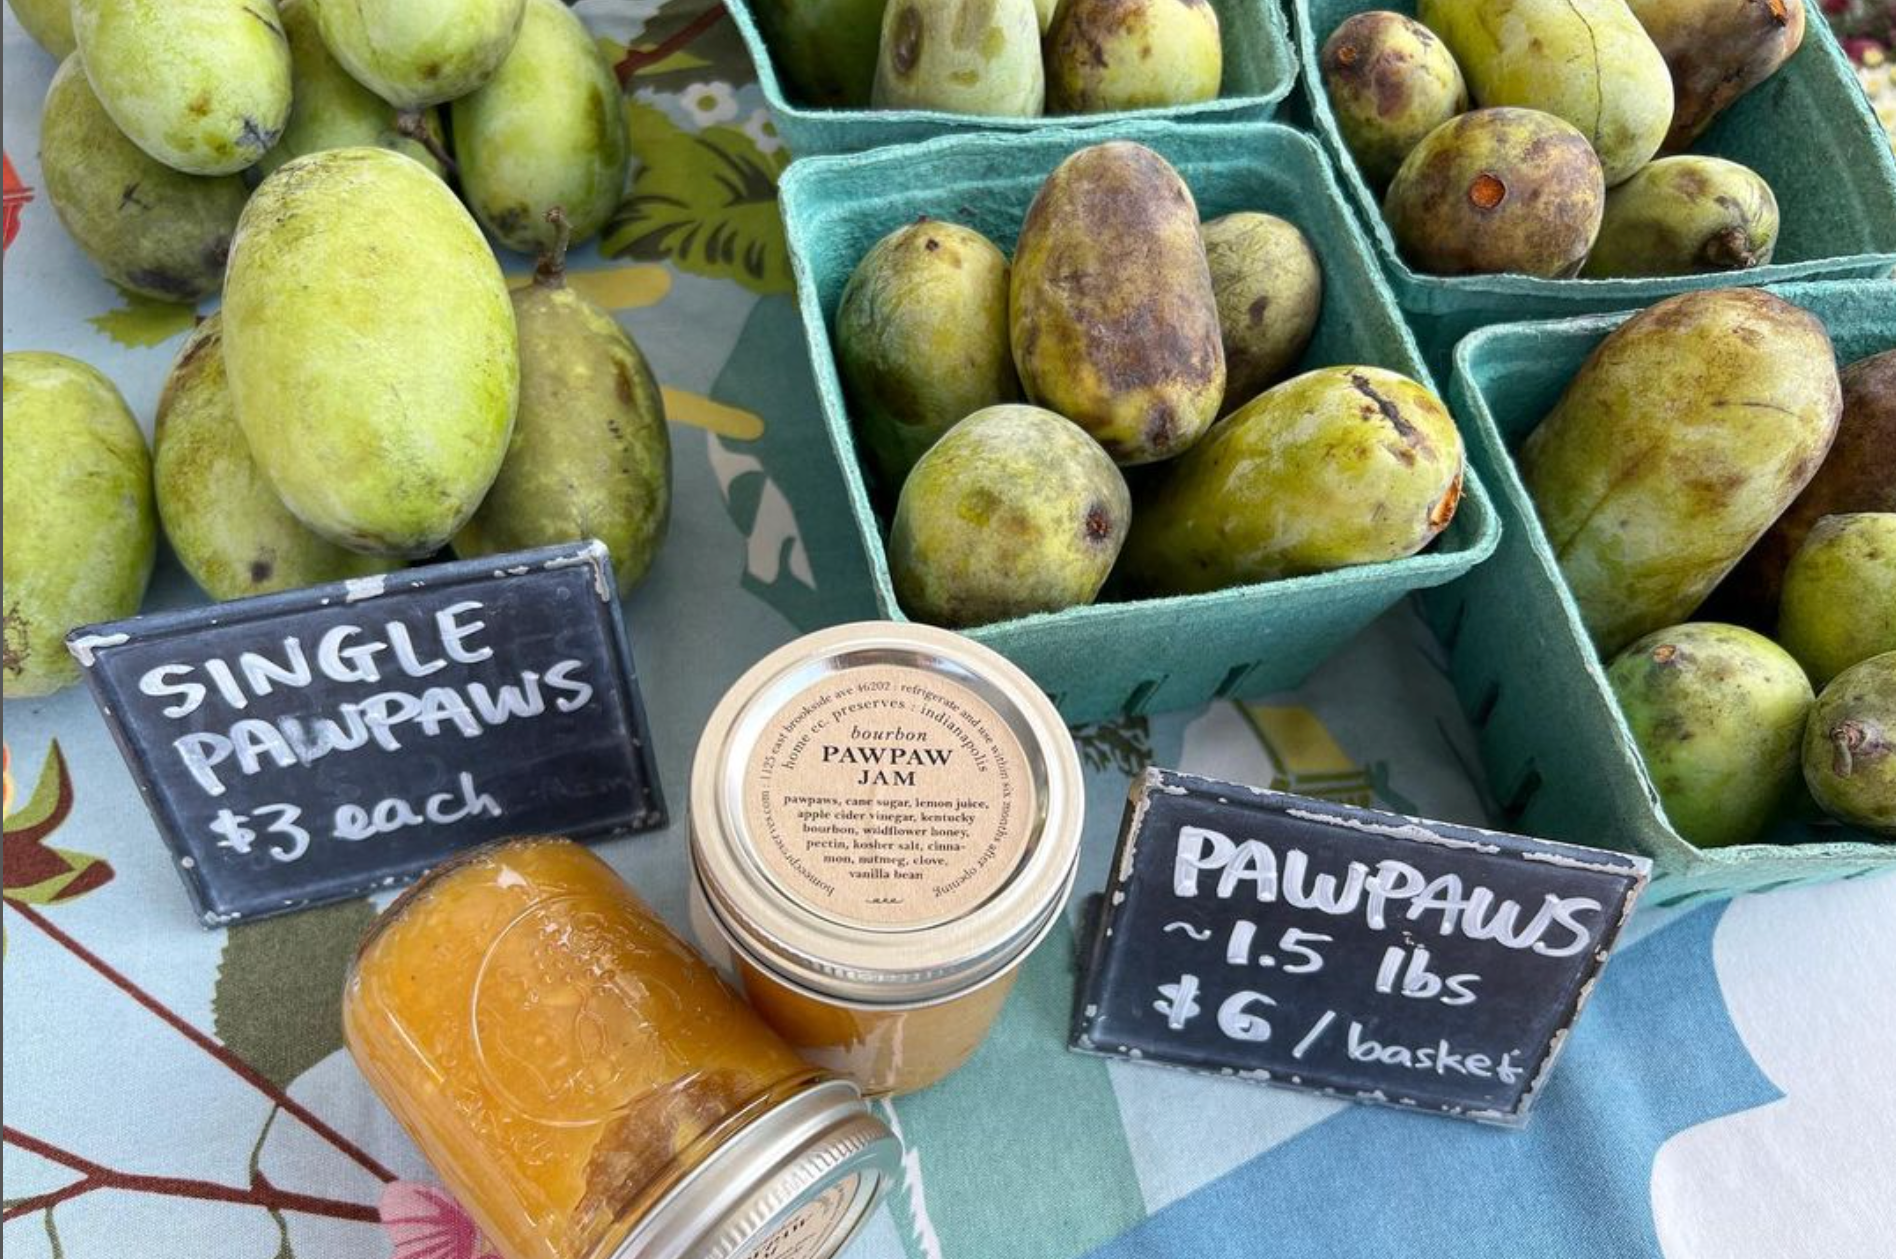
In September, look for pawpaws in local farmers’ markets. They have a very short season! Grocery stores do not generally carry fresh pawpaws as they bruise very easily and do not ship well. Some stores do have frozen pawpaw pulp.

When ripe, the paw is soft yields easily to a gentle squeeze, and has a strong fragrance. Don’t worry if you see blackish splotches; it doesn’t affect the flavor.

fresh pawpaws for sale at the farmer's market

Growing Pawpaw Trees

Pawpaws are very resilient and easy to grow in zones 5 to 8. They dislike strong winds, so they don’t grow on the sea coasts. Pawpaw trees need hot summers and cold winters, with a minimum of 400 hours of winter chill and at least 160 frost-free days. They’re hardy down to -20 degrees F (USDA Climate Zone 5). In nature, they often start out as understory plants and prefer filtered sun for the first year or two. Once established, pawpaws prefer full sun. They are generally disease-free. Contact your local cooperative extension or a tree nursery to inquire.

How to Eat Pawpaws

Pawpaws are great for eating fresh out of hand. But the ripe fruit is very perishable, with a shelf life of only a couple of days. So the soft pulp is often used in baking (breads, pies, puddings), jams, and ice cream. In that sense, it’s similar to another wild fruit, persimmon.

We chose to make a quick bread as it’s easiest and we weren’t sure if we’d have enough fruit since pawpaws have big seeds. (Get a few more pawpaws than you think you might need!)

Pawpaw Quick Bread

Pawpaws can be used in many recipes calling for bananas. So, for this quick bread recipe, we used a simple banana bread recipe but replaced the banana flesh with pawpaw pulp. Select very soft, slightly over-ripe pawpaws. You’ll see in the photos that they are slightly brown (which is perfectly edible).

It was a fun experience getting the pawpaws peeled and sliced. For this recipe, the best technique is to cut the pawpaw lengthwise like an avocado, then nick out its big seeds (often there are 5 to 6!) and scoop out the creamy flesh. It’s messy, and there’s no way around that! 

We found that it took 6 smallish, overripe pawpaws to make 1-1/2 cups of pulp. We had two fruits (below) which weren’t as ripe, so we stored them in the refrigerator in a plastic bag with punctured holes. They will keep up to 3 weeks if chilled.

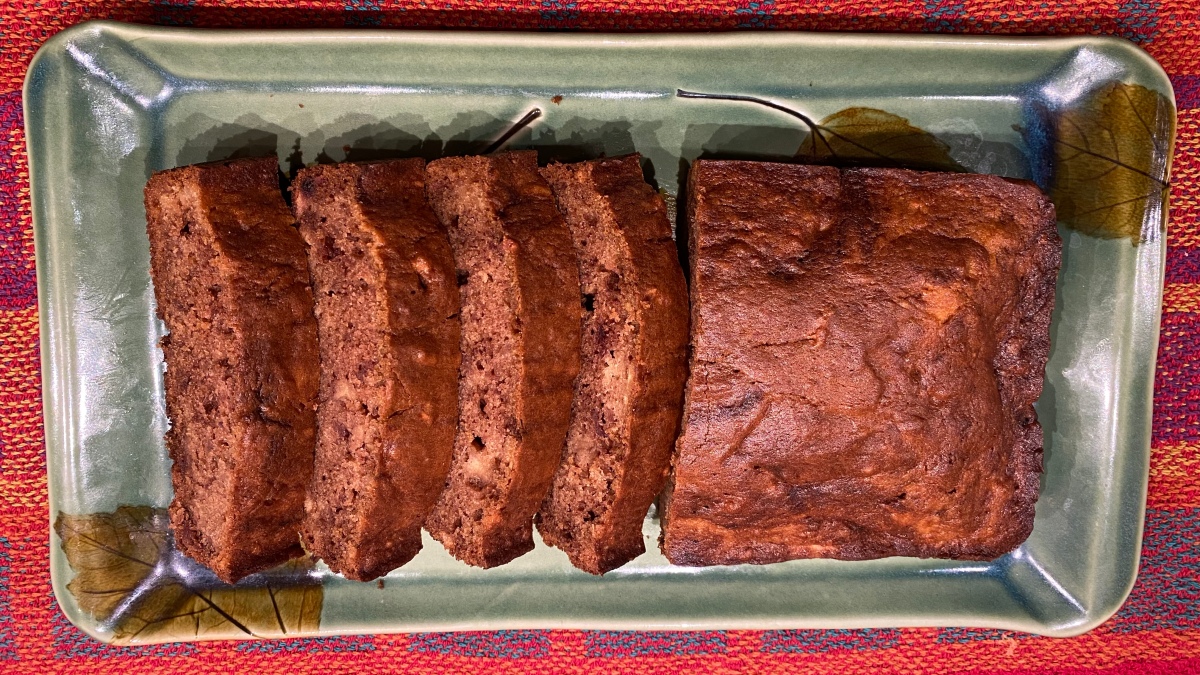
This Pawpaw Bread turned out beautifully; it’s a slightly orange-pink color, which seems fitting for the season as we shift from late summer to autumn. The aromatic scent was really impressive as the bread baked. We cooked our loaf for 55 minutes, and it turned out well—more moist than banana bread, which was a pleasant surprise. Its flavor was not strong but sweet and slightly tropical. We used only 1-1/2 cups of fruit, so we’d suggest trying 2 cups for more pawpaw flavor.

pawpaw bread

Next time—now that we have a better sense of how many pawpaws make enough pulp—it also might be fun to try a recipe that lets more of the pawpaw taste come through (perhaps this pawpaw pudding from The New York Times). But this was a perfect start and fun to bake this wonderful pawpaw bread!

Pawpaw Quick Bread

Ingredients
1-1/3 cups flour
1 teaspoon baking soda
1/4 teaspoon baking powder
½ teaspoon salt
3/4 cup white sugar
1/3 butter (softened)
2 eggs
1/2 tsp of vanilla
1-1/2 to 2 cups pawpaw pulp
1/3 cup warm water
½ cup chopped walnuts (Optional)
Instructions
  1. Preheat oven to 350 degrees F (175 degrees C). Grease the bottom and sides of an 8x11 loaf pan with cooking spray or butter.
  2. Stir together flour baking soda, salt, and baking powder. Add nuts if desired. Set aside.
  3. Combine sugar and butter in a bowl; beat together until creamy. Add eggs one at a time, beating well after each addition. Add the vanilla. Add pawpaw pulp and water; beat until combined, about 30 seconds.
  4. Add the dry ingredients and mix only until the flour is incorporated — don’t overmix. Pour batter into prepared loaf pan and place in oven.
  5. Bake 45 to 60 minutes. Cake should be brown and should start to leave the sides of the pan. Test with a toothpick inserted into the center which should come out clean. Allow to cool before slicing, about 30 minutes.
Instructions

Notes: 318 calories; protein 5.1g; carbohydrates 44.7g; fat 14.1g; cholesterol 66.8mg; sodium 391.6mg. 

About The Author

Catherine Boeckmann

Catherine Boeckmann loves nature, stargazing, and gardening so it’s not surprising that she and The Old Farmer’s Almanac found each other. She leads digital content for the Almanac website, and is also a certified master gardener in the state of Indiana. Read More from Catherine Boeckmann