Get new berry plants for free by simply taking cuttings from other healthy shrubs during winter or early spring. We’ll show you how to propagate your soft fruit bushes to start more plants!
Berries are nature’s original superfoods. They’re loaded with vitamins and low in carbs plus who wants to fork out for those expensive berries in grocery stores when it’s so easy to have your own berry bushes?
Raspberries from Suckers
First up: raspberries – one of the very easiest berries to make new plants from because they virtually propagate themselves. Most types of raspberry spread by sending out new shoots, called suckers, from their root system so that the clump gradually expands outwards. Some of these shoots pop up some distance from the main clump, and we can take advantage of this, by simply digging them up to replant elsewhere.
Look for suckers at least a foot away from the plant to avoid damaging the mother plant when you dig it up. Now just get your fork in there and carefully dig and lift the whole thing up. If the sucker is connected to the mother plant by a root, just cut it free and replant it into a waiting planting hole, taking care to set the cane at the same depth it was at before lifting it up. Once it’s in there, cut the cane down to a height of around 10 inches, making the cut just above the bud (see video). You can transplant suckers like this at any time of the year, but autumn or early spring, before plants have set into new growth, is best. Don’t forget to keep your new plants watered as they establish and, it goes without saying, only remove suckers from healthy plants, so you don’t spread disease.
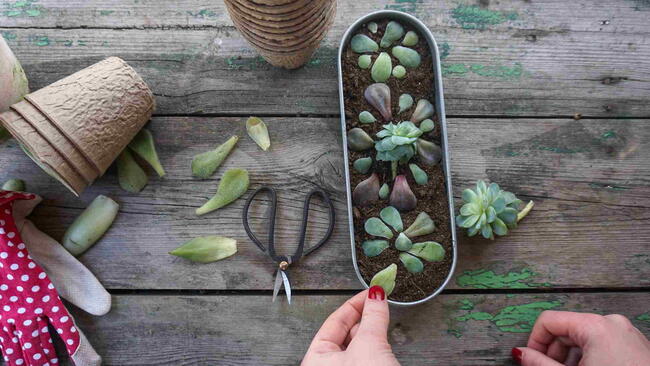
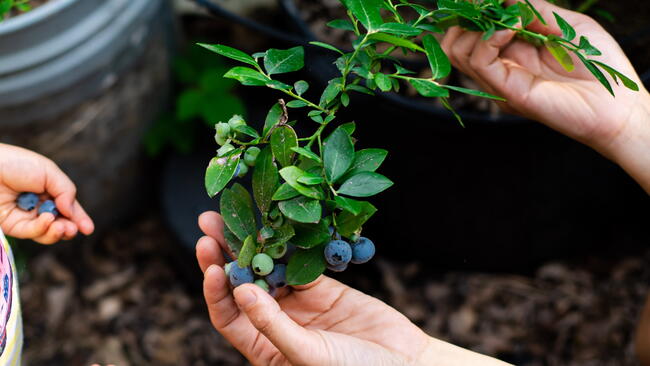
Blueberries from Cuttings
Blueberries are a firm favorite for health-conscious fruit lovers, and winter’s the perfect time of year to take hardwood cuttings of many fruit garden staples. Blueberry bushes thrive in acidic soil and put on growth every year.
The best time to take hardwood cuttings from blueberries is later on in winter, once plants have already undergone some winter chilling. Begin by cutting away healthy young shoots. The straighter and stronger the better. Look for growth that is pale green or red – you don’t want any of this older growth towards the bottom of the plant. Then cut down into six-inch lengths using a sharp pair of pruners or secateurs. But first to sterilize them, using a solution of one part household bleach to five parts water. This just keeps everything clean to minimize any risk of spreading disease.
To take the cuttings, cut just below a leaf node, and trim to the top end with a slanted cut just above a node (see video). This can help you identify which end is up in case you forget.
Once you have your cuttings simply pop them into pots filled with a low-nutrient, free draining medium. A 50:50 mix of perlite and coconut coir fiber is good, but also you could, for example, use a potting mix made from equal parts coarse sand, pine bark and coir. This will prevent the cuttings from ever getting too wet and allows for plenty of air around the base of the cuttings.
Before popping the cuttings in, dip them into this rooting hormone gel. This should encourage more roots more quickly – it’s not essential but will give your cuttings an even greater chance of success. They should go in quite deep, about halfway down. Once they’re in, pop your cuttings in a sheltered position such as a cold frame and protect from harsh sunshine next summer. Keep the growing medium moist throughout. Your cuttings should be ready to carefully separate and pot into their own containers by next winter.
Currants and Gooseberries
Now is the ideal time to take hardwood cuttings of currants and gooseberries, as well as many fruit trees like fig and mulberry, and even grapevines. Like blueberries, the cuttings are taken from dormant plants – but this time we can take them anytime from autumn right through to the end of winter – and they are an honestly super-easy way of starting off new plants. This is a quiet time of year in the garden, so if you’re itching to get on and grow something, this should keep you busy, and who doesn’t love the prospect of tasty, garden-grown fruit! Summer fruits start in winter!
Learn more about growing gooseberries.
Take Your Cuttings
Hardwood cuttings can be taken the same time as pruning established bushes – just use the offcuts as material for your cuttings. Nothing goes to waste!
Ideally, you’ll want to take hardwood cuttings of fruit just after the leaves have been shed in autumn or just before they burst into leaf again towards the end of the colder months.
To take cuttings, select material from this year’s growth, and you can tell that by the color of the stems – they are a lot paler than the older wood here. (See video.) Look for stems that are about pencil thickness too.
Take what you need and then trim cuttings to size. Cuttings should ideally be about a foot long, so begin by cutting them to the right length. Make a cut at the bottom of your cutting just below a bud. (See video.) And then trim the top of the cutting. Make this cut just above a bud, but at a slant that faces away from the bud. Again, making a slanted cut makes it easy to get your cuttings the right way up when you come to plant them, and it sheds water away from the bud, reducing any risk of water lingering and causing rot. Use clean, sharp pruners or secateurs for the job – again properly sterilized – to give a good, neat cut.
Plant Your Cuttings
To plant your cuttings you have two options: in the ground or in pots. For the in-ground method, you’ll need a sheltered spot and – this is important – well-drained soil. Give the soil a further boost by digging some garden compost into the area first. (See video demo.)
Now simply push in your cuttings. Bury them so that about a half to two thirds of the cutting sits below ground. This still leaves a few buds above ground to sprout and grow on in spring. Space cuttings about 6 inches apart to give them plenty of room to grow. You can now leave them where they are until next autumn, when they can be dug up and transplanted to their final positions.
If you only have a few cuttings or don’t have lots of garden space to spare, root them in containers of potting mix. Pots will need to be deep enough to accommodate your cuttings – one like this is ideal. Use any all-purpose potting mix but, to help drainage, mix in some coarse grit, sand or perlite like this. Fill your pot… and push in the prepared cuttings – about four to a pot this size. Place close to the edge of the pot so they are further apart from each other, and this also helps with drainage.
You can dip the ends of your cuttings into a hormone rooting powder or gel to encourage root formation. This isn’t necessary for currents – but you can do this if you want to increase the chances of your cuttings rooting successfully.
Keep your pots somewhere sheltered – against the wall of a house or, ideally, in a greenhouse or cold frame to keep the worst of the cold off them. This will also help to protect them from nuisances such as deer and rabbits.
Care for Your Cuttings
Keep a regular eye on cuttings and water them as necessary to keep the potting mix or soil moist. This will become more important in spring, as temperatures begin to rise again. You may see new growth by the end of spring.
Leave your cuttings untouched though. You want them to remain in their pot or in the ground where they are for at least a year, before either carefully separating them out or digging them up to transplant into their final growing positions. If they produce any flower buds before this point, just pick them off to concentrate the young plants’ energy on root formation.
Transplant Your New Fruit Bushes
By the spring of their second year, you will be amazed at how much growth they’ve put on. They had a really fantastic root system by this point. Holes were dug into prepared soil – enriched with a wheelbarrow-load of garden compost – and the young plants popped into place and firmed in.
Don’t forget that excess berries are easily frozen, so there’s very little risk of going over the top when including these powerfully good-for-you fruits in your garden, and, of course, freezing will lock in all that goodness until it’s time to use them. See how to freeze fruits.
Will you be using any of these methods to grow more berries? We hope you found this useful!