A DIY Herb Garden!
The Almanac Garden Planner - Use It Free for 7 Days!
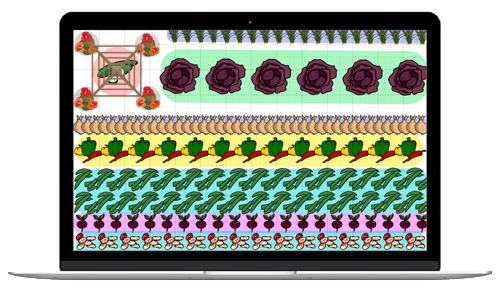
Plan your 2025 garden with our award-winning Garden Planner.
Fresh herbs are the hallmark of a gardener with good taste! This stunner of a project is going to cram in the herbs—vertically—to give you an at-hand supply of aromatic goodness whenever it’s needed. See our instructions and video on how to make your own herb planter—simply recycling old pallets.
Instructions to Make an Herb Pallet
The first step is finding old pallets that you can upcycle. You could also try hardware stores; go to the rear of an home improvement store, industrial area, or wearhouse. People are usually only too happy to be rid of them, as it saves them the cost of disposal. Just ask first!
Look for the pallet stamp (see video to find out where to find stamp); it tells you how the wood has been treated. What we’re looking for is either the letters IPPC or EPAL plus the initials HT, which shows the wood’s been heat-treated and is safe to use. Most pallets fit the bill, but avoid pallets with MB on them, which indicates it has been treated with the toxic pesticide methyl bromide – we don’t want that anywhere near our herbs!
Prepare the Pallet
The pallet’s going sit on its side so it’s vertical. We’ll pull up three boards so the planting pockets are two boards deep rather than just one. This will help the herbs to thrive rather than merely survive.
The easiest way to remove boards is with a short, sharp blow to the back with a hammer. Then line the boards up with the existing ones on our pallet planter… and hammer them on using nails.
The pallet is ready for the planting pockets to be added! If you wish, paint the pallet in a non-toxic, weatherproof wood stain. (See video.)
Attach the Planting Pockets
Now for the planting pockets – otherwise any potting mix is just going to fall straight through. You could box things in with extra boards but having done this before, making your planting pockets from landscape fabric like this is a lot easier; it’s strong and permeable so excess moisture can drain out of the bottom.
Start by cutting the landscape fabric to size, so it easily covers the full depth, width, and height of the planting pocket with a little to spare. To attach the planting pocket, use a staple gun but if you don’t have one, you could small nails to pin the fabric down into position. Begin along the front, folding the fabric in to give a clean, straight edge and to stop it from fraying. If there’s any excess fabric, just fold it in, then secure the sides and finally the back – again, nice and level. Do all 6 pockets.
Plant the Herbs
It’s time to plant! You could use herbs from a garden center or even a mix of living herbs from the grocery store – parsley and mint are reliable for replanting like this.
- For the fleshier, leafy herbs such as parsley, mint and some cilantro or coriander, just use a normal, all-purpose, peat-free potting mix. If you have a pot that fits into the planting pocket, that’s fine. (See video.)
- For the more aromatic, Mediterranean-type herbs such as rosemary, thyme, and sage, use the same potting mix, but also mix in a few handfuls of lightweight perlite or any grit for better drainage of these dry-climate herbs.
Just place the herb planter in a sunny spot for maximum growth and to stimulate all those heady aromas. Then water in. See the Almanac’s library of Herb Growing Guides for more information on growing herbs successfully!
Your herb planter can be replanted as and when needed or when you simply want to switch things up a bit.
If this kind of project’s your thing, be sure to check out our recent Lettuce Tower Garden which packs in healthy salads in the smallest of spaces!
Tim Goodwin


ADVERTISEMENT