
Caption
Image credit: Guppyfish / Shutterstock

Planting

Although watercress can be grown in hydroponic setups, most gardeners grow watercress from seeds planted directly in their veggie beds or in indoor or outdoor pots. If you want to grow watercress in an outdoor water garden or in floating pots in a water feature, just transplant indoor-started plants when their stems are sturdy and a few inches long.
When to Plant Watercress
Watercress can be sown directly outdoors in early spring or planted indoors in pots about 3 to 4 weeks before your last frost date. If you go with the latter method, transplant your seedlings outside when they’re a few inches tall and the risk of frost has passed.
Watercress plants grow best in cool weather and turn bitter in the heat. However, you can extend your harvest by succession sowing multiple plantings of watercress seeds every few weeks throughout the growing season!
How to Plant Watercress
- Select a growing location that receives at least 4 to 6 hours of light per day, or use grow lights.
- Fill pots with pre-moistened seed-starting mix, or prep garden beds by removing weeds and working a bit of compost into the soil.
- Plant watercress seeds singly in seedling cells or about 1 to 2 inches apart in garden rows and lightly cover the seeds with about ¼ inch of soil.
- Water the seeds well and keep the soil consistently moist until the seedlings sprout. This should take a week or two.
- When the seedlings are about an inch tall, thin out the weakest, so the remaining plants are spaced 6 to 8 inches apart.
- If you’re growing watercress in pots, use a container at least 6 inches wide with a drainage hole in the base. Then place the pot inside a larger bucket with 2 to 3 inches of water at the base to provide a steady stream of water for water-loving cress.
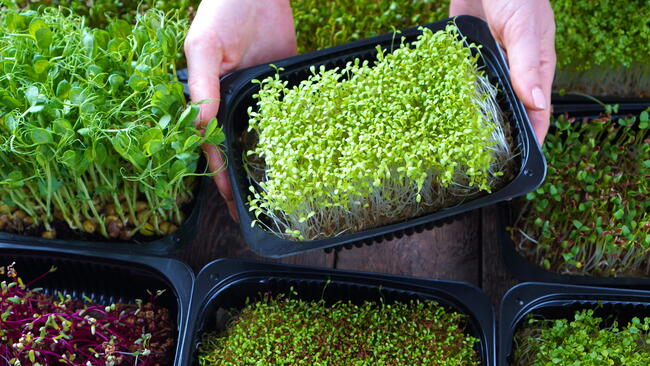
- For microgreens, scatter watercress seeds in larger quantities over a damp seed-starting mix or microgreen growing mats at any time of year. Keep the seeds well watered until they reach a harvestable size!
Growing

Although watercress grows wild in many areas, foraging for wild watercress is not recommended. Wild plants are more likely to contain pollutants and other nasties that make them unsafe to eat. However, you can avoid these issues and get your hands on high-quality watercress by using these tips to grow your own watercress at home!
Light
Watercress can be grown indoors (using grow lights) or out in full sun or part shade. Just make sure your plants receive at least 4 hours of light per day.
Water
The hardest part about growing watercress is making sure these plants never dry out. You can do this by growing watercress fully or partially submerged in water or in floating pots in water-filled buckets. If you grow these plants in soil, feel the soil regularly and water them enough to keep it evenly moist at all times.
Fertilizer
Watercress is a relatively light-feeding plant, but it can develop nutrient deficiencies in poor soil. To avoid this, add compost to your soil before planting and feed watercress every 2 to 4 weeks from spring through summer with a diluted liquid fertilizer, like kelp or fish emulsion.
Humidity and Temperature
High humidity is a-okay with watercress, and these plants don’t mind cold temperatures either. Temperatures between 60 and 70°F are ideal, while temperatures above 85°F can make watercress stop growing and turn its leaves bitter.

Seasonal Care
Although watercress can grow perennially in many areas, most growers cultivate it as an annual for convenience, replacing their plants each year. In general, watercress care doesn’t vary much throughout the year. However, these plants will need more water in hot weather.
As long as you harvest watercress often, you shouldn’t need to worry about pruning your plants. However, watercress can become bitter as it begins to flower, so you may want to pinch off the flower buds to keep your plants productive a little longer.
Propagation
Watercress can be grown from seed or from stem cuttings taken from healthy plants. If you want to propagate watercress from cuttings, here’s how:
- If possible, take cuttings in spring when watercress is actively growing. Avoid taking cuttings when plants are in bloom.
- Make cuttings directly below a leaf node.
- Gently strip away the lowest leaves from the plant stems, then place the cuttings in a glass of water.
- Move the cuttings into bright, indirect light and refresh the water regularly.
- When the cuttings root in a few days, repot them in pots filled with damp potting mix or plant them out in your garden instead!
Harvesting

Some growers grow watercress for microgreens, while others harvest larger watercress stems and leaves. Microgreens are usually ready to harvest about 10 to 15 days after planting. At the same time, you can start harvesting watercress leaves about 3 weeks after planting or when the plant stems are about 6 inches tall.
Like many herbs, watercress is a cut-and-come-again plant that is generally harvested little by little as needed for recipes. To harvest, cut the stems about 4 inches above the soil line, leave the rest of the plant to regrow, and never harvest more than one third of your plant’s stems at once. If you’re harvesting microgreens, however, go ahead and cut the greens down to the soil line, compost the roots, and plant more seeds!
Storing Watercress
All parts of watercress are edible, including the plant’s leaves, stems, and flowers. But these plants don’t last long after harvesting, so it’s best to only pick what you plan to use right away. Even when stored in the fridge, watercress only stays fresh for about 2 to 3 days, and it doesn’t freeze or dry well.

Comments