

Planting
To grow big, healthy stalks, corn needs three main things: blazing sun, plenty of water, and rich soil. Choose a spot that gets full sun—meaning at least 6 to 8 hours of direct sunlight every day. Because corn grows fast, it is a very hungry and thirsty plant. Keep the soil consistently damp, and mix a generous amount of garden compost into your planting beds to give the seeds a rich, nutrient-packed home.
When to Plant Corn
It is best to plant your corn seeds directly into the outdoor garden soil. Corn roots are incredibly sensitive, and they do not like to be disturbed by being moved from an indoor pot to an outdoor bed.
Because corn hates the cold, timing is everything. Do not plant your seeds until the chilly spring weather is completely gone and your soil has warmed up to at least 60°F (16°C). If you chose one of those extra-sweet “supersweet” seed varieties, wait even longer until the soil hits 65°F (18°C), or the seeds might rot in the ground before they can sprout.
For most gardeners, this perfect planting window opens about 2 to 3 weeks after the very last spring frost. To find the exact dates for your neighborhood, plug your ZIP code into our customized Vegetable Planting Calendar. If you just want to know when the freezing weather usually ends in your area, you can also check our Frost Date Calculator.
How to Plant Corn
Preparing your seeds ahead of time can give them a huge head start. To speed up sprouting, soak your corn seeds in water, wrap them in a damp paper towel, and leave them in a sealed plastic bag for 24 hours before you head outside.
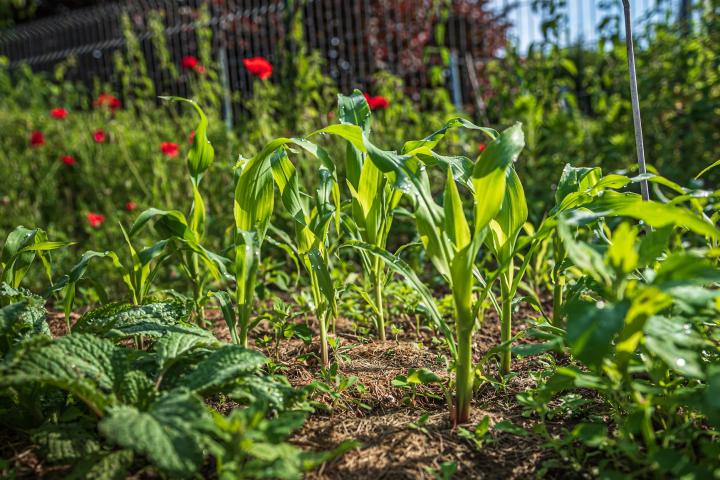
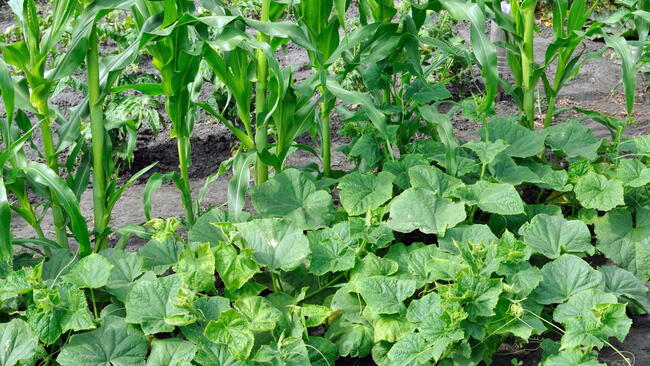
When you map out your garden, remember the golden rule: always plant corn in a block, never in a single row. Because corn relies on the wind to bounce pollen from the tassels at the top down to the silks below, your plants need to live in a tight group. Aim for a small grid of 10 to 50 plants—think of it like a square checkerboard rather than a long straight line. If you plant a single file line, the wind will blow the pollen away, leaving you with cobs that have sad, empty gaps where the juicy kernels should be.
Follow these steps to get your seeds in the ground:
- Dig the holes: Poke holes in your soil that are about 1½ to 2 inches deep.
- Space the seeds: Drop one seed into each hole, keeping them 12 inches apart from each other.
- Space the lines: If your block has multiple rows, make sure the lines are 2½ to 3 feet apart so the plants have room to breathe and you have room to walk.
- Water deeply: Gently cover the seeds with soil and give the entire patch a thorough watering right away to wake up the seeds.
Sowing Corn Indoors
While planting seeds directly outside is best, starting them indoors is a brilliant shortcut if you live in the North with a short summer. It gives your plants a three-to-four-week head start before the warm outdoor weather even arrives!
Because corn roots are fragile and hate being disturbed, you need to use the right pots and follow these careful steps:
- Choose the right pots: Fill small, 4-inch-wide biodegradable starter pots or deep seed trays with damp potting soil.
- Plant the seeds: Poke two seeds into each pot, about ½ inch deep. If both seeds sprout, gently pinch off the weaker seedling at the soil line so only the strongest one survives.
- Keep them cozy: Place the pots in a warm, sunny windowsill, a greenhouse, or under a clear plastic dome. Keep the soil damp but not soggy.
- Harden them off: When your outdoor planting date arrives, do not rush them straight into the garden. Over the course of a week, set your pots outside for a few hours longer each day to get them used to the wind and sun.
- Transplant carefully: Once your seedlings are at least 6 inches tall and the outdoor soil is warm, dig a hole exactly the size of their indoor home and gently slide them into your outdoor garden block without breaking up the root ball.
Check out this video for great tips on growing juicy corn:
Harvesting
Finding the perfect moment to pick your corn is a bit of an art form, but these simple signs will tell you exactly when the cobs are at their peak flavor.
1. Signs the Corn is Ready
- Count the days: Corn is usually ready to pick about 15 to 23 days after the fine silks first appear on the ears. If your summer weather has been blazing hot, they will mature even faster.
- Check the top ear first: If a stalk produces two ears of corn, the top ear will always ripen one to two days before the lower one.
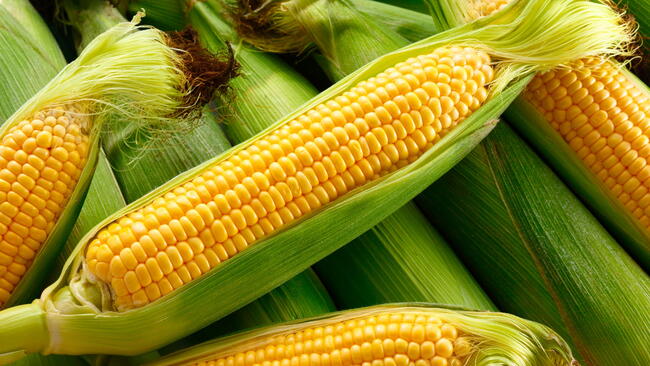
- Look at the shape: Ready-to-pick ears should feel rounded and blunt at the top, not pointed. The tassels at the very top of the plant will also be completely brown.
- The fingernail test: Gently pull back a small piece of the green husk and press your fingernail into a juicy kernel. If a milky, white liquid pops out, it is ready! If the liquid is completely clear, it needs more time.
- Don’t wait too long: This sweet “milk stage” goes by fast. If your daytime weather is over 85°F (29°C), the corn will stay at its peak for only 1 to 2 days, so check your patch daily. Corn left on the stalk past this window will quickly lose its sweetness and taste starchy.
- Watch out for early frost: Keep an eye on the autumn forecast. If an unexpected late-season freeze hits immature corn plants, it can ruin the flavor of the kernels or kill the stalk entirely.

2. How to Pick and Store Your Harvest
- The twist technique: To harvest an ear without damaging the main stalk, firmly grab the cob, pull it downward, and give it a sharp twist to snap it free.
- Race to the kitchen: Except for special supersweet types, standard sweet corn varieties begin turning their natural sugars into bland starch the absolute minute they are picked. Cook and enjoy your cobs as fast as you can—the quicker they hit the pot, the sweeter they will taste!
- Freeze the extra: If you harvested more than you can eat today, sweet corn preserves beautifully. For the best flavor and texture, cut the kernels off the cob and follow our step-by-step guide on how to freeze fresh corn.
- Use the whole plant: Don’t throw away the leftovers! From brewing corn-silk tea to crafting traditional husk dolls, you can discover plenty of clever ideas in our guide on the many ways to use corn.
Types
Understanding Your Sweet Corn Type
Before you get your seeds in the ground, it is important to check the label on your packet. Note that we are talking about sweet corn—the tender variety grown for fresh eating—not the tough field corn used for animal feed or corn syrup!
Sweet corn is divided into a few distinct types based on its sweetness and how long it stays fresh after harvest. More importantly, you must never mix these types in the same garden patch—if different varieties cross-pollinate, your ears of corn will turn out disappointingly tough and starchy!
- Classic Sweet Corn: This is traditional corn with an old-school, robust flavor. It grows vigorously, but there is a catch: the sugars turn to starch almost immediately after picking, so you must cook it the same day you harvest.
- Sugar-Enhanced Corn: A step up in sweetness, these popular varieties keep their tender, sugary flavor for a few days after harvest. They are incredibly easy to grow and a perfect choice for beginners.
- “Supersweet” Corn: These varieties pack up to three times more sugar than classic corn and stay sweet for a whole week in the fridge. However, they are a bit finicky to sprout and must be isolated from other corn types in your garden, or the cobs will turn out tough.
Top Beginner Varieties to Try
Whether you want classic white kernels, bright yellow cobs, or a fun ornamental project for the kids, here are the most reliable varieties for home gardens:
- ‘Silver Queen’ (White): A legendary favorite known for its classic, dependable corn flavor and excellent resistance to plant diseases.
- ‘Sweet Sunshine’ (Yellow): A fantastic choice if you want maximum sweetness. It is a highly disease-resistant “supersweet” variety that produces massive yields.
- ‘Luther Hill’ (White Dwarf): Short on space? This compact variety only grows 4 to 5 feet tall, producing perfect 6-inch ears. It is ideal for small backyard plots.
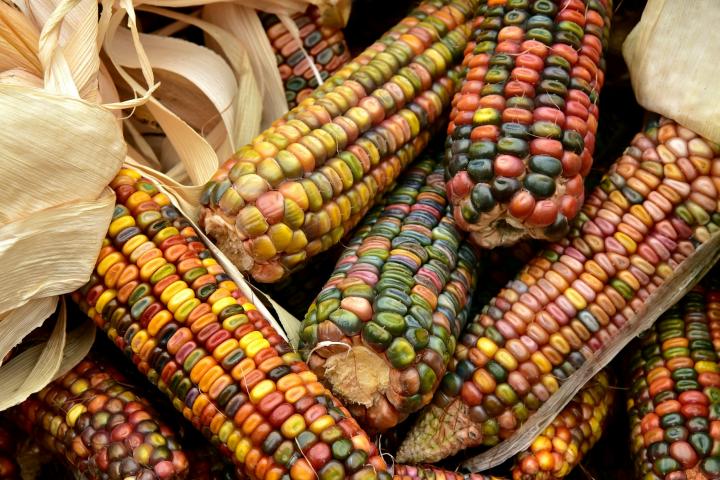
- ‘Glass Gem’ (Multi-Colored): A show-stopping ornamental variety featuring translucent, rainbow-colored kernels. It is a massive hit for kids and makes beautiful fall decorations.
- ‘Painted Mountain’ (Multi-Colored): A tough, resilient variety sporting gorgeous, traditional native tones. Check out our video to learn more about growing and using painted mountain corn.

More Like This

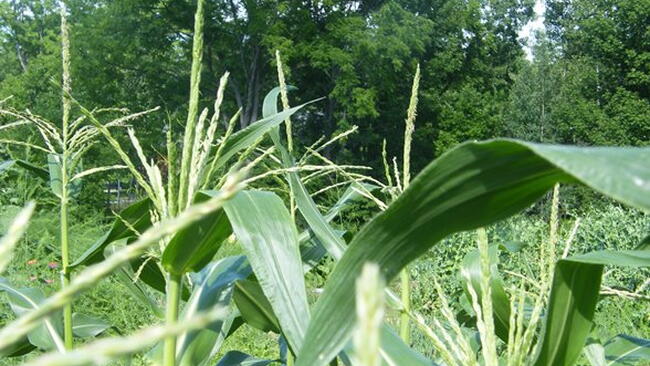

If you have tassels, it's not pollination. And if your corn looks tall and green but lacks ears, it might be overcrowded, and your plantings are too thick. However, the yellowing that you mention, plus the lack of ears, does indeed suggest nitrogen deficiency. It's hard for us to diagnose from afar, and you should call your local county extension services. In terms of a solution, there are mixed results on late-season nitrogen application for corn. If your corn already had a nice nitrogen application in fall/spring, and it's the weather called some leaching, it may work. If the corn lacked nitrogen all along, it probably wouldn't make up the yield. But you might as well try it. Here is a good reference from the Purdue extension.
Dear Ello,
Thank you for your note about your furry wild popcorn-loving neighbors. Yes, if the corn is ripe, you can dry the ears inside. Here is our guide to growing popcorn including advice for harvesting and drying. Good luck and happy popping!
—The Editors
You will want to remove the stalks soon after harvest. There are a number of pests that will use what remains after harvest as a winter home and by removing the stalks you will greatly reduce their chances of survival. But you have a few options of what to do with your stalks.
You can cut them down and put them in your compost pile. We suggest cutting them up some to increase the rate of decomposition. You will then want to till the stalk nubs back into the soil. You can also till all of it into the soil. There are a lot of great nutrients that remain in corn stalks and it will provide good organic matter for next year's plantings once it breaks down.
And if you want to think ahead, cut some of the stalks and dry them upside down and they will make for great decor when fall rolls around!
Hi, Louise. When you boil corn on the cob, allow the water to come to a full boil and then add in the ears of corn. Cook it for 5 minutes. When it comes to cooking corn on the cob on the grill there are several methods. Try this: peel the corn and remove the silk. Pull the husks back up and then soak the ears in salted water for about 10 minutes. Remove and make sure to shake off any excess water. Place the ears on the grill, close the lid, and turn every 6 minutes. Your corn should be ready after 20 minutes.
- « Previous
- 1
- 2
- …
- 10
- Next »

Comments