Caption
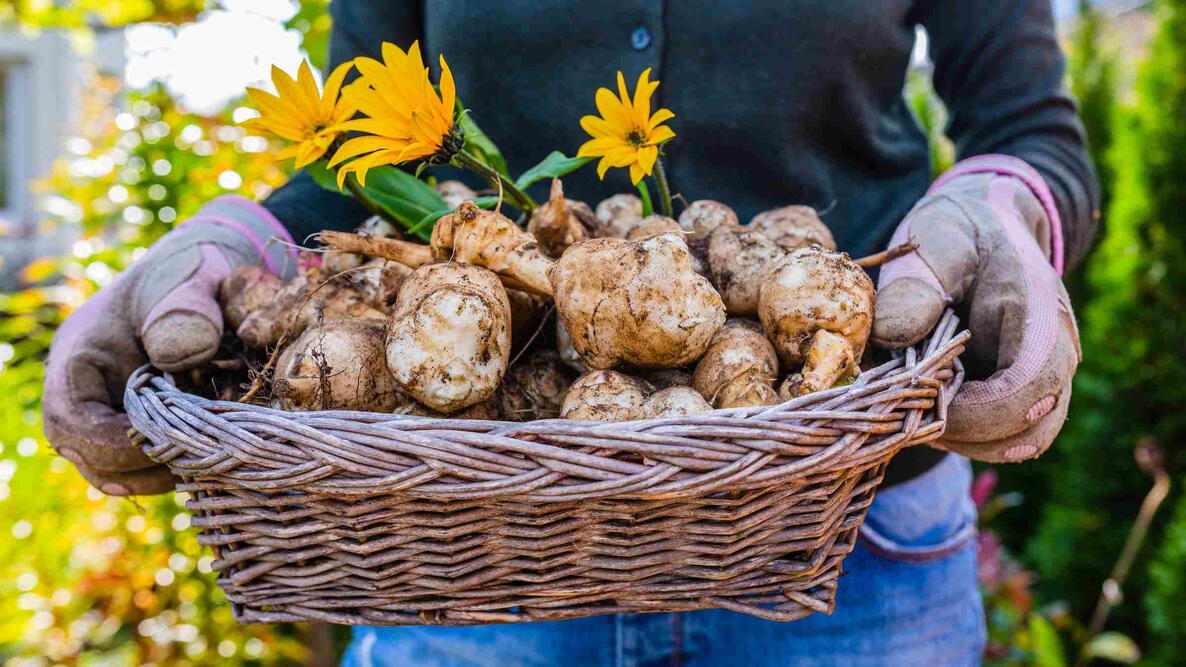
Meet Jerusalem artichokes: knobby, quirky tubers that don’t look like much—until you taste their unexpectedly sweet, nutty crunch!
Also known as sunchokes, these cheerful sunflower relatives grow easily, spread fast, and offer nutty tubers come fall.

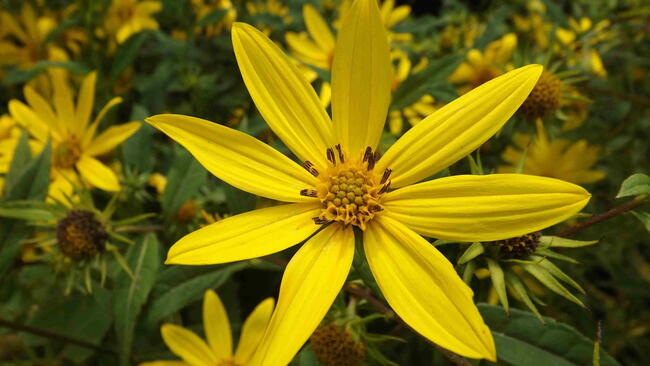
It’s natural to assume a Jerusalem artichoke is an artichoke from Jerusalem—but it’s neither. Also called a sunchoke, this hardy native sunflower is grown for its knobby, flavorful tubers—not its bright yellow flowers. Curious to learn more? Keep reading!
What Are Jerusalem Artichokes, Anyway?
Despite the confusing name, Helianthus tuberosus has no connection to Jerusalem and isn’t related to globe artichokes. Native to North America, it’s valued for being easy to grow, cold-hardy, and remarkably productive.
Jerusalem artichokes grow tall—6 to 10 feet or more—and bloom with 2- to 4-inch sunflower-like flowers in late summer. I’m always struck by how much birds and butterflies love this plant, making it a top pick for pollinator and bird-friendly gardens. It spreads by rhizomes and self-seeds, so plant it in an area where it can establish itself in USDA Zones 3 through 9.
The real star, though, is the edible tubers, which contain 75% inulin, a healthy dietary fiber. They resemble ginger or fingerling potatoes and can be eaten raw or cooked—roasted, fried, pickled, or boiled. The possibilities are endless!

Are Jerusalem Artichokes Invasive?
While they are not categorized as an “invasive,” Jerusalem artichokes are fast growers—and even harder to get rid of! Spreading aggressively through underground rhizomes and self-seeding, they can quickly take over garden areas if left unchecked. For that reason, it’s best to plant Jerusalem artichokes in a dedicated raised bed, large container (5 gallons minimum), or their own space. Give them room to roam, and they’ll reward you with plentiful tubers year after year.
Pro Tip: I advise harvesting all tubers diligently in the fall and continuing to dig through winter or early spring, leaving no small pieces behind to prevent unwanted regrowth. Stay vigilant: remove any volunteer plants promptly in spring!
Read Next
Planting
Jerusalem artichokes grow best in full sun and loose, well-draining soil, but they’re tough and adaptable to many soil types. Remember: Because they spread underground and can quickly take over, it’s best to plant them in their own dedicated area or use barriers to keep them contained.
When to Plant
- Generally, tubers are planted in early spring, as soon as the ground can be worked. Depending on the variety, Jerusalem artichokes can require 110 to 150 days to maturity, so getting an early start is beneficial, especially in zones with shorter growing seasons.
- In milder locations, you can plant tubers in late fall or winter before the ground freezes.
How to Plant
- Most gardeners start with tubers rather than established plants.
- When planting, place tubers with the eyes facing up, 3 to 6 inches deep. Space them 12 to 18 inches apart to allow ample room for growth.
- You can cut larger tubers into pieces weighing about 2 ounces, as long as each piece has at least one healthy eye. This helps maximize the number of plants from your initial tubers.
- If you do use established plants, plant them at the same depth they were growing in their pots.

Types
There are quite a few cultivars of Jerusalem artichokes to choose from, each with slightly different traits. Here are a few popular and heirloom varieties:
- ‘White Fuseau’ – One of the most commonly grown varieties, with smooth, white-skinned tubers and a mild, nutty flavor. Its long, uniform shape makes it easier to clean and cook.
- ‘Red Fuseau’ – Similar to White Fuseau but with reddish skin. Often considered slightly sweeter and just as productive.
- ‘French Mammoth White’ – Known for producing large, knobby tubers and heavy yields. A good choice if you want a big harvest with fewer plants.
- ‘Stampede’ – An heirloom variety prized for its vigorous growth and large yields. It’s often grown in colder regions thanks to its early maturity.
- ‘Sugarball’ – A smaller, round variety with a sweeter flavor, sometimes favored for raw eating or quick roasting.
You can sometimes find Jerusalem artichoke tubers at local farmers markets in late fall or early spring. They’re also available from specialty seed catalogs and online nurseries that carry perennial vegetables.
Gardening Products
Cooking Notes
Jerusalem artichokes—also called sunchokes—may look like knobby ginger, but they have a crisp texture and a mild, nutty-sweet flavor that’s completely their own. They’re delicious raw or cooked, and they pair well with everything from roasted vegetables to creamy soups.
Raw: Thinly slice into salads for a crunchy bite, or shred them into slaws. The flavor is slightly sweet and earthy, with a water chestnut–like crunch.
Cooked: Roast, sauté, boil, mash, or pickle them—just like you would with potatoes. Roasting brings out their natural sweetness, while mashing them creates a smooth, slightly nutty puree. They can also be blended into soups or sliced thin for homemade sunchoke chips.
Note: Jerusalem artichokes are high in inulin, a type of dietary fiber that can cause gas or digestive discomfort in some people. Try small servings at first, or cook them well to help break down the fiber.


Comments