

As we come indoors and go out, the dry winter air causes static hair, parched skin, and—especially—cracked lips. It’s easy and inexpensive to make your own moisturizing lip balm from natural ingredients
Why Homemade Lip Balm Works
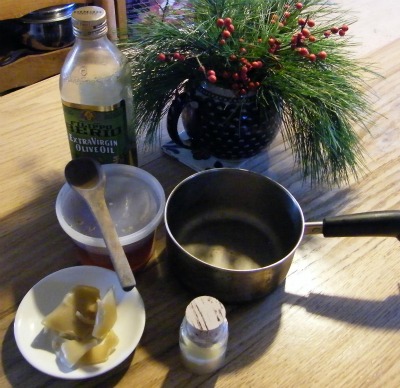
You need only two ingredients for the most basic product: a little beeswax and a good-quality oil.
The oil and wax seal in moisture, and the beeswax (which contains healing, anti-inflammatory, and antibiotic compounds) stiffens the product. I add a little raw honey to mine for its flavor, healing properties, and moisturizing effects.
Ingredients for Homemade Lip Balm
| Ingredient | Amount |
|---|---|
| Beeswax | 1 Tbsp |
| Oil (olive, almond, etc.) | 3 Tbsp |
| Raw honey (optional) | 1 tsp |
If you know a local beekeeper, he or she probably sells food-grade beeswax as well as honey. Health food stores usually carry beeswax in blocks, “medallions,” or beads. A dollar or two will buy enough to make quite a few batches of lip balm.
Tools You’ll Need
- You can dedicate a small stainless-steel or Pyrex pot to melting the wax (You may want to use it again to make other balms, salves, or ointments).
- A small wooden spoon or stainless-steel whisk for stirring.
- A small glass jar or another container (e.g., a new or recycled lip balm tube).
Step-by-Step Lip Balm Recipe
1. Melt the beeswax and oil.
Place the beeswax and oil in a small heat-safe pot or double boiler. Warm gently over low heat, stirring occasionally, until the beeswax is completely melted. Do not let the mixture boil.
2. Remove from heat and add honey.
As soon as the wax has fully melted, remove the pot from the heat. Whisk in the raw honey (if using) until fully combined.
3. Pour into containers.
Carefully pour the warm mixture into a small glass jar or lip balm tube. Work slowly to avoid spills.
4. Let the balm set.
Allow the lip balm to cool and firm up completely at room temperature. This usually takes 20–30 minutes.
5. Test the texture.
Once set, test the consistency with a fingertip. If the balm feels too firm, gently remelt it and whisk in a little more oil. If you prefer a firmer balm—especially for tube packaging—remelt and add a small amount of additional beeswax.
6. Adjust and repeat if needed.
Remelting takes only a few seconds, so don’t hesitate to adjust the texture until it feels just right.
Customizing Your DIY Lip Balm
Once you’ve succeeded with the basic product, you can try a new batch using ingredients such as a few drops of a medicinal tincture or an essential oil; cocoa butter, shea butter, or coconut oil for some of the oil; and carnauba wax in place of beeswax.
By the way, this stuff also works well to smooth unruly eyebrows, treat chapped hands, and moisturize cuticles and fingernails, so you may want to make a bigger batch on your second try.
Frequently Asked Questions
How long does homemade lip balm last?
Stored in a cool, dry place, homemade lip balm can last up to one year.
Can I make lip balm without beeswax?
Yes, you can substitute plant-based waxes like carnauba wax, though the texture will be firmer.
What oil is best for homemade lip balm?
Olive oil, almond oil, coconut oil, and grapeseed oil all work well.
Is homemade lip balm good for sensitive skin?
Yes—using simple, natural ingredients makes it ideal for sensitive or dry skin.
Making your own lip balm is a simple, satisfying project that delivers real results—soft, moisturized lips all winter long. With just a few natural ingredients and a little patience, you can customize the texture, scent, and ingredients to suit your needs.

More Like This


Hi Colleen-
This recipe should make 12-13 standard tubes of lip balm (.15 oz).
Please let us know how it goes!
We have not tried coconut oil ourselves, but believe it should work fine in this recipe.
- « Previous
- 1
- 2
- …
- 10
- Next »
Comments