

Straw bale gardening is a smart solution for gardeners with poor soil, limited space, or a desire for raised beds without construction. This guide covers how to garden in straw bales, including what straw is, how to condition bales, fertilizer options, and the best plants to grow.
If you want to build a raised bed, straw bales are a great alternative, too. First, let’s talk about what is straw? It’s NOT hay!
What Is Straw? (And Why It’s Not Hay)
Straw consists of the dry hollow stalks left from cereal stalks like wheat and barley. It has so many uses. It makes a great mulch. (See our article about mulching with straw.) It can be used to grow potatoes and mushrooms, keep ponds clear, and make instant planters, as we’ll show you.
Straw bales will eventually decompose like any organic material, but they’ll decompose much more slowly because the outsides are less insulated than the center. What you’re left is a shell filled with the beginning of a compost pile—the perfect planter!

Benefits of Straw Bale Gardening
The straw bale gardening method was pioneered by Joel Karsten. Straw bales used as planters have several advantages:
- As straw rots, it releases nutrients, feeding the plants growing in it.
- The bales raise the planting area, so there is less bending and back pain.
- It saves buying loads of compost!
- They reduce the incidence of pests, diseases, and weeds. The bales are quite tall so you rarely have slugs or any insect issues.
- You won’t have to water extra. Straw bales dry out more slowly in hot sunny weather due to their sheer size, so it helps in high heat. The inside of the straw bale remains damp.
- A raised bale planter also means it’s easier to harvest!
Where to Find Straw Bales
You can source straw bales from nearby farms, garden centers, DIY stores, etc. Or, try looking online. Organic bales are harder to find. You’d need to find bales from organic farms or ensure they’re marked organic. Avoid any that have been treated with herbicides.
Once home, put your bales on hard ground, grass, or paving, or store them in a greenhouse.
Ensure the twine runs along the sides. The cut ends should face up for easier watering.
What Fertilizer to Use for Straw Bale Gardening
To get started, you will need water and a quick-release high-nitrogen fertilizer. For fertilizer, you could use:
- Ammonium sulfate
- A soluble lawn fertilizer
- Blood meal as an organic alternative
Straw Bale Conditioning Chart
Bales need a little conditioning before planting. You’re starting off the composting process. It’s not complicated, but there is a 2-week upfront procedure. If you’re using organic fertilizers, you’ll need to wait an extra week as the composting takes longer.
Straw Bale Conditioning Schedule (10-Day Chart)
| Day | Fertilizer Type & Amount | Water |
|---|---|---|
| 1 | High nitrogen, 1 cup (≈235 ml) | 1 gallon (≈4 liters) |
| 2 | — | 1 gallon |
| 3 | High nitrogen, 1 cup | 1 gallon |
| 4 | — | 1 gallon |
| 5 | High nitrogen, 1 cup | 1 gallon |
| 6 | — | 1 gallon |
| 7 | High nitrogen, ½ cup | 1 gallon |
| 8 | High nitrogen, ½ cup | 1 gallon |
| 9 | High nitrogen, ½ cup | 1 gallon |
| 10 | Balanced fertilizer, 1 cup | 1 gallon |
| 11 onward | maintain moisture |
- Day 1: Sprinkle 1 cup of fertilizer evenly on top of bales. Water in with 1 gallon of water. Let it soak.
- Day 2: Soak bales with another gallon of water. No fertilizer.
- Day 3 and 5: Repeat 1 cup fertilizer and 1 gallon water.
- Day 4 and 6: Water only.
- Day 7, 8, and 9: Just half a cup of fertilizer and water as usual.
- Day 10: One cup of traditional “balanced fertilizer” (equal parts N-P-K such as 10-10-10).
During this time, the temperature inside the bales will increase (up to 100°F) and then cool back down. - Day 11 and 12: Check that the bales are moist.
Best Plants to Grow in Straw Bales
You can grow almost anything, from leafy greens to beans to onions.
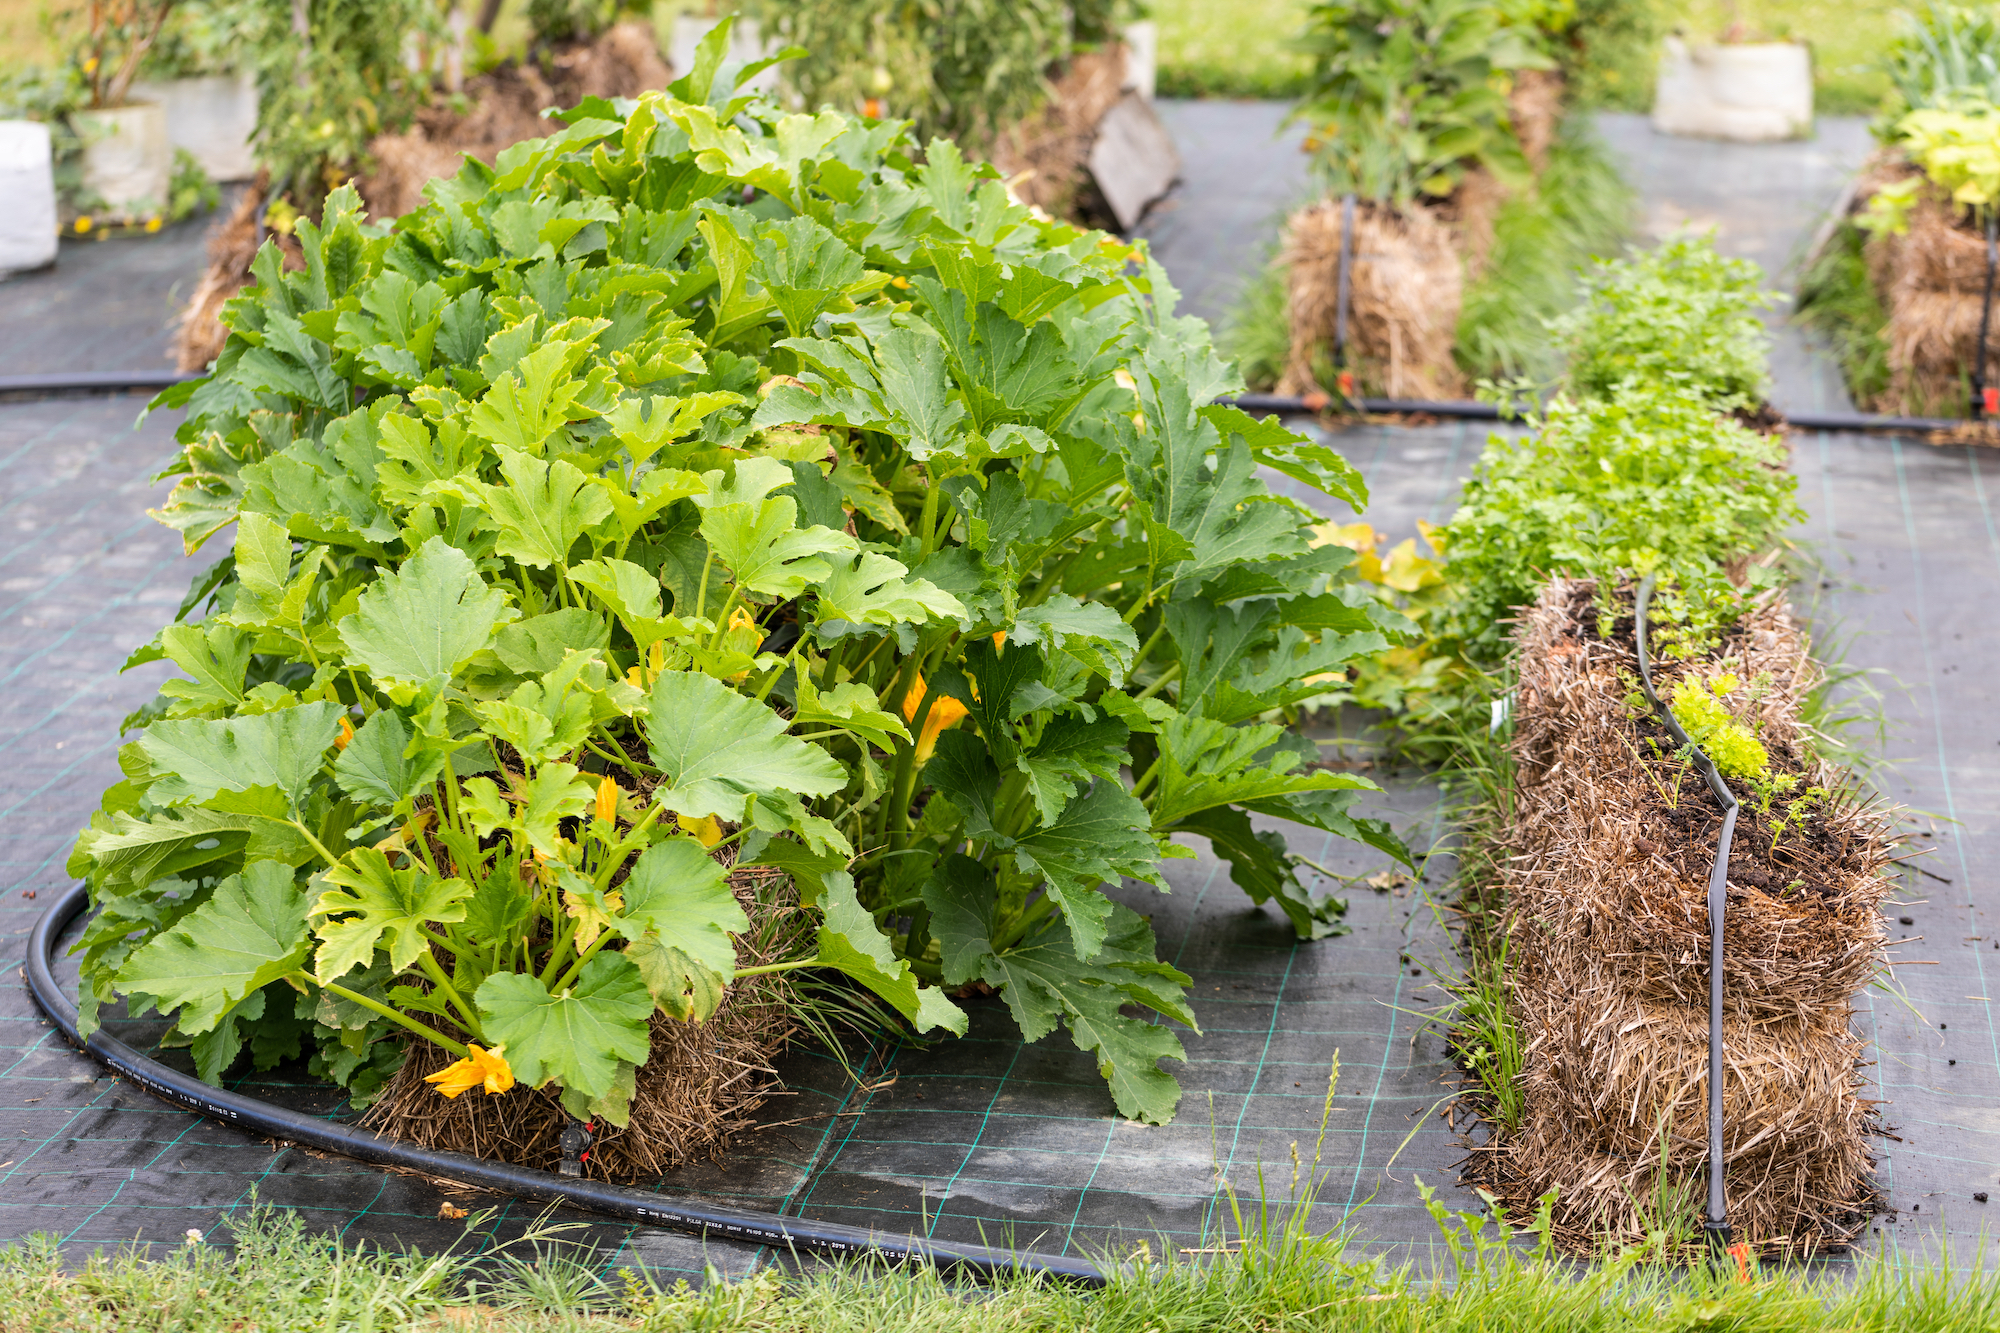
But straw bale planters are most often used for warm-season crops like tomatoes, cucumbers, peppers, and zucchini.
It’s probably best to avoid root crops, as they can be challenging, and corn that gets top-heavy.
How to Plant in Straw Bales
Large seeds like runner beans can just be pushed into the moist straw.
For smaller seeds, top the straw bale with an inch of potting mix and sow into that.
For warm-season crops, start them off in pots. Then, plant by pulling out enough straw to fit in the root balls. Firm them in place. Make sure there’s enough contact between roots and straw, then thoroughly water.
Tips for Straw Bale Gardening
- Don’t cram in plants. Plant at the correct spacing for airflow and light.
- Including supports for climbing vegetables such as cucumbers.
- Keep crops moist with regular watering.
- Feed with a regular plant or tomato fertilizer.
- Keep picking to keep the harvest coming!
- At the end of the season, you can use the straw in compost or as mulch next season.
See the video to truly understand how to plant in straw bales.
Interested in planning your garden now? See our online Garden Planner!

More Like This


Hi Randal,
As we mentioned above, root crops like potatoes present challenges, but with that being said it is definitely possible.
Given the specific conditions you outlined, it's hard to know what the outcome will be. If you do not have another option for growing potatoes, you could try growing them in the straw bales and see what happens. Even presented with the most ideal conditions, sometimes crops fail.
If high temperatures persist for a long time, you should try to find a way to provide some shade during the hottest times of the day. Consistent watering will be key to success because if there is no rain and such high temperatures, you will want to take extra care to make sure that your potatoes are given the necessary amount of water.
Hope this helps!
Comments