
Caption
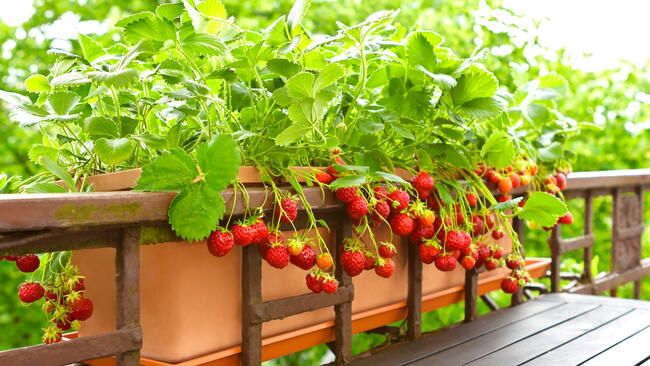
Strawberries growing hydroponically with a strawberry runner growing roots.

Heard about hydroponic strawberries but thought they were too much hassle? Growing hydroponic strawberries at home is easier than you might think and allows you to enjoy fresh, sweet berries for months—or even year-round.
It’s a joy to grow strawberries in the garden. Bright, red, flavorful strawberries were a fleeting and ephemeral treat when I was a kid in Wisconsin. But we only enjoyed a few weeks of berry bliss each summer. What if you could enjoy homegrown strawberries for months—or even year-round—at home? That’s what growing hydroponic strawberries can provide.
How Do You Grow Hydroponic Strawberries? Hydroponic strawberries are grown without soil in a nutrient-rich water solution. Plants are supported in net pots, provided with oxygen and adequate light, and maintained at a pH of 5.5–6.5 for best growth.
What Are Hydroponic Strawberries?
Hydroponics means plants grow without soil—unlike traditional gardens or planters. With hydroponics, plants are grown in a system that supplies nutrient-laden water.
Hydroponic strawberries can be grown indoors or outside, and systems can be as simple as a few buckets. There’s more than one way to grow a hydroponic strawberry, and you might even decide to add a few fresh herbs or a couple of heads of lettuce once you get going.
The Benefits of Hydroponic Strawberries
While that may sound a bit like more work instead of less (I’m usually a big fan of letting nature do the heavy lifting in my gardening efforts), hydroponic strawberries are quick and easy—and offer many benefits:
- They can be grown year-round indoors. Fresh, ripe fruit in winter is fantastic, especially when the grocery store strawberry flavor is a bit underwhelming.
- They can solve the challenges of poor soil quality, extreme weather, and disease.
- You can outsmart the birds, squirrels, and chipmunks.
- They can be grown when garden space is at a premium—and even in urban environments.
- No weeds!

Best Hydroponic Systems for Strawberries
Deep Water Culture (DWC) Systems
Deep water culture (DWC) hydroponic systems are one of the easiest methods for home growers to get their strawberry roots wet.
They involve a tub, a lid, and net pots that fit in the lid. The plants sit in the net pots, with their roots dangling in water with added nutrients. They have all the nutrients and water they need for the entire season. Check this publication from the University of Minnesota Extension for more details on the components.

In a DWC system, the plants sit in a substrate, a fancy word for some material that supports and holds the plant up. The substrate is what keeps part of the plant out of the water and provides the chance for roots to exchange gasses. Rockwool, perlite, clay pebbles, and coconut coir are common choices. The substrate material is held by a net pot, which looks like a small plastic nursery pot with slits in the side and bottom through which the roots grow.

Net pots are fitted into holes made in the lid, which can be fixed in place or made of a material that floats on top of the water, like Styrofoam. The tub holds the water-nutrient solution.
Aeration for the system can be passive or active. In a passive system, also known as the Kratky method, the air is supplied by a gap between the lid and the water surface, similar to how a pond or lake is aerated. Active aeration systems typically use an air stone similar to what you might find in an aquarium, with a small pump to move air through the holes in the stone and into the water.
Make Your Own DWC System
While you can purchase ready-made DWC systems, you can also make your own pretty easily. You just need:
- A large plastic tub. For planning, six strawberry plants fit well in a 27-gallon tote filled with water and liquid plant food. It’s acceptable for spacing to be tight, as long as there’s enough room for the plants to grow and mature. Ensure the tub is made of food-safe material and has sturdy sides that won’t bend. Also, it’s best to go with a dark color—not clear; without sunlight, algae can’t grow.
- A lid in which you’ll make holes for the net pots to sit in—or a foam board purchased at a hardware store, cut to fit just inside the opening of the container. The changing water level will raise or lower the lid or floating foam board.
- Some net pots. You could go whole hog and make your own net pots with old yogurt containers, but actual net pots are inexpensive, and they’re reusable (and durable).
- Substrate material. Rockwool, perlite, clay pebbles, and coconut coir are all suitable, so go with what’s available.
- An air supply (air stone, tubing, and pump) if using active aeration.
Strawberry Varieties for Hydroponics
To make things easier, start with strawberry plants or rootstock, not seeds. Many garden centers and online vendors sell quality strawberry plants, often in packs of 25.
Choosing a strawberry variety is always tricky—they all sound good. For hydroponic growing, look for a day-neutral or everbearing type. Day-neutral strawberries will make a flush of fruit and then continue to make more berries until frost. If you are growing them indoors, they’ll keep trucking for months.
- ‘Albion’ is known for its large fruit and excellent flavor.
- ‘Seascape’ yields firm, good-sized fruit with nice flavor.
- ‘Quinault’ is a newer variety from the University of Washington, with unrooted runners.
- ‘Tribute’ provides heavy crops of large berries and is popular with commercial growers.
- ‘Mara des Bois’ is considered the most flavorful of the day-neutral varieties. This type has smaller berries but a potent fragrance and flavor.

Setting Up a Hydroponic Strawberry System
For some folks, DIY is the name of the game; others prefer a turnkey package. Regardless of what system you select, you’ll need to set it up, and there are a few common requirements: a source of clean water, nutrients (fertilizer), and light.
Choose a location for your hydroponic system that is out of the way but not out of mind. Many systems rely on a water pump for circulation or an air pump to provide oxygenation, which sometimes make as much noise as a refrigerator or fan. However, you’ll need to check on it frequently, so its location shouldn’t be too remote. Room temperature doesn’t matter much, as these systems can be used indoors or outside.
- Water should be clean, but tap water is fine. If your water source is treated by your municipality, fill the system and let it sit for 24 hours to allow any chemicals like chlorine to dissipate. Note: Set up the system first, and then add the water (water is heavy—20 gallons of water weighs about 166 pounds). Initially fill the tub or bucket so the water level comes to the bottom of the net pots.
- If your hydroponic setup is indoors, you’ll likely need to provide supplemental lighting. Strawberries need at least 6 hours of full sunshine daily, and more is better. Choose LED lights, as fluorescent bulbs would need to be only a few inches above the plants, complicating harvest. Set a timer to run the lights.
- A ready-made hydroponic fertilizer product is the way to go, as it completely dissolves in the water. Here’s an example. Getting the nutrients wrong is a sure way to have problems. Choose a water-soluble product intended for strawberries. An NPK (nitrogen-phosphorus-potassium) ratio of 8:12:32 is common, but any similar ratio will work well.
Caring for Hydroponic Strawberries
Planting the strawberry plants in net pots is even easier than planting in soil. You’ll tuck the roots down and let them hang below if they’re long enough, fill the net pot with your medium, and set the pot into the hole in the lid or foam board.
Fill your bucket or tub with water and add the initial nutrient dose according to the package instructions. The roots need to touch the water, but the water level should be below the base of the plant so that air circulation is maintained. Initially, the roots are short, and the water level is high. Lower the water level 1–2 inches below the net pot as the roots grow. If you have a floating foam board, it will automatically adjust.
The rootstock plants are dormant, so it will take a little time to start growing. Be patient with plants; they’ll wake up and push out flowers and flavorful berries and keep fruiting for months!

pH and EC Levels
We know that pH is important for nutrient uptake in the garden, and it’s important in hydroponic growth, too. Too low or high, and nutrient availability is limited. If your pH is out of whack, it won’t matter how much fertilizer you provide. While strawberries in soil do well with a slightly acidic pH, hydroponic strawberries do best with a pH of 5.5–6.5. A pH meter or test strips work well.
EC (electrical conductivity) measures the dissolved salts and nutrients in your water. For home growers, it’s easy to over-apply or under-apply nutrients to the solution. A simple meter that measures EC and pH is inexpensive and can help you keep the nutrient solution in the right band for your strawberries.
How often you’ll need to add nutrients depends largely on the size of your reservoir and the number of plants in it. A few plants in a large tub will need less-frequent attention than many plants in a small space. Start with a frequency of adding nutrients every 10–14 days. If you have an EC meter,
Light Requirements
It’s worth mentioning again that hydroponic strawberries grown indoors need extra light. The simple approach is to put your grow lights on a timer, set it for 12 hours during the day, and watch your plants. If they are growing well, not getting leggy, have deep green foliage, and are fruiting well, then you’re doing okay.
Water Temperature and Levels
The ideal water temperature in a DWC system is about 65°–70°F. However, it’s not an exact requirement. Warmer water holds less dissolved oxygen, but cold water can slow down plant growth. For indoor growers, room temp is usually fine. Outdoor DWC systems heat and cool naturally throughout the day, often providing a usable average temperature. If your system is in bright summer sun and starts heating up, provide some shade for the tub (not for the strawberry plants), or toss a frozen water bottle inside and refreeze it for use again the next day. The tub can also be partially buried in the soil if you have a spot in which to do so.
In a DWC system, the water level begins right at the bottom of the net pots and will eventually lower as the plants use the water. Eventually, the roots will hang down below the net pot and into the water. Refill as needed so that about half of the roots are in the water. Just like with a houseplant or garden, how often you need to add water will depend on the number of plants, their size, and their growth rate. A floating lid system will act as a water level gage for you. Refill when the tub is about half empty. The strawberry plant roots should always be partially in the water, but not completely submerged.
Some DWC growers change out their entire water supply every 2 weeks, and some don’t. Like many things in gardening, it depends. If the water in your tub starts to get scummy or the sides are covered in algae, discard the water, scrub the tub, and recharge with fresh water and nutrients. When the plants are growing well, you may find that the addition of fresh water required to keep the level up is sufficient to keep the tank clean and not stagnant. Remember that adding several gallons of fresh water means your nutrient levels will become diluted. To keep it simple, mix the recommended amount of nutrients into the makeup water before adding.
Pruning
Strawberry plants grow runners (long stems that eventually would root into a new daughter plant). In the soil, that’s not so bad for a home gardener, but when growing hydroponically, those runners are just wasting energy that could go to making berries. Snip them off.
Pollination for Hydroponic Strawberries
Many day-neutral strawberry varieties are listed as self-pollinating, meaning you can get fruit from only one plant. However, that doesn’t mean the plants don’t benefit from pollination. An indoor grow doesn’t have pollinating insects (hopefully) buzzing freely from flower to flower, so you’ll want to do that yourself.
Hand pollinating is easy and ensures a heavier yield with more shapely, large berries. A small artist’s paintbrush is the perfect tool. Gently dab the pollen (the yellow stuff) from one flower, and while making a buzzing sound, dab it on the next one. Bounce around and dab all the flowers gently but bee-like. Unless you have a very large system, it won’t take more than a minute and can be done a couple of times per week.
Preventing Root Rot in Hydroponics
We often talk about drainage being important for plants in the soil (to prevent root rot), so how does that work in hydroponics? Healthy hydroponic roots should be white or cream-colored. If they’re black or dark brown, there are likely root-rot issues.
Sanitation is the first line of defense. Between crops, wash everything. Net pots can be soaked in a 10% bleach solution for 30 minutes and then rinsed and dried. If you had issues with the last crop, use fresh substrate.
Cooler temperatures, in that ideal range of 65°–70°F, will reduce pathogen growth as well. Low oxygen levels and warm temperatures combine to favor root-rot pathogens.
Frequently Asked Questions
Are hydroponic strawberries easy to grow?
Yes. Hydroponic strawberries are beginner-friendly and grow quickly with the right setup. Once the system is established, maintenance is often easier than growing strawberries in soil.
Can strawberries be grown hydroponically indoors?
Absolutely. Indoor hydroponic strawberries grow well with adequate light, nutrients, and airflow. LED grow lights make it possible to grow strawberries year-round inside your home.
What is the best hydroponic system for strawberries?
Deep Water Culture (DWC) systems are one of the best and easiest options for home growers. They provide constant access to water, nutrients, and oxygen, which strawberries love.
What strawberry varieties grow best in hydroponics?
Day-neutral and everbearing varieties perform best in hydroponic systems. Popular choices include ‘Albion’, ‘Seascape’, ‘Quinault’, ‘Tribute’, and ‘Mara des Bois’.
How long do hydroponic strawberries take to produce fruit?
Most hydroponic strawberry plants begin flowering within a few weeks and can produce fruit in about 4–6 weeks, depending on the variety and growing conditions.
Do hydroponic strawberries need pollination?
Yes. While many varieties are self-pollinating, indoor hydroponic strawberries benefit from hand pollination using a small paintbrush to increase fruit size and yield.
Do hydroponic strawberries taste better than store-bought?
Many growers say yes. Hydroponic strawberries are harvested at peak ripeness, resulting in sweeter, juicier berries compared to many store-bought options.
Have you tried growing hydroponic strawberries at home? Share your setup or questions in the comments!


Comments