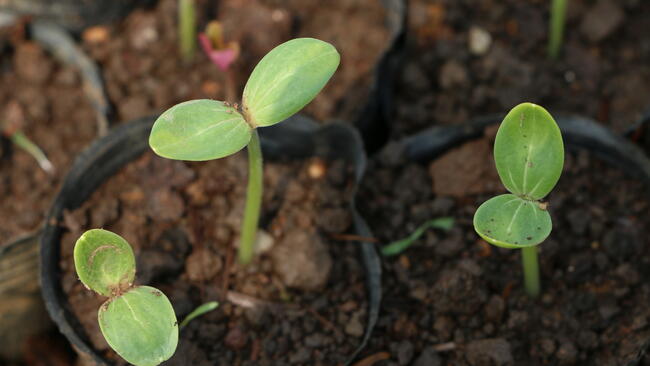
Caption
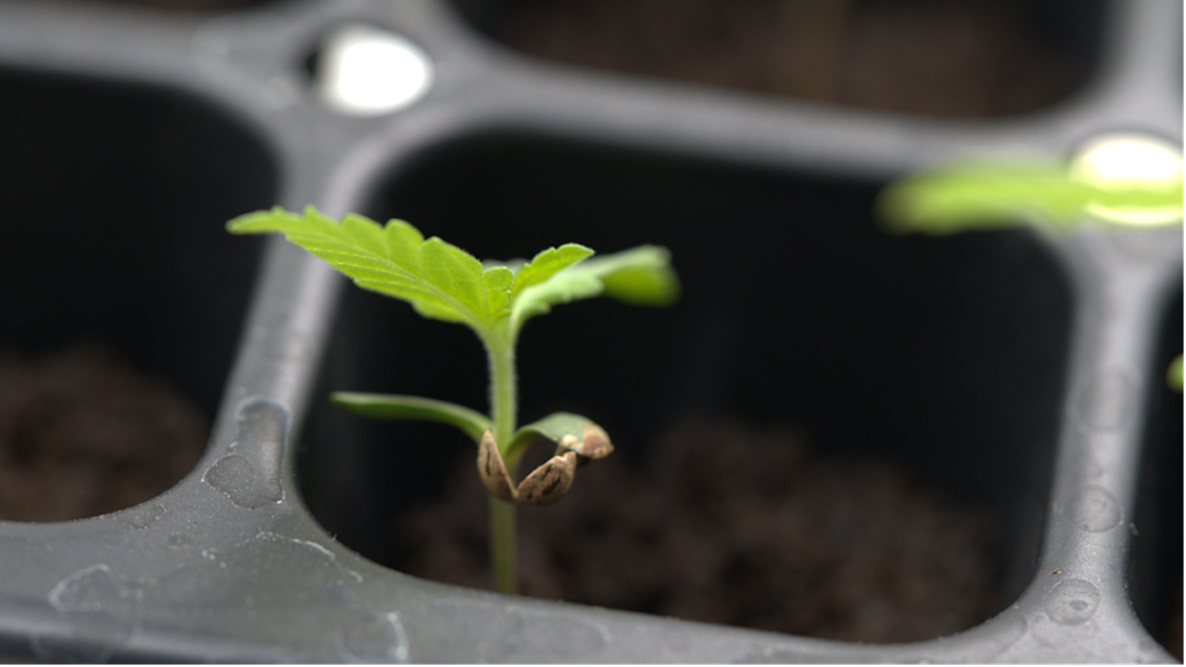
A tiny cannabis sprout emerging from the soil after direct planting.
A beginner-friendly guide to germinating cannabis seeds
Every thriving cannabis plant starts the same way—with a single seed and the care to help it sprout. Germination is where your bountiful harvest truly begins, laying the foundation for strong roots, healthy growth, and a rewarding harvest. When done right, this simple process gives your plants the best possible start. Here’s a step-by-step guide to germinating cannabis seeds successfully, with everything you need to set them on the path to thriving.
What You Need to Germinate Cannabis Seeds
Every good harvest begins with preparation, and germinating cannabis seeds is no exception. Before you begin, make sure you have everything ready to create a warm, moist, and stable environment for your cannabis seeds.
You’ll need fresh, healthy seeds, clean water, paper towels or cotton pads, and a dark, warm spot to encourage sprouting. A small container or sealable plastic bag can help maintain humidity, while a heating mat or thermometer ensures steady warmth—ideally between 70° and 80°F (21° and 27°C).
Having the right materials and conditions from the start will give your cannabis seeds the best chance to germinate quickly and grow into strong, healthy plants.
Fresh Seeds
When it comes to germinating cannabis, fresh seeds make all the difference between a lively sprout and a no-show. Over time, even the best-kept cannabis seeds lose vigor as their shells harden and moisture levels drop.
- Fresh cannabis seeds are plump, firm to the touch, well-colored, and have a smooth, flat surface. There should be no sign of mold or shriveling. If they are fresh, the seeds will be eager to grow at the first touch of warmth and moisture.
- Treat your seeds like living things. Know the harvest date. Don’t wait too long before planting.
- If you’re saving your own seeds, store them in a cool, dark, and dry place—ideally in an airtight container with a desiccant pack to keep moisture at bay.
To ensure your cannabis seeds are fresh, start with reputable breeders or seed banks.
Sponsored resource: Browse beginner-friendly cannabis seeds from Homegrown Cannabis Co.
Supplies
Growing cannabis may seem simple—just seed meets water—but good preparation makes all the difference. Here’s a list of basic supplies to have ready before germinating your cannabis seeds:
- Fresh water: Clean, room-temperature water is essential for germination. Avoid chlorinated tap water if possible; filtered or spring water is best.
- Paper towels or cotton pads: Used to cradle the seeds and keep them moist, but never soaked. A damp, breathable medium helps roots emerge without drowning.
- Two plates (or a plastic bag): To cover the damp paper towels and maintain steady humidity and darkness while your seeds crack open.
- Clean tweezers: For gently handling seeds without crushing or contaminating them.
- Containers or cups: If you prefer to presoak seeds or start them in water for a few hours before moving to the paper towel method.
- Starter soil or growing medium: Light, airy, and slightly moist, since seedlings need a soft bed to stretch their roots. Avoid heavy, nutrient-rich mixes at first; young plants’ roots can burn easily.
- Small pots or seedling trays: Once roots appear, these provide a temporary home until transplanting time. Good drainage is a must.
- A warm, quiet spot: Germination thrives between 70° and 80°F (21° and 27°C). Too cold and the seed will stall; too hot and it may dry out or die.
- Patience: Not for sale in any store, but perhaps the most essential equipment of all. Seeds sprout on their own schedule, and rushing them rarely ends well.
Germination Methods (Step-by-Step)
Before you dive into any one technique, it helps to understand that there’s more than one way to coax a cannabis seed to life. Growers have their favorites: some swear by the classic paper towel method, others prefer to plant straight into soil, while a few let their seeds soak until they crack open on their own.
Each approach has its own rhythm, advantages, and little quirks. The key is to choose the method that suits your growing style and environment. Below, we’ll break down each germination method, the materials you’ll need, and helpful tips to keep your seedlings healthy from the very start.
Paper Towel Method
Materials Needed:
- Plain, undyed paper towels
- Clean, room-temperature water
- Two plates or a resealable plastic bag
- Tweezers
- Labels or a marker

Process:
- Moisten, not soak: Wet two paper towels, then wring gently until they’re uniformly damp but not dripping. (If water runs when you squeeze, they’re too wet.)
- Lay out the seeds: Set one moist paper towel on a plate. Arrange the seeds on the towel so that they are 1 inch (2–3 cm) apart. Blanket with the second damp towel so they’re sandwiched, then put the second plate upside-down on top to make a dark “cloche.” (Or slip the towels into a resealable plastic bag left slightly open.)
- Keep warm and dark: Aim for 72°–79°F (22°–26°C). A warm shelf or a heat mat set to ~75°F (~24°C) works well. Avoid direct sun and big temperature swings.
- Check daily: Peek once a day. Towels should stay evenly moist; mist lightly if they start to dry. If using a bag, open it briefly to let in fresh air.
- Watch for the taproot: Most viable seeds crack in 24 to 72 hours; some take up to a week. When a white taproot emerges and reaches ¼–½ inch (0.5–1.5 cm), they’re ready to plant.
- Transfer gently: Premoisten your starter medium (seed-starting mix or light potting soil). Make a small hole about ¼–½ inch (0.5–1 cm) deep. With clean tweezers, place the seed taproot down, shell up. Bury lightly.
- Aftercare: Keep the medium warm (same temps), evenly moist (not soggy), and under gentle light (low-intensity grow light or bright indirect light) once seedlings break the surface. Hold off on feeding until the first true leaves appear.
Helpful Hints:
- Keep towels lightly damp, not soaked. Too much water can cause rot; too little can stall germination.
- Transplant promptly once roots appear. Leaving sprouts in paper towels for too long can cause roots to tangle or tear.
- Handle with care. Always hold seedlings by the seed shell, never the root.
- For stubborn seeds, try a 12- to 18-hour presoak in room-temperature water before switching to the paper towel method.
Water Soak Method
Materials Needed:
- Clean glass or a small jar
- Room-temperature distilled or filtered water
- Labels or tape for marking
- A dark, warm spot

Process:
- Prepare the soak: Fill your container about halfway so the seeds can float freely. The water should be comfortably lukewarm, never hot—around 68° to 77°F (20° to 25°C). Temperature stability helps the seed’s shell soften evenly.
- Introduce the seeds: Gently drop them in. They may bob on the surface at first, but as they absorb water, most will slowly sink, signaling they’ve begun to take in moisture and awaken.
- Create the right environment: Place the glass in a dark, draft-free spot that stays consistently warm. Seeds sprout best when they feel safe and tucked away from light.
- Observe and wait: Check on them once or twice daily. In 24–48 hours, some may split open, revealing the first sign of life: a tiny white taproot. Give the glass a soft swirl to refresh the oxygen each time you look.
- Mind the clock: Don’t let seeds linger too long; three days (72 hours) is the limit. Beyond that, they risk suffocating or starting to rot. The goal is to wake them up, not drown them.
- Move to their new home: Once the taproot appears, ¼ to ½ inch (0.5 to 1 cm) long, lift the seed out with clean tweezers. Nestle it into moist seed-starting mix or a plug, root tip down, about ¼ inch (0.5 cm) deep. Cover loosely and keep the soil damp, not soggy.
- Nurture the seedlings: Maintain steady warmth (around 75°F / 24°C) and humidity until sprouts poke through the surface. Then, introduce gentle light and fresh ventilation to strengthen the young stems.
Helpful Hints:
- If some seeds keep floating after several hours, gently tap them to settle. Seeds that sink are usually healthy and ready to germinate.
- Always handle seeds with care; the root is extremely delicate.
- If nothing happens after 2–3 days, transfer them to a damp paper towel to continue germinating.
- For added oxygen and cleanliness, a drop or two of hydrogen peroxide per cup of water can help.
Direct-to-Soil Process
Materials Needed:
- Small pots or containers with drainage
- Light, airy seed-starting mix (not dense garden soil)
- Clean water
- Labels
Process:
- Prepare the soil bed: Fill your containers with the moistened mix—damp like a wrung-out sponge, not soggy. Gently tap the pot to settle it, but don’t pack it in too tightly. Seeds need both water and air to breathe.
- Plant the seeds: Using the tip of a pencil or your finger, make a shallow hole about ¼ to ½ inch (0.5–1.5 cm) deep. Drop one seed per hole, root end down if visible (otherwise, either way is fine). Lightly sprinkle with soil—just enough to block light, but not smother the seed.
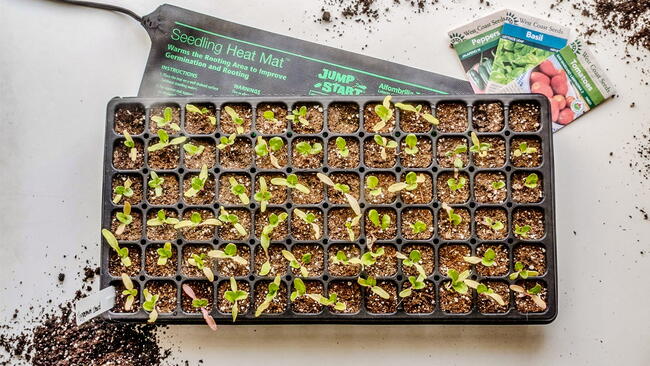
- Set the right conditions: Place the containers in a warm, dim area, ideally 72°–79°F (22°–26°C). Consistent warmth is key—cold slows germination, and heat that’s too high can dry or damage seeds. A seedling heat mat can help steady the temperature.
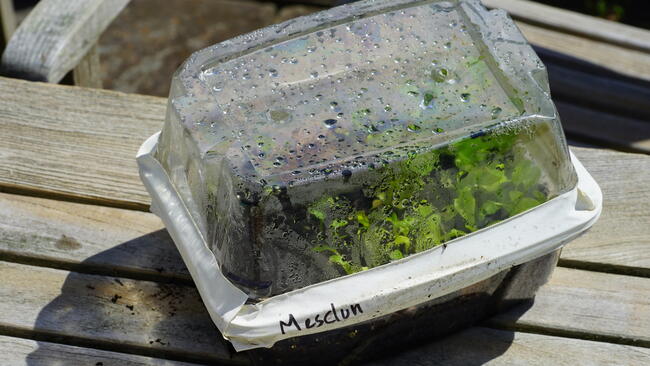
- Keep moisture steady: Mist the surface, or gently water it with a spray bottle, when the top layer begins to dry. Avoid heavy watering; too much can wash seeds deeper or cause rot. A clear cover or plastic wrap (with small air holes) helps retain humidity.
- Be patient and watchful: Depending on seed age and vigor, sprouts will appear in 3–7 days, though some take up to 2 weeks. Once seedlings break through, remove any cover and let them breathe.
- Let there be light: Move the pots under gentle grow lights or near a bright window once the sprouts appear. Keep lights close but not touching, or just a few inches away, to prevent stretching and encourage sturdy growth.
- Care for young seedlings: When seedlings have two or three sets of true leaves, they’re ready to transfer into larger pots or their permanent home.
Helpful Hints:
- Don’t bury seeds too deep—light coverage is best.
- Avoid compacted or heavy soil; roots need oxygen to expand.
- If your space runs cool, use a heat mat to hold warmth.
- Label each container—strains can look identical at this stage.
- Patience pays: soil germination takes a touch longer, but seedlings often establish more smoothly.
Some growers prefer autoflowering seeds because they flower automatically and don’t require changes in light cycles. Sponsored resource: Explore autoflower cannabis seeds from Homegrown Cannabis Co.
Best Conditions for Germination
Temperature and Humidity:
Cannabis seeds are most eager to sprout when they feel the steady warmth of early spring. Keep your germination environment between 70° and 80°F (21°–27°C), warm enough to encourage sprouting but not so hot that it dries or cooks the seed. A stable temperature is more important than a perfect number, so avoid big swings between day and night.
Relative humidity of 70–90% is ideal. The growing environment and medium should feel comfortably damp, never soaked. A covered tray, humidity dome, or loosely placed plastic bag can help maintain moisture while allowing a bit of airflow.
Light Needs:
During germination, seeds don’t need strong light, just a hint of brightness. Indirect light or a dim grow lamp is enough once they break the surface. Before that, darkness encourages growth by mimicking underground conditions. Once sprouts appear, gentle light supports steady development and keeps stems from growing too tall or fragile.
How Long Does Germination Take?
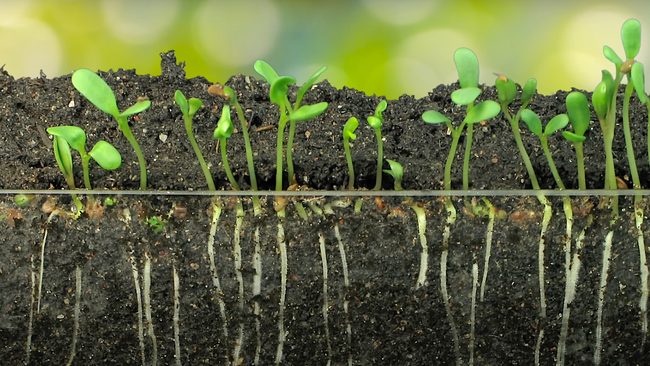
Under the right conditions—warmth, steady moisture, and quality seeds—cannabis usually germinates within 2–3 days, though some stubborn seeds may take up to a week. As the seed absorbs water, its shell softens and the radicle (first root) emerges. Soon after, a small shoot appears, marking the start of active growth.
Troubleshooting Germination Problems
Germinating cannabis seeds may seem simple, but a few minor missteps can keep them from starting as they should. Let’s take a look at some of the most common problems and how to set things right before the growing season closes.
Seeds Not Sprouting
When seeds refuse to germinate, it’s often a sign that their basic needs aren’t quite in balance. Too much water can suffocate a seed and invite rot, while too little leaves it too dry to awaken. Cold temperatures can slow or halt the germination process altogether, and planting too deeply may keep the seed from ever reaching the surface. Sometimes, the problem lies with the seed itself, so keep in mind that old, poorly stored, or immature seeds often lack the energy to start.
- Check temperature: Keep your germination area warm and steady, ideally between 70°–80°F (21°–27°C). Cooler conditions can stall germination.
- Adjust moisture: The medium should be moist but never waterlogged. Excess water cuts off airflow, while dryness halts the process.
- Mind the depth: Plant or place seeds no deeper than ½ inch (1 cm) so they can break through easily.
- Use fresh, viable seeds: If you suspect age or poor storage, test new seeds or try a presoak in clean, room-temperature water for 12–24 hours to soften the shell.
- Be patient: Some seeds take longer than others, so give them up to 10 days before giving up. Consistency in warmth and moisture usually brings success.
Mold or Rot
Mold and rot are the grower’s quiet enemies, signs that there’s been too much humidity and not enough ventilation. Seeds sitting in soggy conditions or sealed away without ventilation are quick to invite fungus, especially when warmth and darkness combine to make the perfect breeding ground.
- Start fresh: Discard any seeds or materials showing visible mold. Clean your tools and containers before trying again.
- Watch the water: Keep the medium damp, not dripping. If you’re using paper towels, they should feel moist to the touch but never soaked.
- Improve airflow: Loosen coverings or open containers briefly each day to let in a bit of airflow, which helps keep fungus at bay.
- Use clean water: Always moisten with filtered or distilled water to avoid contaminants that can feed mold.
- Mind the temperature: Warmth speeds germination but also favors mold, so keep it steady around 70°–80°F (21°–27°C), not hotter.
Weak Seedlings
Weak seedlings often signal that their start wasn’t quite right: too little light, too much water, or not enough support as they first emerge. The stems will look tender, stretch thin, and pale in search of brightness, or they may topple over before they can stand firm. The good news is that a few simple adjustments can bring them back to strength.
- Increase the light: Move seedlings closer to a gentle light source or provide 14–18 hours of steady illumination each day.
- Water wisely: Keep the medium wet but not soggy. Excess water limits air below the surface and weakens young plants.
- Encourage airflow: A light breeze from a small fan helps firm up stems and keeps conditions from becoming stagnant.
- Steady the temperature: Hold at 70°–80°F (21°–27°C), since cold slows development and heat can stress tender shoots.
- Replant carefully: Once seedlings have a few sets of true leaves, shift them into a larger pot or bed to give their base more room to spread.

What to Do After Germination
Once the seeds have done their part and tiny seedlings have emerged, the real hands-on work begins. This is a delicate stage when the young plants are still tender and can be easily damaged by rough handling or poor conditions.
Transplanting Seedlings
When seedlings have one or two sets of true leaves and feel sturdy enough to handle, it’s time to transplant:
- Water first: Dampen the medium a few hours ahead so it holds together during the move.
- Prepare the new pots: Fill them with a light, premoistened mix, and make holes large enough for the plug.
- Lift gently: Loosen seedlings carefully, holding by the leaves, not the stem.
- Replant at the same depth: Place each one into the hole, firm the mix lightly, and water well.
- Ease into new conditions: Keep them in gentle light and steady warmth for a day or two before increasing brightness.
- Feed lightly: Begin mild feeding only after new growth appears.
Early Care Tips
- Keep conditions steady: Avoid sudden shifts in temperature or light so young plants can adjust smoothly.
- Water lightly but often: The medium should stay evenly moist without becoming soggy or drying out completely.
- Provide gentle light: Bright, indirect light encourages steady development and prevents strain.
- Allow soft airflow: A light breeze or small fan helps strengthen stems and discourages mold.
- Handle with care: When tending or watering, touch the leaves rather than the stem to prevent injury.
- Watch closely: Early signs of trouble, such as drooping or pale color, can be corrected quickly when noticed in time.
Keep Notes
Track your germination and transplanting process. Using the same method helps you spot consistent results, while small experiments with a few seeds at a time reveal what works best for your setup.
Bringing It All Together
Germination marks the quiet beginning of every successful cannabis season; it’s a small act of patience that shapes everything to come. By tending your seeds with steady warmth, careful handling, and consistency, you set the stage for strong, resilient plants ready to flourish. As your seedlings find their footing, keep your curiosity alive and your hands gentle.
Ready to take the next step? Continue with our Cannabis Growing Guide to learn how to nurture these young plants into healthy, productive crops.
Comments