
Caption
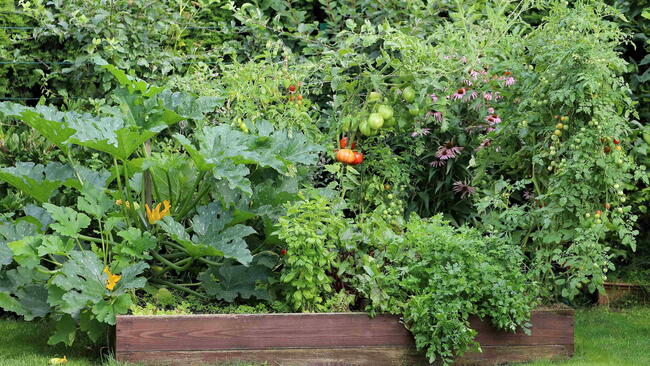
Beautiful DIY trellis in the vegetable garden

Learn how to make a DIY trellis with this step-by-step guide, including pictures to help each step of the way. We love this simple A-frame trellis to give you more vertical garden space and give climbing plants the support they need.
Sometimes, we get too focused on the square footage of our garden and how many plants we can fit in each bed. But adding a trellis—or many trellises—to your garden opens up a whole world of vertical space and vertical gardening.
Pole beans, peas, cucumbers, and squash need a structure to climb up. Flowers like nasturtiums can also happily use a trellis; they’re one of the best companion plants for vegetables, taking the brunt of pest attacks, according to the University of Minnesota Extension. Trellises are also perfect for flowering vines such as clematis, adding new dimension and beauty to your garden.
Making a Trellis: Step-by-Step Guide
If you’re even a little handy, you can make a useful trellis in one afternoon. The instructions here are for a single, simple design. You may adapt this idea to suit your own needs or style, or even use wood you already have on hand. You can build the design exactly as it appears here or make adjustments. (*See the safety note below.)
Supplies Needed for a DIY Trellis
The tools needed for this project are minimal. We’ve provided some alternate options based on which tools you own (or can borrow from a friend).
Tools Needed
- Pencil.
- Tape measure.
- Paint and paintbrush (you can look for nontoxic—even organic—paint for use in the garden).
- Saw: This is for trimming wood to the proper lengths. On a project this small, it could be a basic handsaw or a power circular saw. Optional: table saw to “rip” your lumber into the wood strips needed quickly and easily.
- Hammer. Optional: pneumatic pin nailer (for quick and easy assembly).
- ⅞-inch carpentry finish nails (adjust the length of the nail if you’re using thicker lumber for any reason).
- Safety protection (ear protection, dust mask, safety glasses, etc.).
For assembly, use a hammer or a pin nailer. A pin nailer helps keep the wood from cracking during the nailing process and makes assembly very easy. You can load your nailer with either carpentry finish nails or a type of small staple for extra strength.
If you don’t have access to a pin nailer or are uncomfortable using one, then just carefully nail the project together with a hammer and carpentry finish nails. In this case, it can be helpful to pre-drill “pilot” holes for nails with a cordless drill and a small wood drill bit—this will help keep the wood from cracking.
Lumber Cut List:
Even though your trellis is for use outdoors, it may be best to forgo treated wood if it’s going into a vegetable or food garden. Pine wood is typically used for these types of projects, although for a little extra expense, use cedar, which has natural rot-resistant properties. You’ll need wood cut into different sizes, which we’ll explain in the steps below.
- 5 60” ½” x 1” pine
- 2 35 ¼” ½” x 1” pine
- 1 40” ½” x 1” pine
- 1 37” ½” x 1” pine
- 1 34” ½” x 1” pine
- 1 31” ½” x 1” pine
- 1 28” ½” x 1” pine
Now you’re ready to start building! It’s going to be easy!
Step 1: Make your lumber cuts
We are making a trellis in a fan shape with five 60-inch pieces. This design uses some fairly narrow strips of wood.
- For the specific design we built in the photos, we used ½ x 1-inch pine that we “ripped” down (cut lengthwise) with a table saw from larger pieces of lumber. This a good way to use spare wood that you already have on hand.
- However, you can find 1 x 2-inch lumber—sometimes called furring strips—at a home-supply retailer, and this will work fine for this trellis. In this case, all you need to do is cut them to the appropriate lengths, which could even be done with a simple handsaw since they are so narrow (or maybe the home-supply store will do it for you!).

Step 2. Begin the layout
Take a good look at the photo of the finished trellis before you start so you have the right idea. This can help you lay out the first sections of the trellis correctly. As you’re creating a fan shape with the five 60-inch pieces, we’ll call these five pieces the “vertical sticks.” Place these out on a flat surface like a garage or shop floor. It’s helpful to have a friend who can lend an extra pair of hands for this.
Begin by spacing the bottom end of each vertical stick about 4¼ inches apart—as accurately as you can. To make a fan shape, space the top end of each vertical stick 8¾ inches apart. Making the initial layout can be tricky because adjusting the spacing on the bottom affects the spacing at the top and vice versa. But you should be able to complete the design with a bit of care. It can be helpful to start with the center vertical stick and its immediate left and right neighbors. Once you have those appropriately spaced, add the final two. You’ll have the proper shape if you successfully maintain spacings of 4¼ inches at the bottom and 8¾ inches at the top.


Step 3. Assemble
Now, let’s lock that design together before someone accidentally knocks it out of place with their toe! We’ll tie the vertical sticks together with five horizontal struts. We’re looking to space these at intervals of 11 inches. Beginning at the bottom, place a horizontal strut at 11, 22, 33, 44, and 55 inches along the vertical sticks. Use the center vertical stick as your guide for making these measurements. Ideally, the horizontal struts are perpendicular to the center vertical piece. You’ll create a grid-like pattern.

Nail them into place with the pin nailer, placing a nail at every junction. Or, you can hand-nail with a hammer, although this is trickier; pre-drilling pilot holes makes hand-nailing far easier.


Step 4. Make extra improvements
At this point, the trellis is starting to look nice, but if you stop here, the structure might be a little weak. We have two final pieces that can add structural stability while providing a decorative touch. These are the two 35¼-inch sections.
Use these to form a kind of “A” shape on the top of the trellis, as shown in the photos. The point of the “A” goes at the top-most horizontal strut, lined up with the center vertical stick. Fasten these with the pin nailer as well.
Optional: If you’d like it to look a little fancier, you can use your saw to angle the ends of the “A” to match.


Step 5. Paint
To protect the trellis from the weather and add a pop of color to your garden, you can easily paint this finished trellis in under an hour. Exterior paints last a long time and are readily available.


Choosing a Location for Your Trellis
Now you have a beautiful new trellis ready to install in your garden. Choosing the ideal location will depend on a few factors. If you’re using the trellis for climbing veggies, you’ll probably want it in a location with full sun to support these types of plants.
But the trellis is tall, and once it’s fully loaded with plants, the leaves will block some light. So think about where the shadows will fall and avoid shading other plants with it.
You really don’t need to push the trellis into the ground—it probably won’t sink in more than a few inches anyway. Instead, use small t-posts to support the trellis and keep it upright. Use zip-ties or similar fasteners to secure the trellis to the t-posts.
You can also use a structure like a fence for support instead of t-posts.

Maintaining Your Trellis
It’s not difficult to maintain your new trellis—the best thing you can do is paint it (Step 5) to keep moisture from rotting the wood. Otherwise, store it indoors during the winter, and at the end of each season, be sure to remove the tangled dried vegetation of pea vines, cucumber leaves, bean plants, or whatever you grew on the trellis. Occasionally examine the trellis, and if you notice a loose strut from time to time, nail it back together; this can sometimes occur if wind strains the fasteners. Your finished trellis should be reasonably sturdy, but be gentle with it.
Ready to Roll?
Ready to put your new trellis to work? Sink it into some fresh garden soil, tie it off with some type of support, and plant your crops. If you’re pleased with your results, consider building another trellis right now, while all the tools are out and you have the concept fresh in your mind. You can probably make a second one much faster with the practice from the first. Enjoy your garden!
Photos by Daniel Johnson.
* Note: It should go without saying that any activity using hand or power tools should be approached with due caution and safety in mind, and DIY projects are no exception. Always use caution when working on any construction project; safety should always be the priority. Read manuals and learn the safest ways to operate a table saw and your other tools, and don’t ever place yourself in danger while working. DIY projects have the potential to be dangerous, and failure to exercise proper safety behaviors could result in injury or death. The authors and publisher cannot assume responsibility for any damage to property or injury to persons or property due to the use or misuse of the information provided.


Comments